
I’ve successfully climbed Lenana Peak on Mount Kenya, a 4,985-meter-high summit, the third-highest peak in Kenya and one of the highest peaks in Africa. This guide is here to help you understand everything you need to know about Mount Kenya, whether you’ve climbed many mountains before or this is your first big adventure.
Is Climbing Mount Kenya Hard?
Mount Kenya has three different peaks that offer differing degrees of climbing difficulty:
- Batian - 5199m altitude: Climbing Batian requires technical mountaineering skills and climbing gear such as ropes and harnesses. Depending on the ice conditions, crampons and an ice axe might be needed.
- Nelion - 5188m altitude: Like Batian, reaching the summit of Nelion requires technical skills in rock climbing. Climbers often do it as part of their ascent to Batian, as the two peaks are connected by a sharp ridge known as the Gate of the Mists.
- Lenana - 4985m altitude: While this peak does not require the technical climbing skills needed for Batian and Nelion, reaching the summit of Lenana Peak still presents a considerable challenge due to its high altitude and potential for rapidly changing weather conditions.
With that in mind, Batian and Nelion peaks are suitable for experienced mountaineers and are more challenging than Lenana. While Lenana does not demand technical climbing skills, reaching its summit still necessitates a good level of physical fitness, strong determination, and the ability to adapt to the challenges of high altitude.
Mount Kenya was my first experience in high-altitude mountaineering. Fortunately, my extensive hiking experience and minimal effects from the altitude allowed for a smooth ascent. However, I’ve seen many climbers facing significant challenges on their way to the summit, some even crawling to reach the top. I also noticed climbers spending over 15 hours to successfully summit and return to camp.
Dealing with Altitude Sickness
The biggest challenge in reaching Lenana Peak is altitude sickness, which can affect anyone, regardless of fitness level. The symptoms include headache, nausea, diarrhea, insomnia, loss of appetite, shortness of breath, fast heart rate, and dizziness. Most severe cases can progress to High Altitude Pulmonary Edema (HAPE) or High Altitude Cerebral Edema (HACE), both of which are potentially life-threatening conditions requiring immediate descent and medical attention.
Staying hydrated, eating well, and moving slowly and steadily are key to minimizing the risk of altitude sickness. It is also advisable to consult a healthcare professional and consider altitude medication. Altitude sickness can make every step during the hike excruciating, emphasizing the importance of preparation and precaution.
Best Time of Year to Climb
The best times to climb Mount Kenya are during the dry seasons: from June to October and from January to March. These periods offer the clearest skies and the lowest risk of precipitation.
As these are the best months to climb it, they are also more crowded. Also, the weather is unpredictable, so you might get heavy rain even during the dry season, so be geared for the worst.
How to Prepare for Your Expedition?
I’m not a professional mountain guide; these suggestions are based on my experience. In my view, the best preparation involves extensive hiking. Hike every mountain you can. When hiking isn’t feasible, aim to increase your fitness level and engage in activities that strengthen mental toughness.
I’ll create a separate detailed guide on equipment. However, it’s worth noting that many tour operators offer the option to rent the essential equipment you’ll need for the climb.
Which Routes Can You Climb Mount Kenya?
Mount Kenya has several routes, each with its own difficulty level, landscapes, and duration. Your choice should align with how challenging you want your climb to be, your love for nature, and how much time you can dedicate to the adventure. The main routes are:
- Naro Moru Route: This is the most popular and quickest route to the summit. However, it is less scenic and includes a challenging section called the Vertical Bog.
- Sirimon Route: This is considered the easiest route to the summit, offering a steady and scenic ascent. Also, with two huts along the way, you might not need to carry a tent, depending on your itinerary.
- Chogoria Route: This is known to be the most beautiful route. It has stunning views of cliffs, lakes, and waterfalls, though it is longer and is physically more demanding.
Although other routes exist, many companies either don’t offer them or don’t openly advertise them. As you can combine two routes, I chose the Chogoria-Simirion Traverse to maximize my time on the Chogoria route, enjoy its scenic views, and then descend via the Sirimon route to experience a different path. Most of the guides I consulted highly recommended it, making it a compelling choice. Here is a map of the route to give you a clearer picture of it.
Can You Climb Mount Kenya Solo?
My research shows no clear guidelines on official websites stating that climbing Mount Kenya without a licensed guide is permitted, only the opposite. Even if solo expeditions were allowed, the logistical challenges of planning and executing a climb on Mount Kenya should not be underestimated. Additionally, the specific peak or route you choose significantly affects the importance of having an experienced companion familiar with the mountain’s terrain and conditions.
How to Choose a Tour Operator?
When picking a company to guide your climb, focus on those known for their safety practices, care for the environment, and how well they treat their employees.
My choice, Go To Mount Kenya, exceeded all expectations. I arranged my trip just one week in advance, and despite contacting several companies, they were the only ones who accepted it, unlike others who suggested I wait for a larger group’s schedule. Besides that, here’s why Go To Mount Kenya stands out:
- Competitive Pricing: They offer very competitive rates, making the climb accessible without compromising on the quality of the experience or safety.
- Supportive Leadership: The company owner is a mountain guide deeply committed to his team. He fosters an environment where everyone can grow personally and professionally.
- Local Company: Being a locally owned company, you contribute directly to the local community.
However, the highlight of the expedition was my guide, Paul. His deep understanding of the mountain’s ecosystem, ability to assess his climbers’ physical and mental state, and talent for tailoring the experience to fit personal preferences made it unforgettable. He is very friendly, and every night, we talked for hours after the hike, sharing life experiences and laughing a lot. Anyone who climbs with Paul as their guide is in for the best possible experience on Mount Kenya.
How Much Does it Cost?
The cost of climbing Mount Kenya can vary widely, typically from 800 USD to 1,500 USD per person, depending on the route, tour operator, size of the group, and level of luxury. This price should include park fees, guide, porter wages, food, and accommodation in the mountain, but check what’s included carefully. Also, expect to give from 10% to 15% as a tip to your crew.
Visa Requirements for Kenya
Most travelers will require a visa to enter Kenya. Many nationalities can obtain a visa on arrival, but Kenya provides the flexibility of applying for a visa online. The visa cost is reasonable, with a single entry visa costing 51 USD. Additionally, they offer the East African Tourist Visa for those planning to visit neighboring countries, Uganda or Rwanda, for 100 USD.
Applying for an electronic visa is strongly advised because it’s convenient. This way, you can avoid the queues upon arrival and avoid potential issues at the airport.
Additional Documents
Apart from the visa, you might need some extra documents and preparations:
- Vaccination Certificates: Depending on your travel history, you may need proof of vaccination against certain diseases, like yellow fever. Check the latest health advice and requirements for Kenya before your trip.
- Travel Insurance: It’s highly recommended to have travel insurance that covers high-altitude trekking. If you’re looking for a suggestion, SafetyWing might be a good option.
My Trekking Experience on the Traverse Chogoria-Sirimon
In this section, I’ll share my experience trekking up Lenana Peak. I’ve decided to do it in five days, but four days might be more suitable, as you can easily skip the initial day. While the first day at the hut was nice, it was not even a warm-up. But if you don’t have experience in high altitude, five days might be a safer choice.
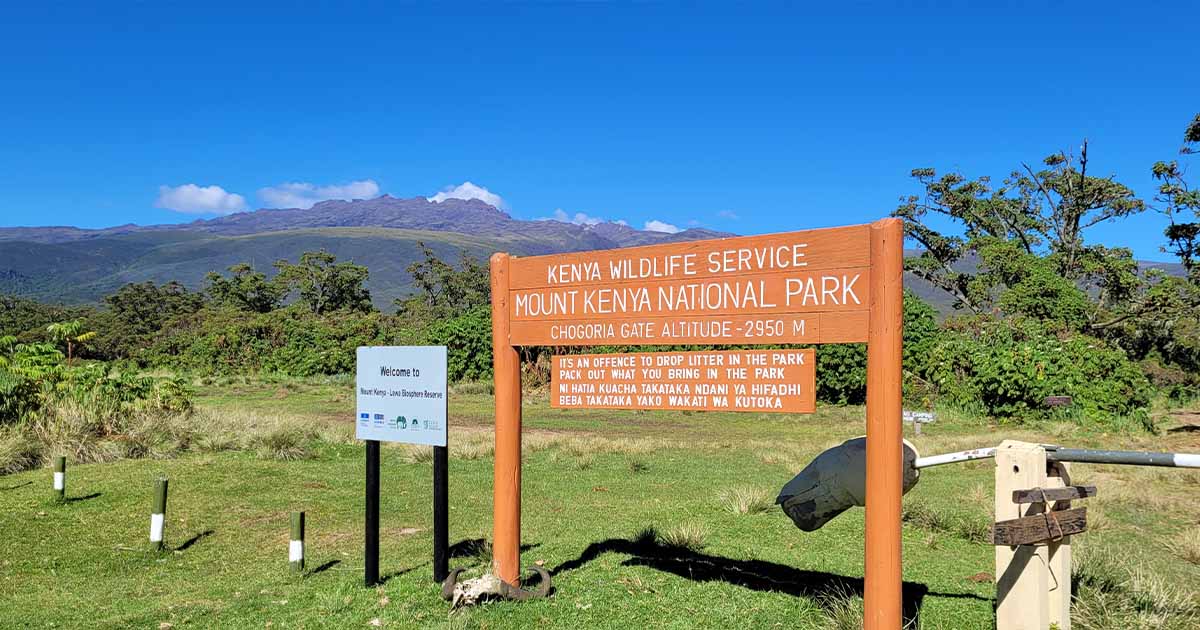
Day 1 - Mt Kenya Bandas
| Description | Details |
|---|---|
| Walk Distance | 9 km |
| Walking Hours | 2 hours |
| Start Altitude | 2480 m |
| End Altitude | 2950 m |
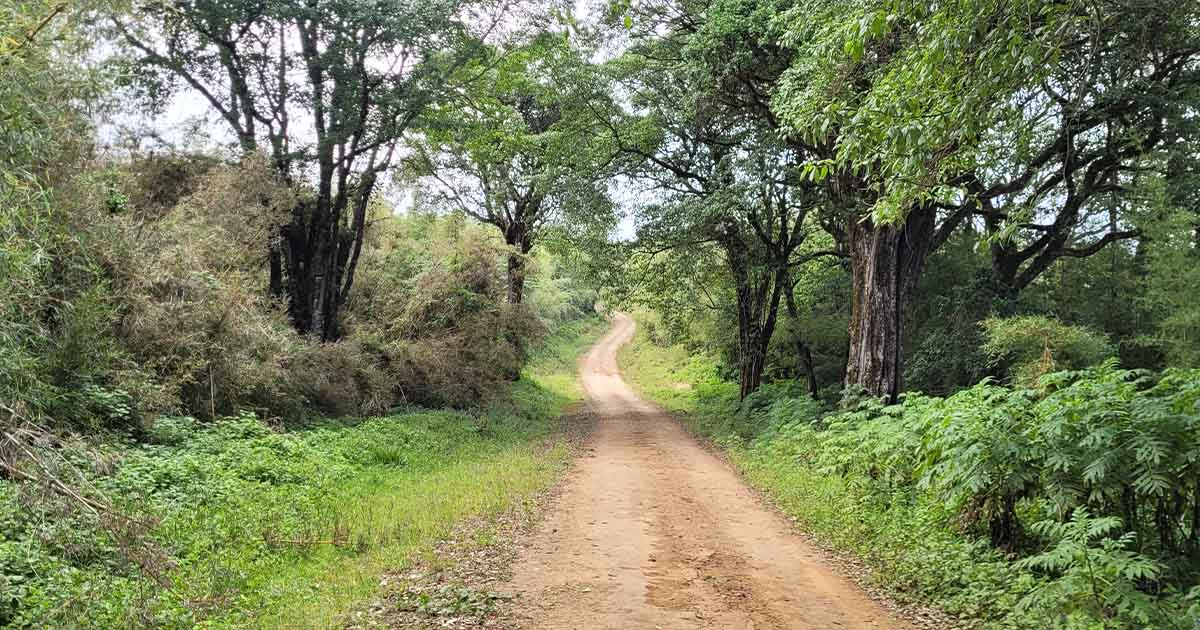
The day started with meeting my guide at 8 am in Nairobi, followed by a drive to Chogoria town for lunch. After lunch, we drove to the Chogoria gate, where we started trekking through the bamboo forest.
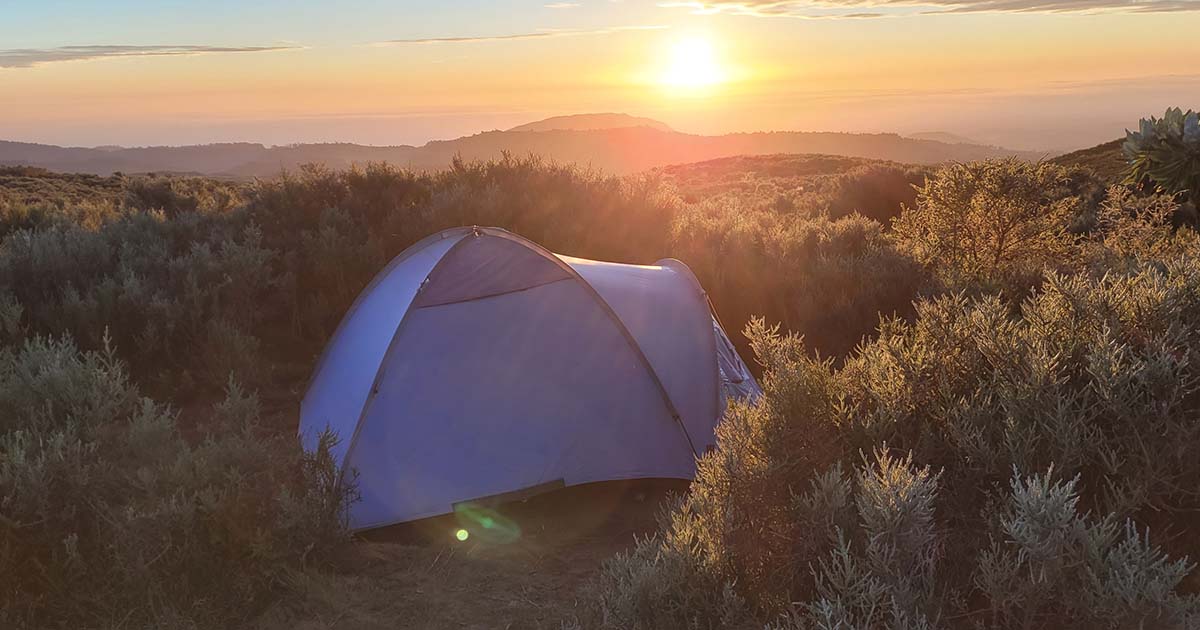
The hike was easygoing. Arriving at the camp, I had a cozy hut to myself, with a bathroom and beds. The evening wrapped up with the crew and me sharing experiences around the firepit I had in the hut.
Day 2 - Chogoria Roadhead Campsite
| Description | Details |
|---|---|
| Walk Distance | 12 km |
| Walking Hours | 4 hours |
| Start Altitude | 2950 m |
| End Altitude | 3300 m |
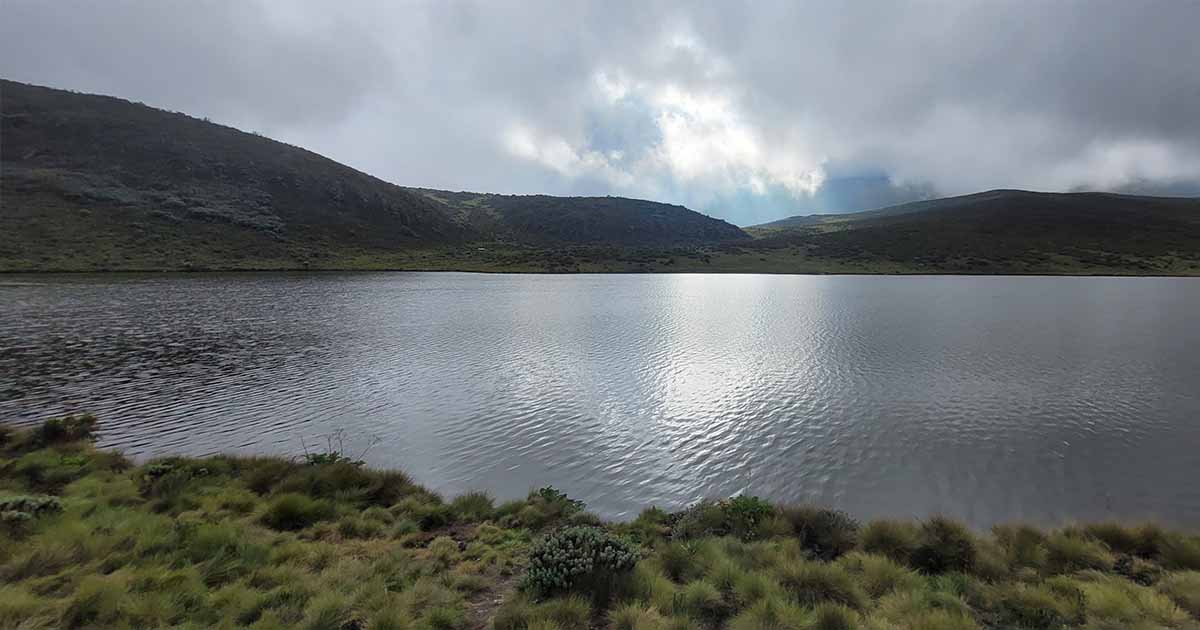
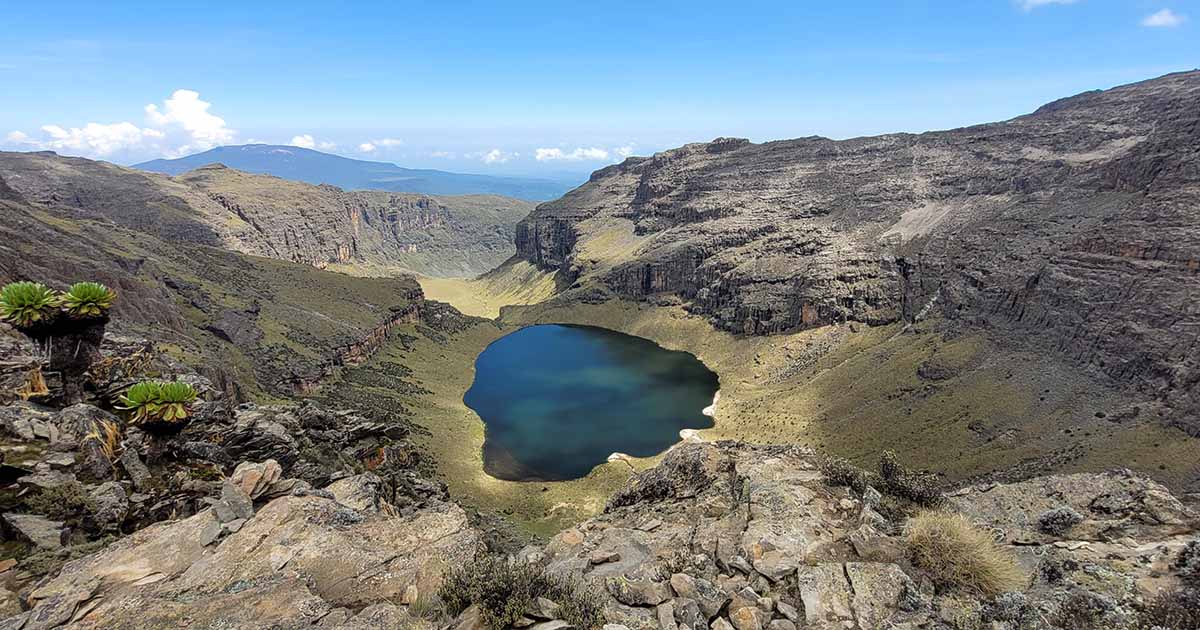
I woke up earlier to see the sunrise and hoped to spot wildlife at a nearby lake. But I only saw Waterbuck. After breakfast, we set off the mountain at a nice and easy pace. Once we got to Chogoria Roadhead Camp, we hiked to the waterfall nearby. After lunch, we rested a bit and walked to Lake Ellis, which was very beautiful. We got back to camp, and after dinner, we made a bonfire, spending a few hours bounding with the crew.

Day 3 - Minto’s Camp
| Description | Details |
|---|---|
| Walk Distance | 8 km |
| Walking Hours | 3 hours |
| Start Altitude | 3300 m |
| End Altitude | 4100 m |
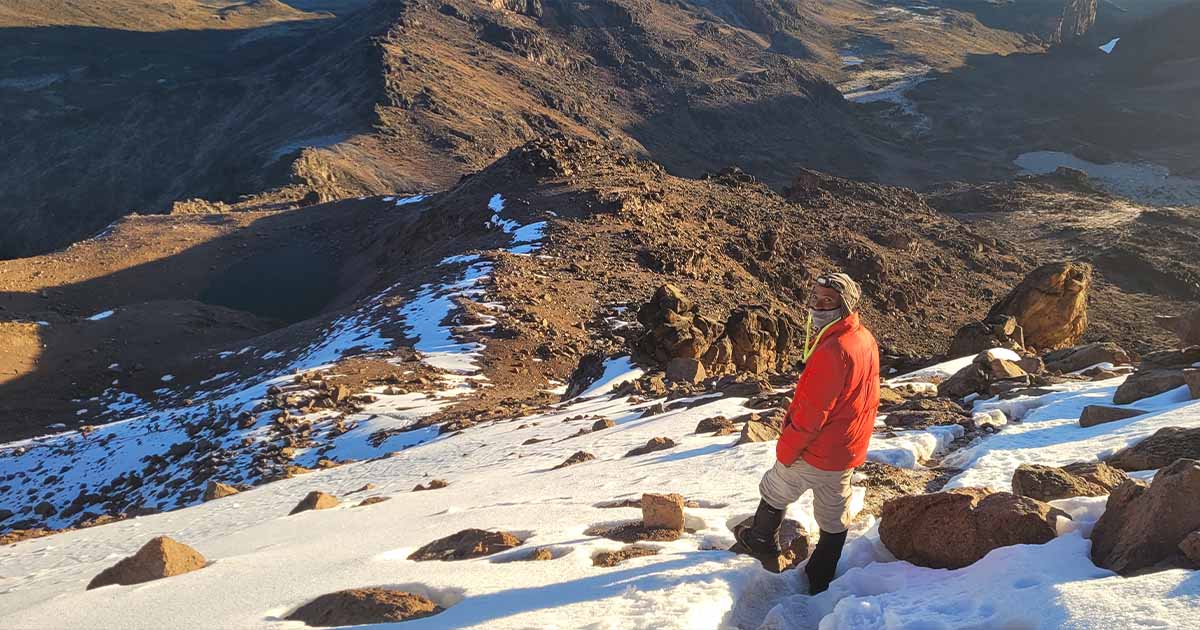
As usual, I woke up early to catch the sunrise, and the views were incredible. After breakfast, we started our hike to Minto’s Camp, which has breathtaking views of Gorges Valley.
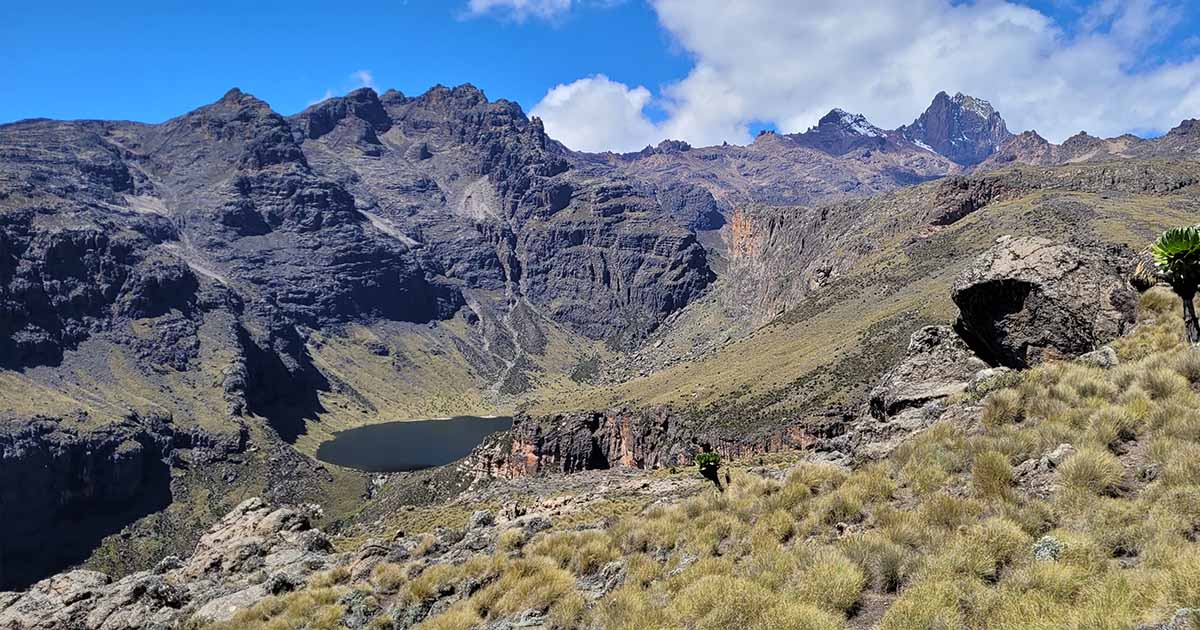
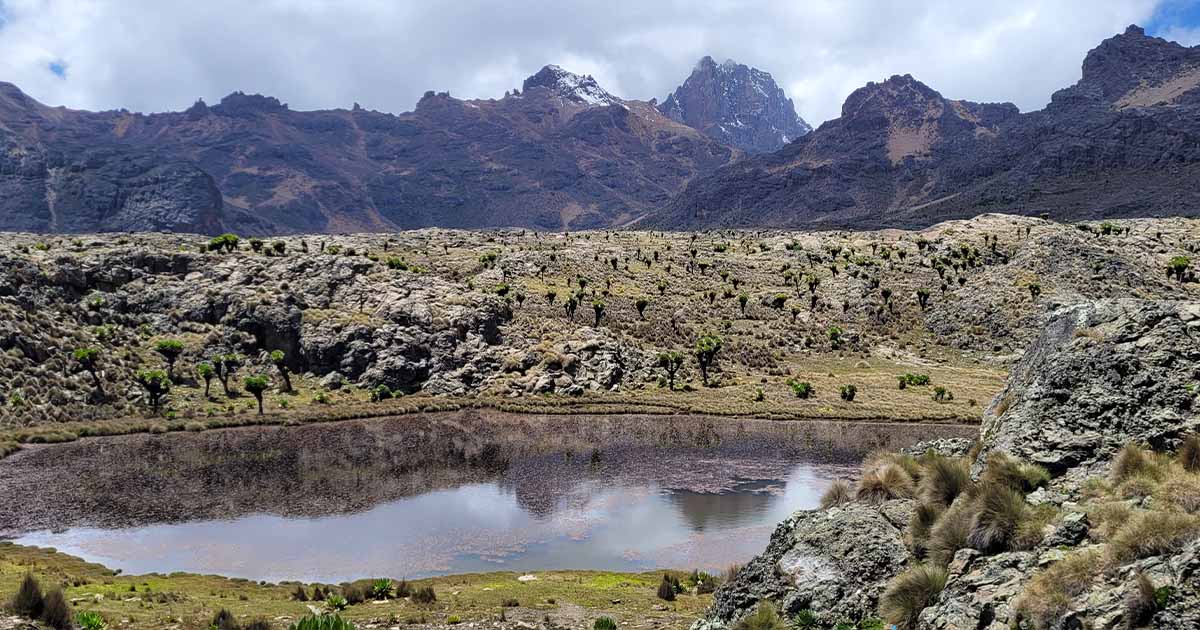
We got there before lunch, which was way ahead of our schedule. Because of this, we decided to have lunch in “The Temple,” the best viewpoint near the camp to the lake on the Gorge; the hike was about 10 minutes long. After returning to the camp, I enjoyed the landscape and later stayed in my tent to rest for summit night.
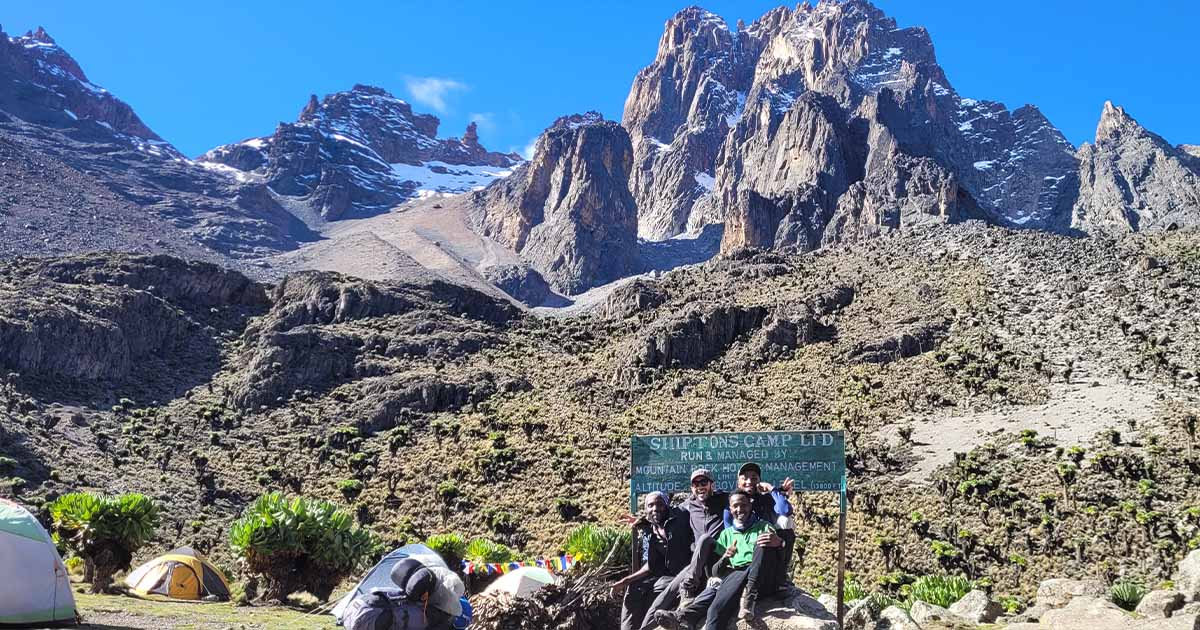
Day 4 - Ascending to Summit and Descending to Old Moses Camp
| Description | Details |
|---|---|
| Walk Distance | 20 km |
| Walking Hours | 9 hours, including the rest in Shipton Camp |
| Start Altitude | 4100 m |
| End Altitude | 3300 m |
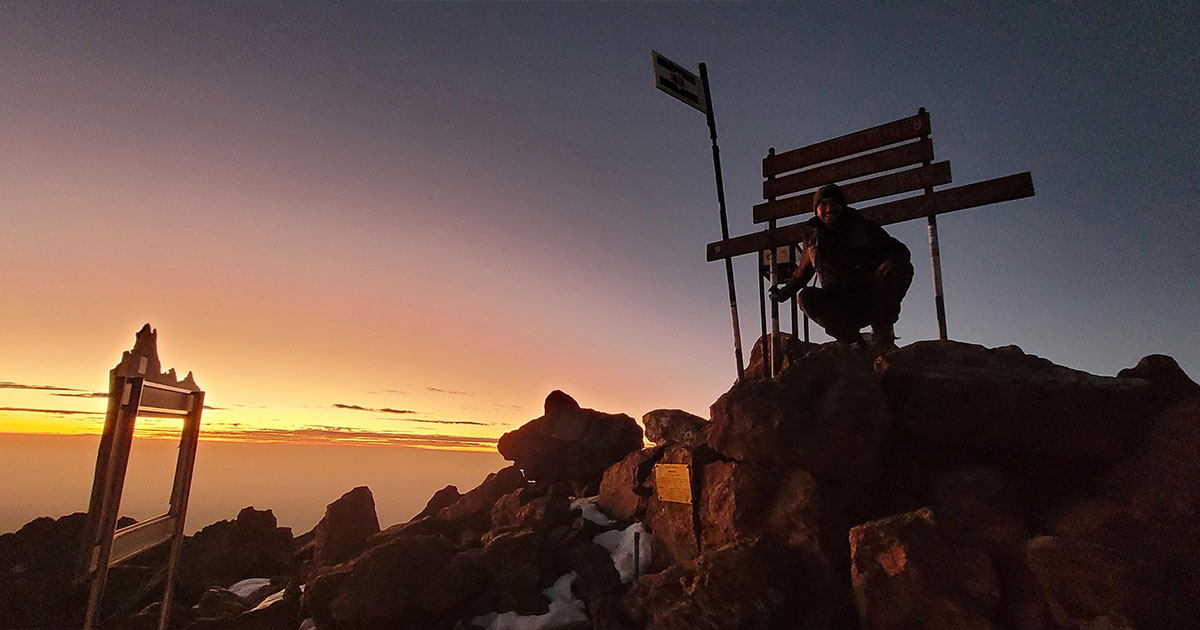
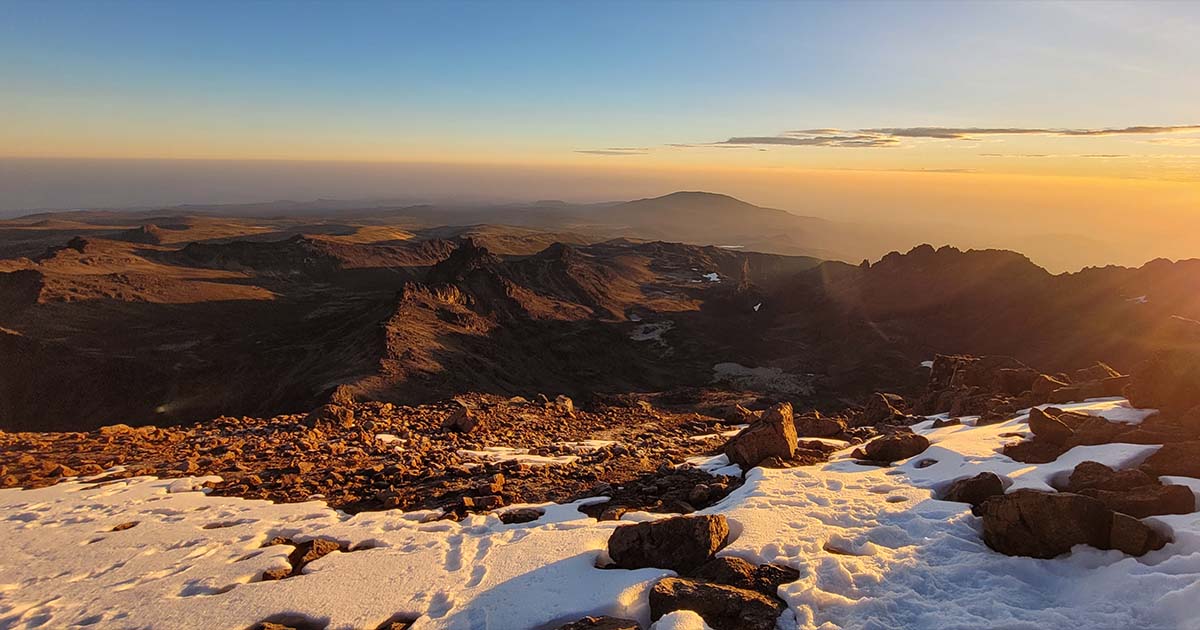
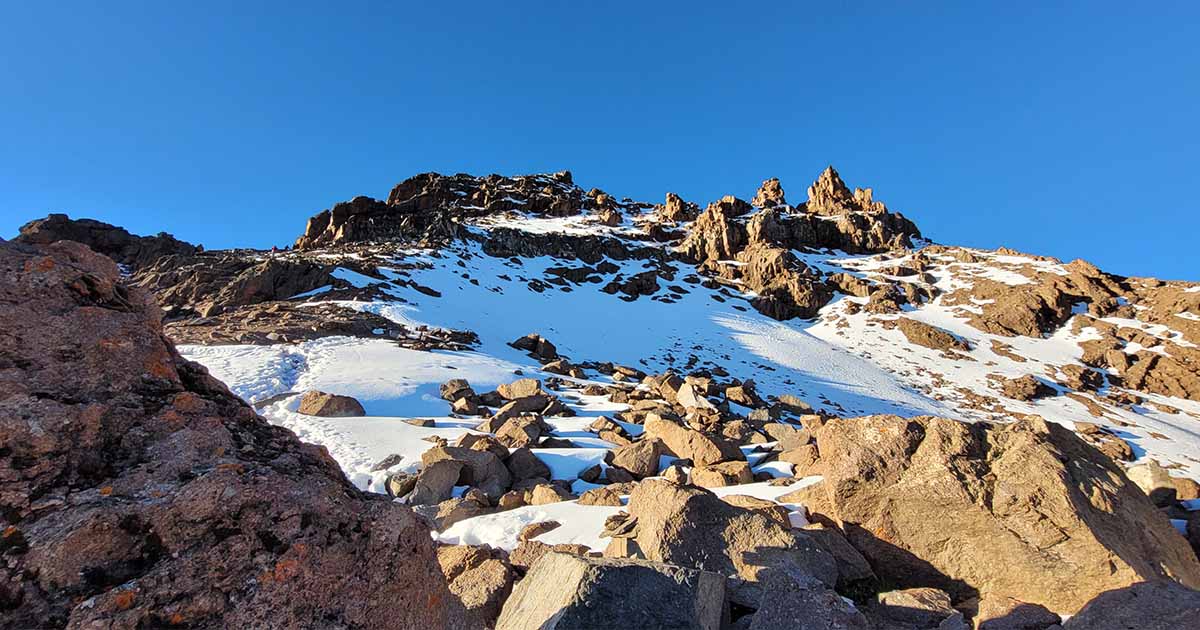
I had a good sleep that night and felt fantastic in the morning. It was neat to leave the tent and hear the frosty grass crunch like cereal under my feet. We began hiking around 3:30 am and reached Point Lenana before sunrise.
We were the first ones there, which felt special because we enjoyed the sunrise all to ourselves. After hanging out for about an hour, we headed down to Shipton camp for breakfast. The way down was tough. Not because it was physically demanding but because I saw people struggling on their summit attempt, even to the point of tears and crawling, which was intense.
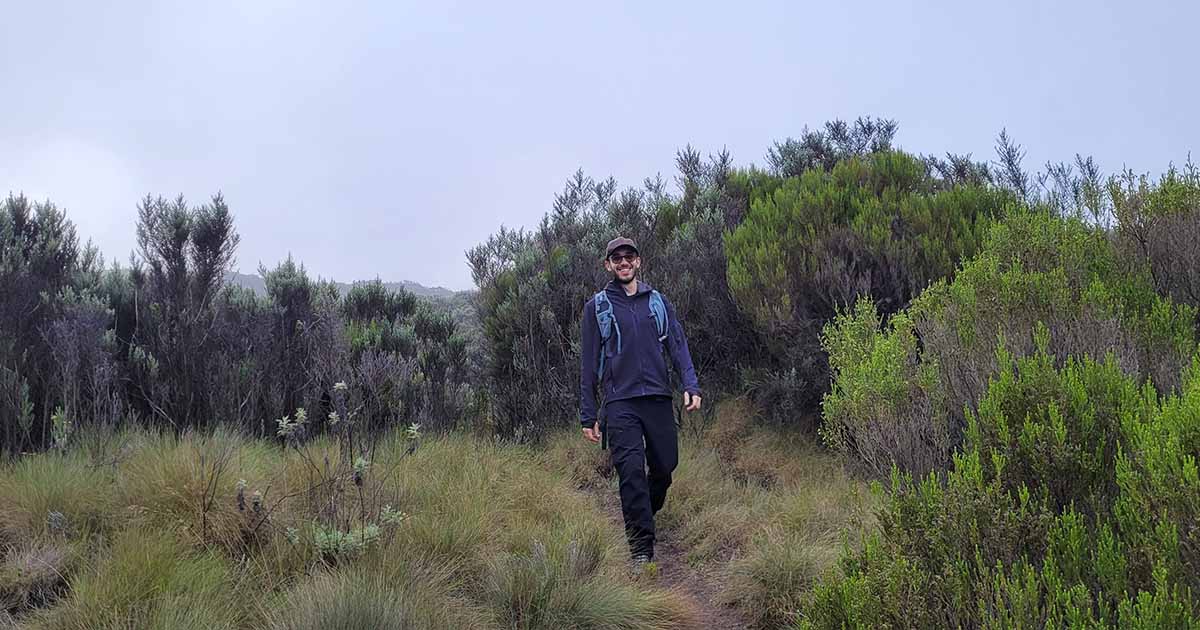
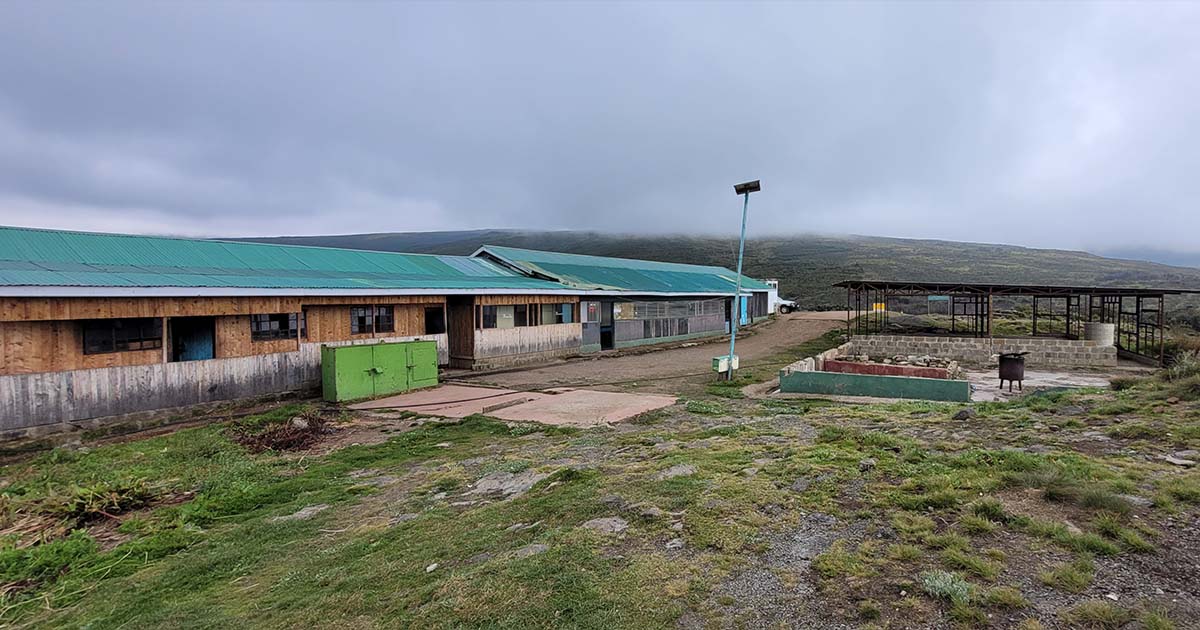
We arrived at Shipton’s camp by 7:30 am. Eating breakfast with a view of the summit was unbeatable. After chilling for a bit, we hiked down to Old Moses Camp. The path through the moorlands was lovely, but I looked forward to getting to camp and resting. We got there by 12:30 pm.
Day 5 - Sirimon Gate
| Description | Details |
|---|---|
| Walk Distance | 8 km |
| Walking Hours | 1.5 hours |
| Start Altitude | 3300 m |
| End Altitude | 2650 m |
That night, I didn’t sleep very well. I shared a room with many people, and everyone had different schedules, from getting late from the summit to people celebrating their first-day hike. The difference between the Chogoria side and Sirimon was immense. I was the only one climbing via Chogoria. It made me think the mountain wasn’t famous, but from Sirimon’s side, it was very crowded.
After waking up, I had breakfast, gave the crew the tips, and started my descent. We arrived at the gate pretty early, greeted by many baboons living their life on the road, a fitting end to an unforgettable experience.
Share This Article
What to read next
Disclaimer: This post may include affiliate links. We may receive a commission at no extra cost to you if you click one of them. Thank you for your support!