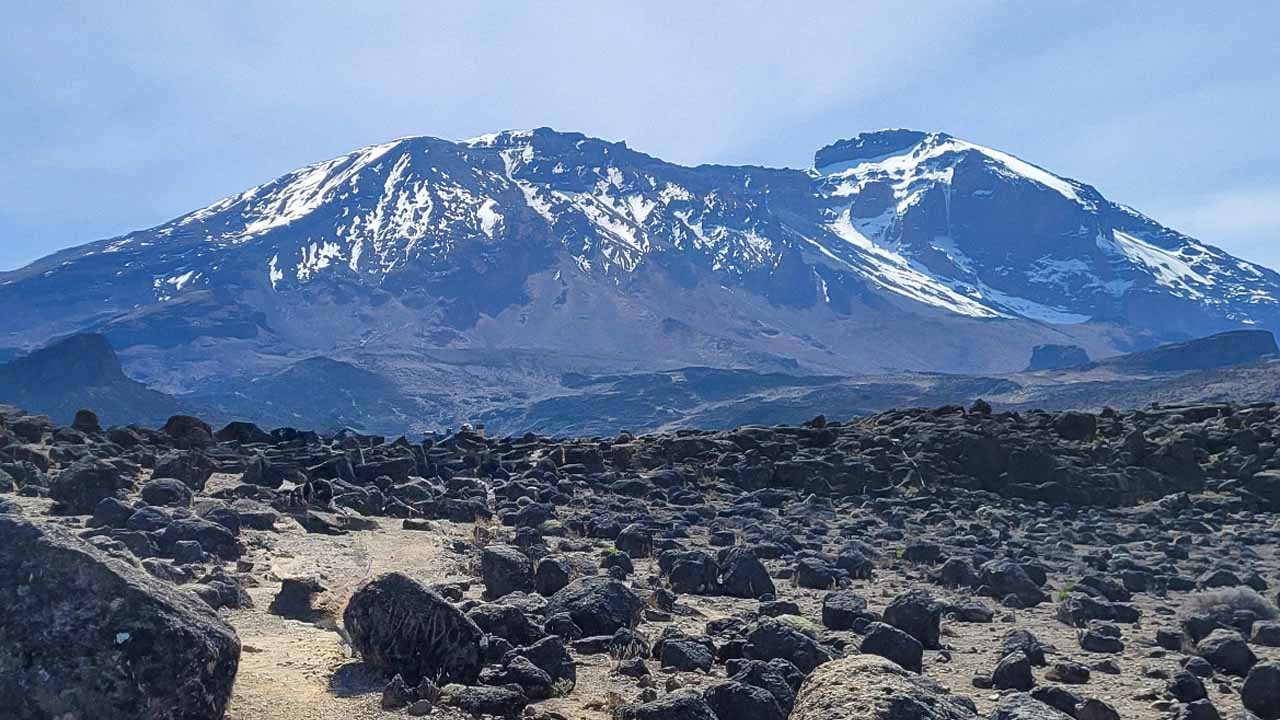
I’ve successfully climbed Mount Kilimanjaro, a 5,895-meter-high volcano, Africa’s tallest peak, and the world’s highest free-standing mountain. This guide is here to help you understand everything you need to know about your Kilimanjaro Expedition, whether you’ve climbed many mountains before or this is your first big adventure.
Is Climbing Kilimanjaro Hard?
Mount Kilimanjaro is often regarded as the easiest of the seven summits (the highest mountains of every continent) due to its non-technical nature. It has a straightforward trek from base to summit without requiring specialized climbing skills. However, it’s important to take it seriously. Reaching the summit requires physical fitness, determination, and resilience to handle high-altitude and low temperatures.
The sentiment that “Kilimanjaro is easy, except for the altitude” is a misleading simplification. This perspective overlooks that coping with altitude is integral to the challenge. It’s akin to suggesting that running a marathon is easy if not for the requirement to cover a long distance. The altitude on Kilimanjaro is not merely a side issue; it’s a central aspect of what makes the climb demanding.
During my trek, I’ve witnessed many climbers who have had to abandon their ascent, overwhelmed by the altitude and exhaustion. So, don’t underestimate the mountain and prepare yourself.
Dealing with Altitude Sickness
As I said, the biggest challenge on Kilimanjaro is dealing with altitude sickness, which can affect anyone, regardless of fitness level. The symptoms include headache, nausea, diarrhea, insomnia, loss of appetite, shortness of breath, fast heart rate, and dizziness. Most severe cases can progress to High Altitude Pulmonary Edema (HAPE) or High Altitude Cerebral Edema (HACE), both of which are potentially life-threatening conditions requiring immediate descent and medical attention.
The key to minimizing the risk is acclimatization, choosing a route that allows your body to adjust to the altitude gradually, staying hydrated, eating well, and moving slowly and steadily.
It’s important to remember that altitude sickness can affect anyone, and the only definitive way to know if you’re affected by it is by experiencing high altitudes yourself. If pre-trip acclimatization isn’t feasible, consulting a healthcare professional and considering altitude medication is advisable. Altitude sickness can make every step during the hike excruciating, emphasizing the importance of preparation and precaution.
Before my trip, I learned about Mount Meru, the second-highest peak in Tanzania, and chose it for my preliminary climb. It’s a three to four-day trek and is an excellent opportunity for your body to adapt to higher altitudes in a less harsh environment, enhancing your acclimatization process.
Moreover, the scenic beauty of Mount Meru makes it a worthwhile adventure in its own right. During my ascent of Meru, it became evident that many others had the same idea, utilizing this climb as a preparatory step for Kilimanjaro.
A Comprehensive Guide to Climb Mount Meru
Climb Mount Meru with this guide. Learn about routes, tour operators, preparation, dealing with altitude, and my personal experience. Get tips for a successful climb.
Best Time of Year to Climb
The best times to climb Kilimanjaro are during the dry seasons: from June to October and from December to early March. These periods offer the clearest skies and the lowest risk of precipitation, making your climb more enjoyable and less muddy.
As these are the best months to climb it, they are also more crowded. Also, the weather is unpredictable, so you might get heavy rain even during the dry season, so be geared for the worst.
How to Prepare for Your Expedition?
I’m not a professional mountain guide; these suggestions are based on my experience. In my view, the best preparation involves extensive hiking. Hike every mountain you can. When hiking isn’t feasible, aim to increase your fitness level and engage in activities that strengthen mental toughness.
Regarding equipment, I’ll create a separate detailed guide. However, it’s worth noting that many tour operators provide the option to rent the essential equipment you’ll need for the climb.
Which Routes Can You Climb Kili?
Kilimanjaro has several routes to the summit, each with its own difficulty level, landscapes, and duration. Your choice should align with how challenging you want your climb to be, your love for nature, and how much time you can dedicate to the adventure.
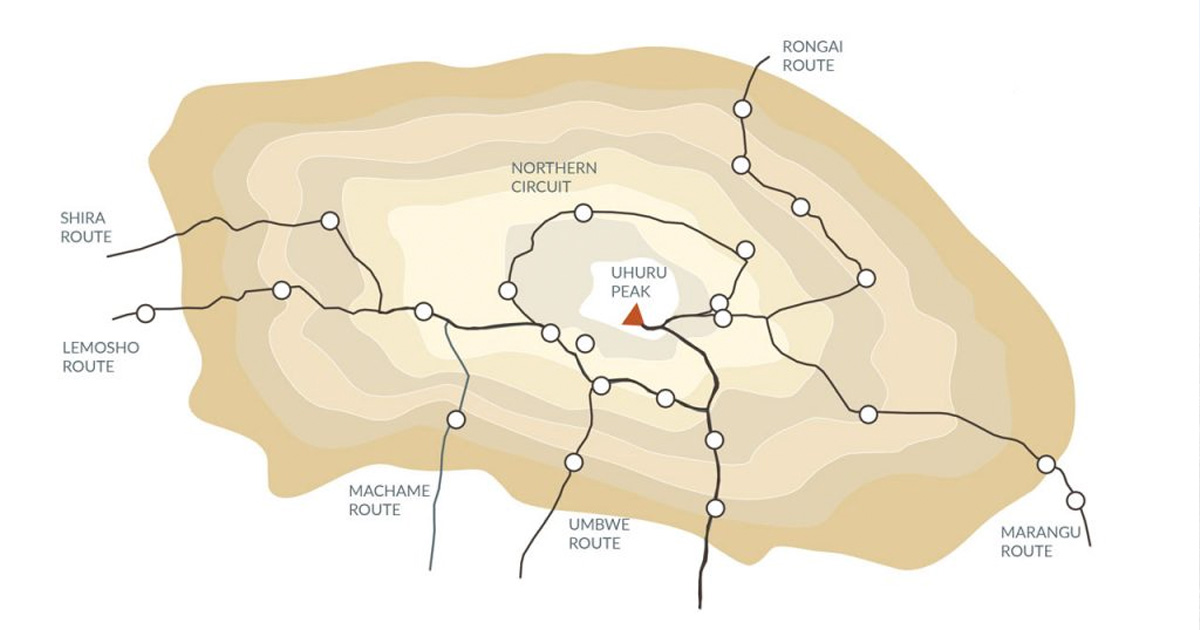
- Marangu Route: Known as the “Coca-Cola” route due to its reputation as the easiest path. It’s unique for offering hut accommodations, providing a more comfortable experience than tent camping. This route follows the same path for ascent and descent, making it less scenic. Its convenience and facilities make it popular for those who prioritize comfort.
- Machame Route: Known as the “Whiskey” route, due to being more challenging than Marangu, it is the most popular route on Kilimanjaro. This trail offers stunning views, a reasonable challenge, and plenty of time to acclimate, making it ideal for climbers who can dedicate more time to their journey.
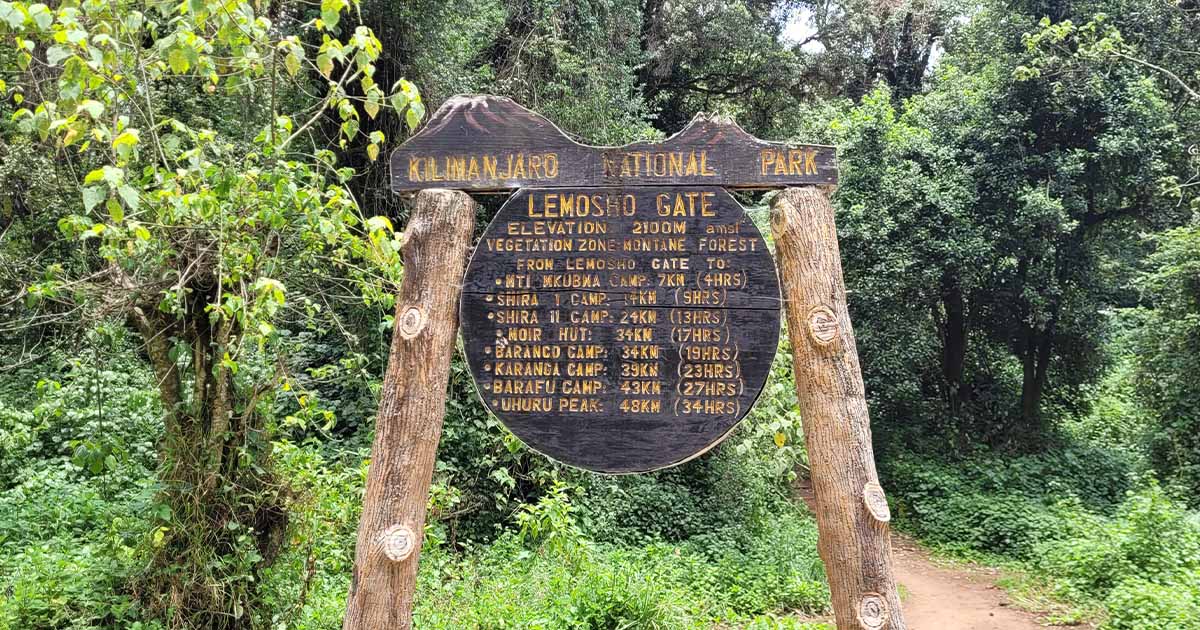
- Lemosho Route: Widely regarded as the most scenic route to Kilimanjaro’s summit, it traverses the expansive Shira Plateau from west to east, offering a gentle and scenic trek. The trail is only crowded once it merges with the Machame route.
- Northern Circuit: is the longest route on Kilimanjaro. It starts on the western side of Kilimanjaro, then heads north and circles the main summit clockwise. It’s more expensive as you stay longer in the mountains, but it has a higher success rate for the same reason.
- Umbwe Route: This is one of the shortest yet most intense routes. The rapid ascent and steepness make acclimatization very difficult. This route is best for experienced climbers seeking a tough challenge.
I chose the Lemosho Route because it perfectly balanced my available time and the desire for stunning scenery. It came highly recommended by most of the guides I consulted, making it a compelling choice.
Can You Climb Kilimanjaro Solo?
Climbing Kilimanjaro without a guide is not allowed. Tanzanian law requires that all climbers be accompanied by a registered and licensed guide and associated with a licensed tour operator. These tour operators are the only entities authorized to purchase the necessary permits for hiking Kilimanjaro.
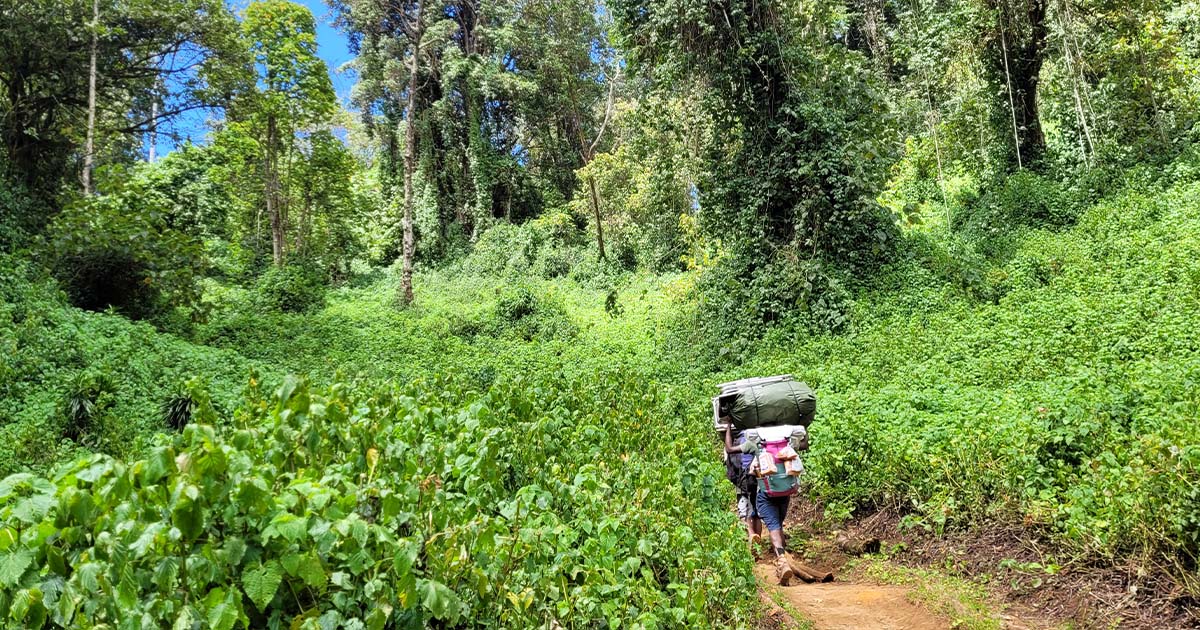
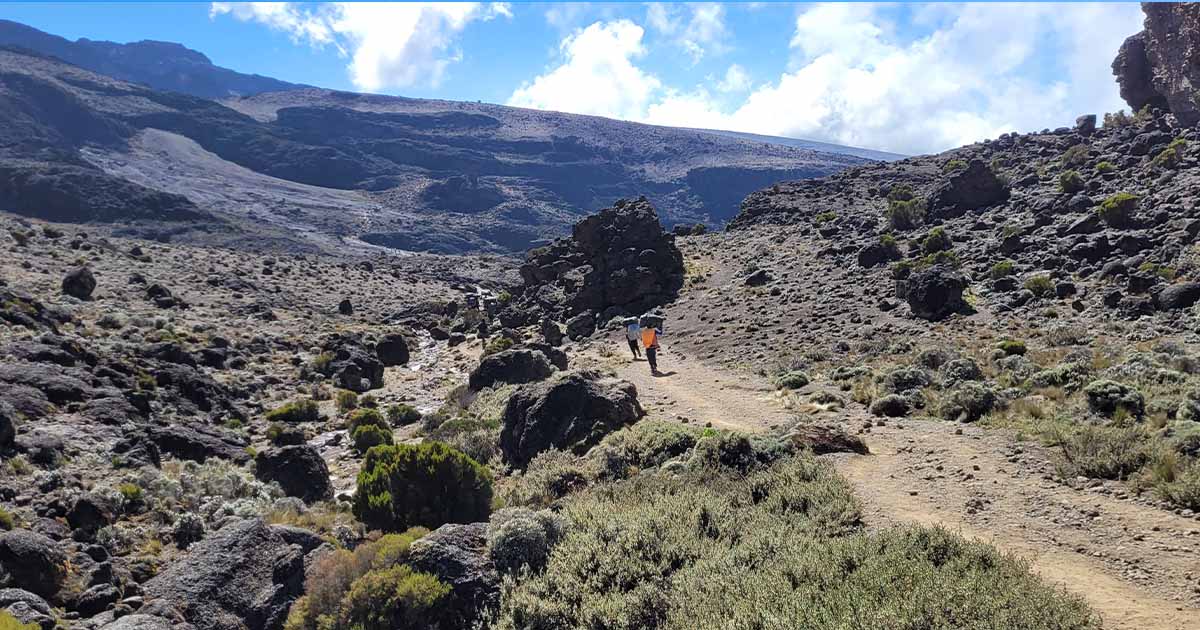
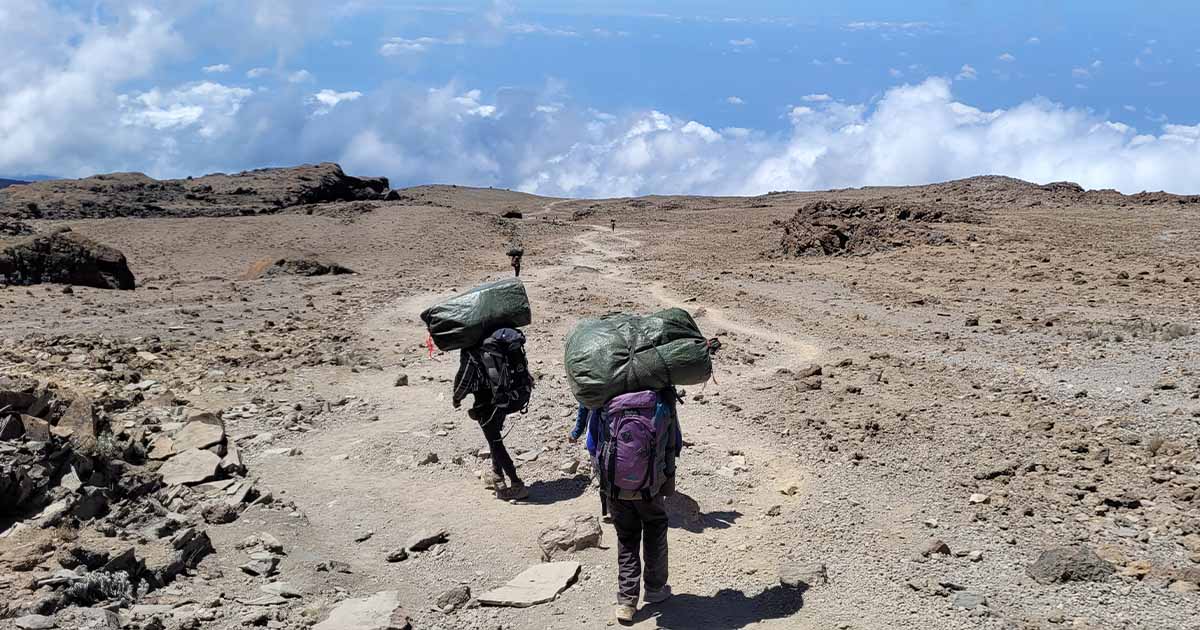
You can expect your climbing team to be large, regardless of which company you choose. It includes porters who carry essential supplies like tents, food, water, fuel, and kitchen equipment. Some porters will have specialized tasks, such as cooking, managing portable toilets, and working with water, among other duties.
How to Choose a Tour Operator?
When picking a company to guide your climb, focus on those known for their safety practices, care for the environment, and how well they treat their employees.
The guide with whom I climbed Mount Kenya vouched Solo Adventures for my Kilimanjaro climb. Following his advice, I went with them and couldn’t have been more satisfied with my decision. Here’s why Solo Adventures stood out:
- Informative Approach: Unlike other companies, they take the time to educate you about the local flora, fauna, and ecosystems. It was common to find climbers from other groups listening to our guide’s explanations.
- Competitive Pricing: They offer very competitive rates, making the climb accessible without compromising on the quality of the experience or safety.
- Supportive Leadership: The company owner is a mountain guide deeply committed to his team. He fosters an environment where everyone has the opportunity for personal and professional growth, as evidenced by his team’s admiration for him.
- Local Company: Being a locally owned company, you contribute directly to the local community.
- Pace Consistency: We maintained a steady pace throughout the climb, which was not the case for some other groups. While some groups initially passed us, their inconsistent pacing often led them to fall behind shortly after, unable to maintain their speed. This steady approach allowed us to climb smoothly without overexerting ourselves.
How Much Does it Cost?
The cost of climbing Kilimanjaro can vary widely, typically from $2,000 to $5,000 per person, depending on the route, tour operator, size of the group, and level of luxury. This price should include park fees, guide and porter wages, food, and accommodation, but check what’s included carefully. Also, expect to give from 10% to 15% as a tip to your crew.
Visa Requirements for Tanzania
Most travelers will require a visa to enter Tanzania. Many nationalities can obtain a visa on arrival, but Tanzania provides the flexibility of applying for a visa online. The visa cost is reasonable, with a single entry visa valid for 90 days or 50 USD.
Applying for an electronic visa is strongly advised because it’s convenient. This way, you can avoid the queues upon arrival and avoid potential issues at the airport.
Additional Documents
Apart from the visa, you might need some extra documents and preparations:
- Vaccination Certificates: Depending on your travel history, you may need proof of vaccination against certain diseases, like yellow fever. Check the latest health advice and requirements for Tanzania before your trip.
- Travel Insurance: It’s highly recommended to have travel insurance that covers high-altitude trekking. While Solo Adventures provided me with insurance, if you’re looking for a suggestion, SafetyWing might be a good option.
My Trekking Experience on Lemosho Route
In this section, I’ll share my trek on the Lemosho Route up Mount Kilimanjaro, detailing the daily routine, the changes in scenery, and the various challenges we encountered. I’ve included a map to give you a clearer picture of our path.
Daily Routine Overview
Each day started similarly: wake up, clean up, eat breakfast, get a medical check-up, and hit the trail. The distance and activities varied daily, with some days including extra acclimatization walks. Once at camp, we’d relax, enjoy snacks like popcorn and tea, get briefed on the next day’s plan, have dinner, and have a medical check-up. Summit day was the exception, as we started early in the morning to reach the peak at sunrise.
Day 1 - End of Mount Meru Trek and Resting day
Having just completed our Mount Meru hike, we checked into our hotel by 3 pm to rest and prepare for the Kilimanjaro climb. That evening, we met our guide for a briefing on the upcoming adventure. After that, we ordered pizza to celebrate the first ascending.
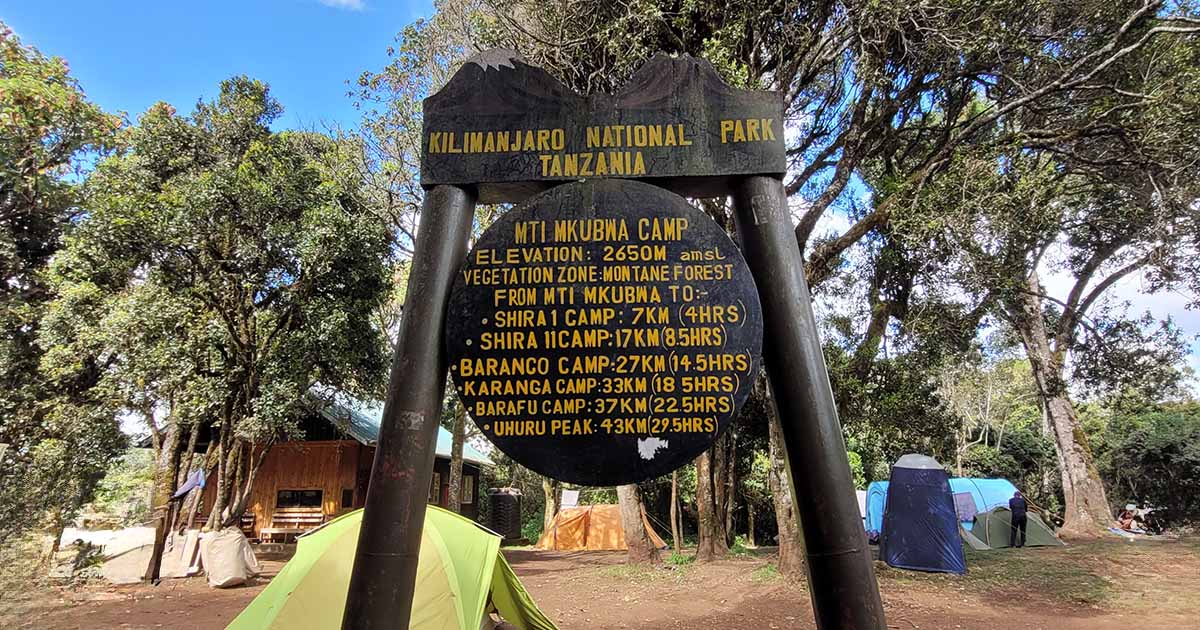
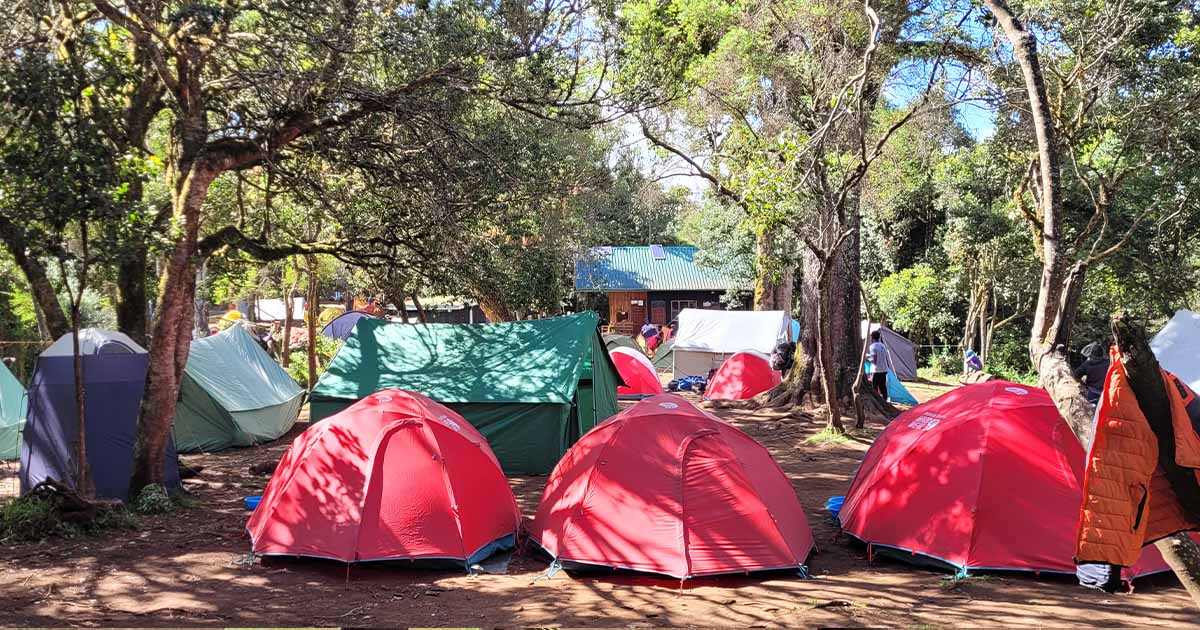
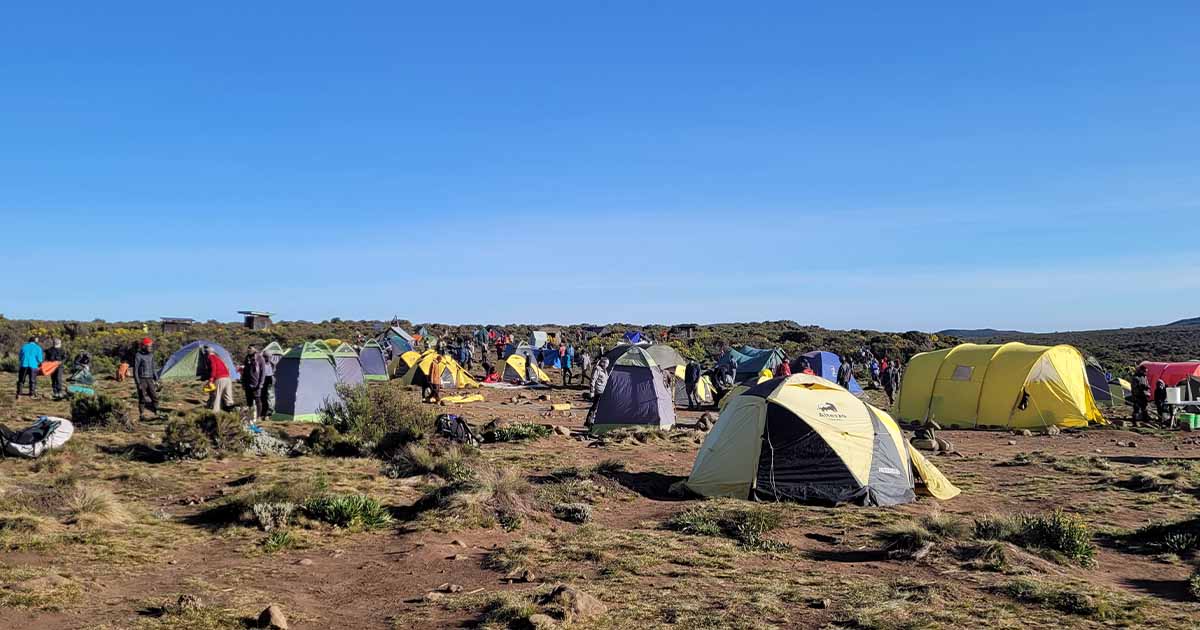
Day 2 - Mti Mkubwa Camp
| Description | Details |
|---|---|
| Walk Distance | 7 km |
| Walking Hours | 2.5 hours |
| Start Altitude | 2100 m |
| End Altitude | 2650 m |
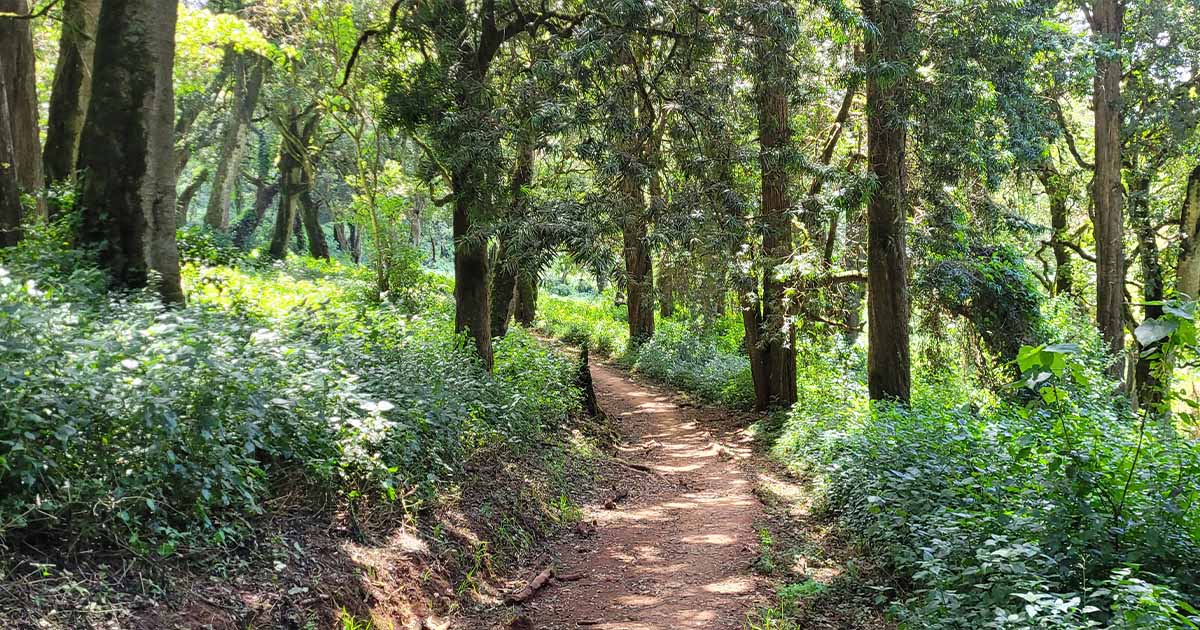
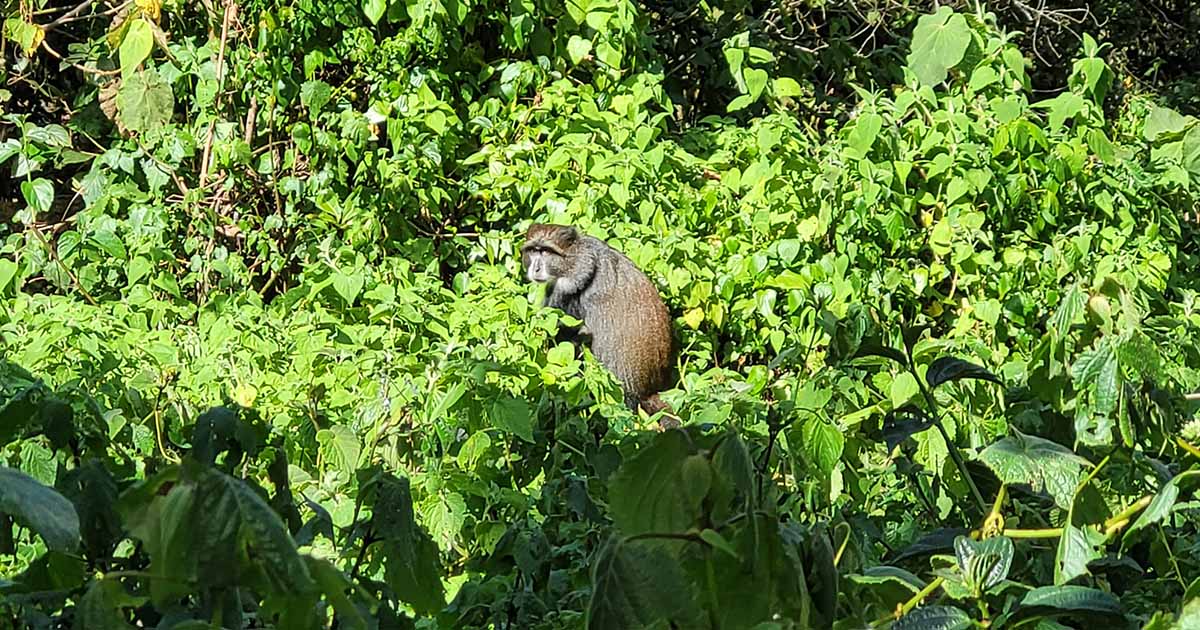
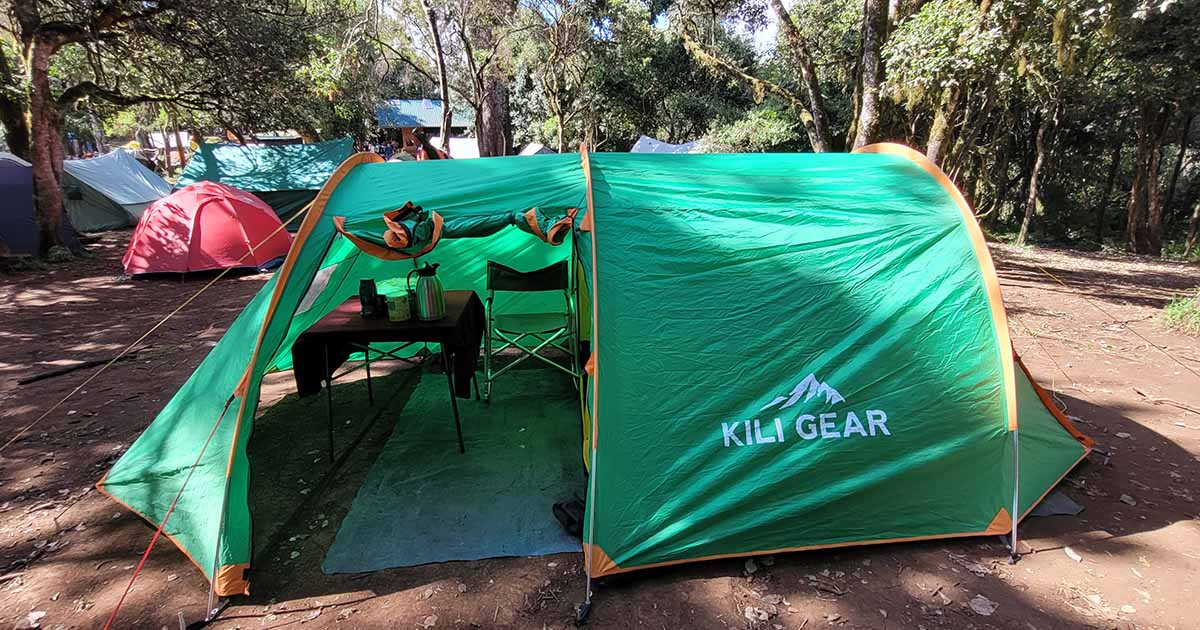
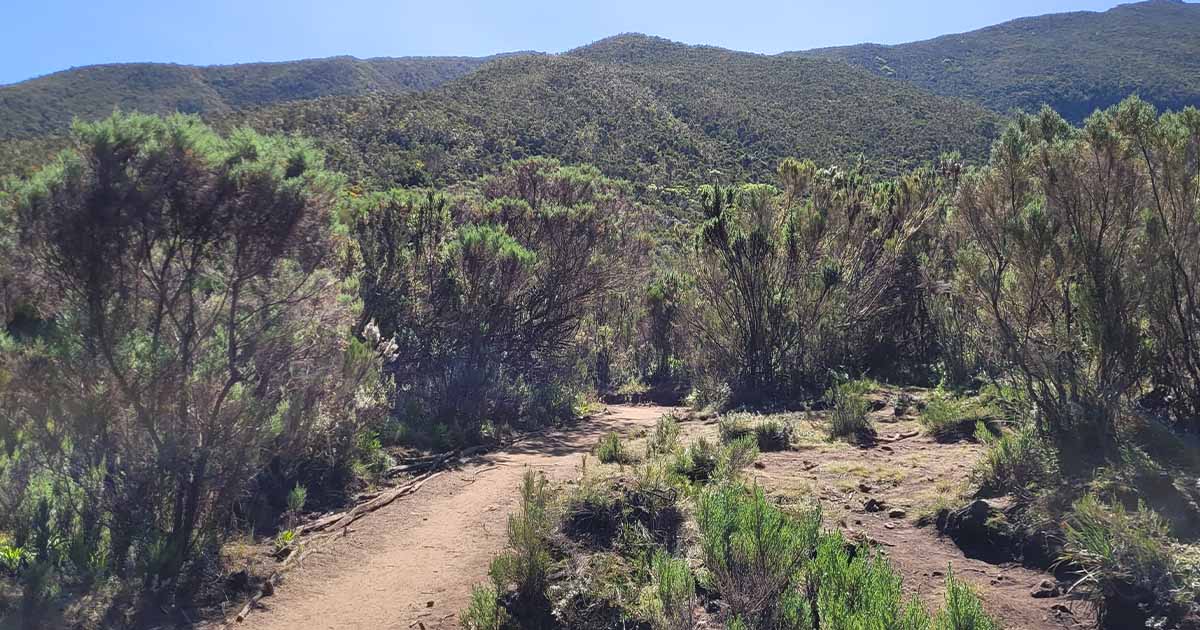
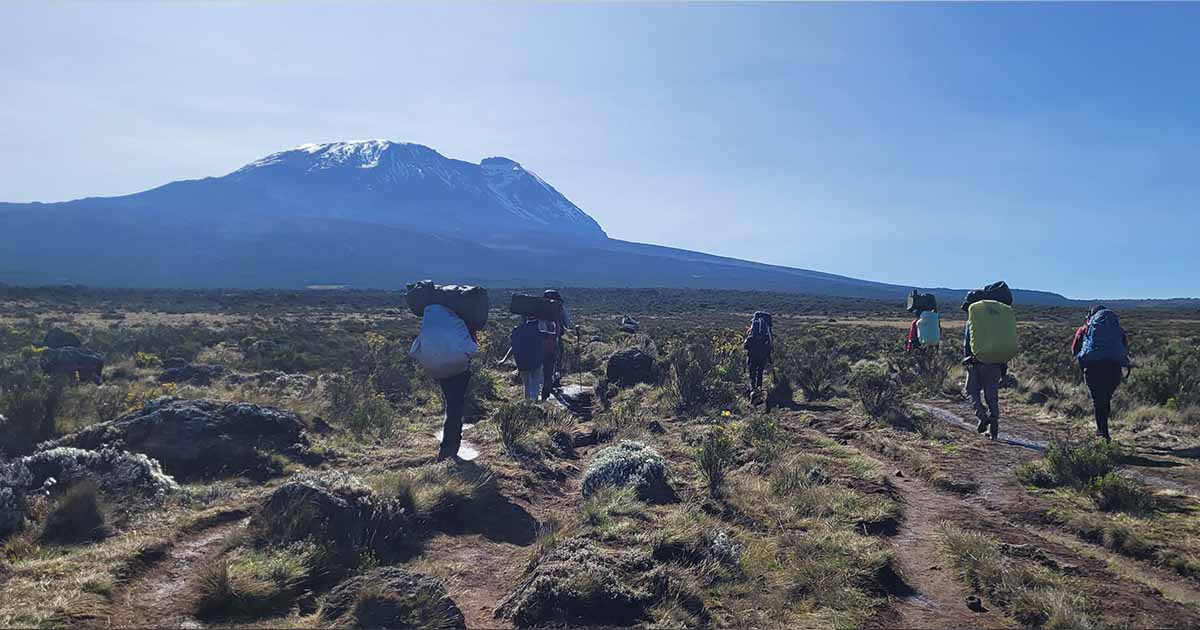
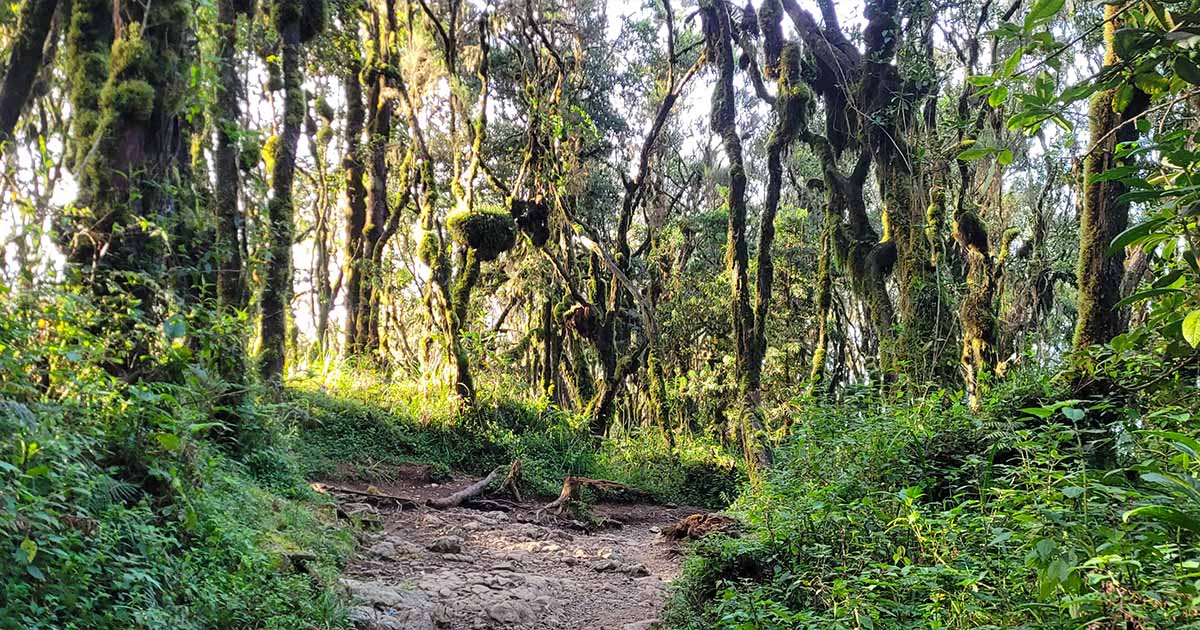
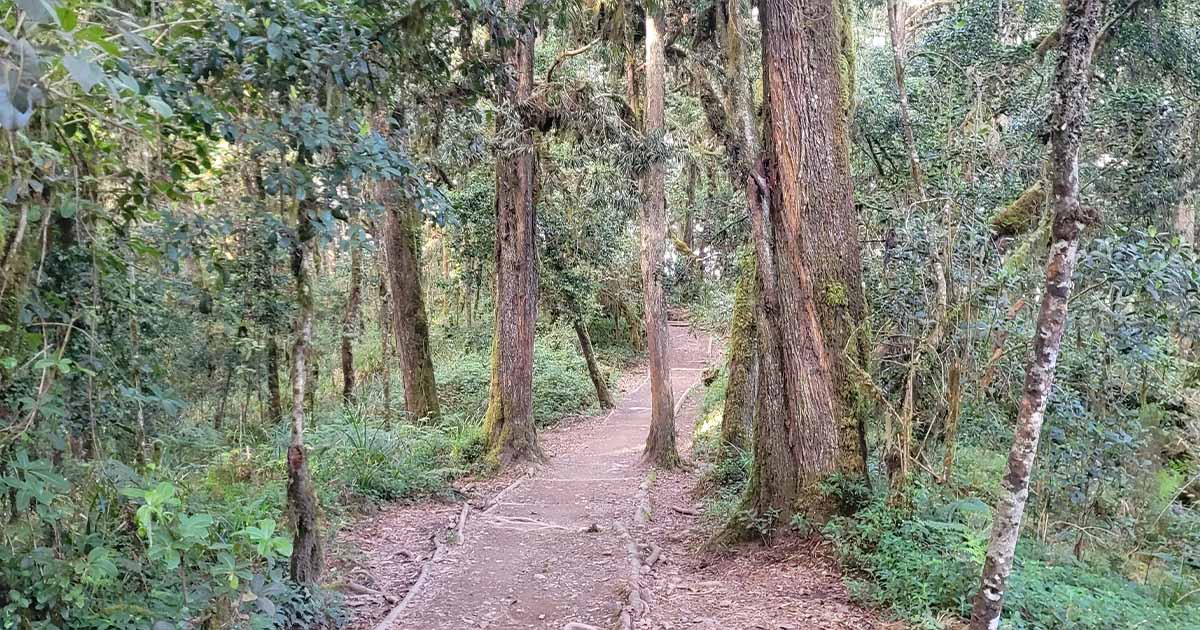
Our day began with a 7 am breakfast, followed by a drive to Lemosho Gate, where we started our hike. The trail led us through a forest where we saw blue monkeys, black and white colobus monkeys, poison ivy, and local construction timber. The trek to camp was manageable and filled with exciting sights and conversations with our guides, Emmanuel and Othman.
The forest campsite was charming. While we couldn’t see Kilimanjaro from there, we did notice monkeys around the camp, drawn, unfortunately, by the litter. Additionally, it was an excellent opportunity to catch up with the friends we’d made on Mount Meru and check in on their recovery from that trek.
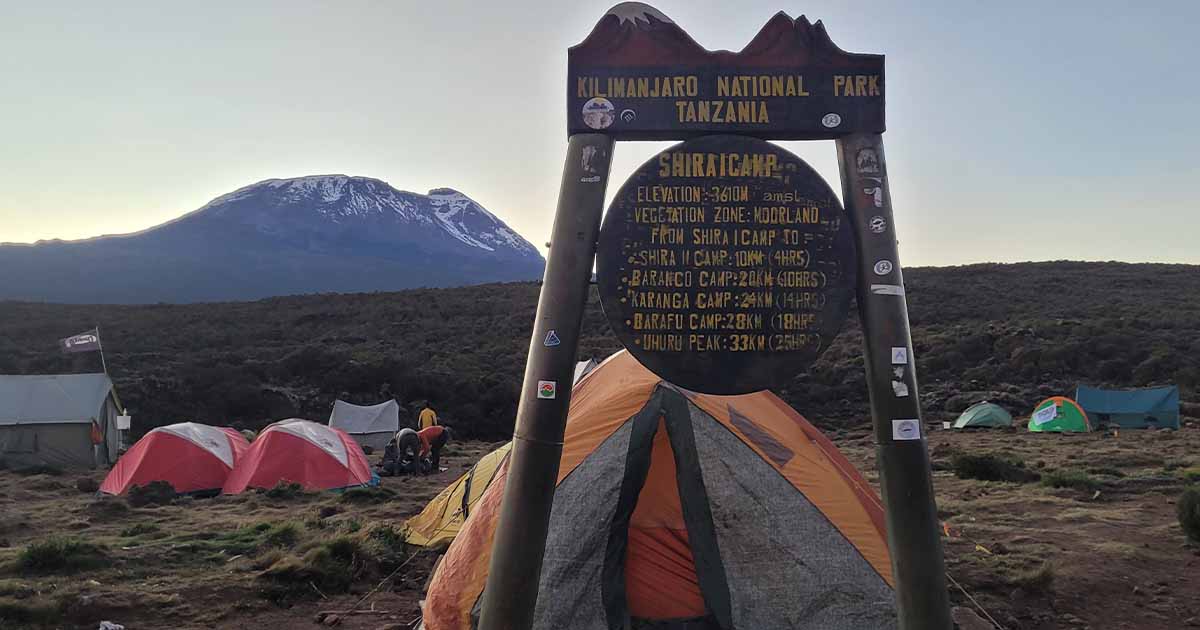
Day 3 - Shira I Camp
| Description | Details |
|---|---|
| Walk Distance | 7 km |
| Walking Hours | 4 hours |
| Start Altitude | 2650 m |
| End Altitude | 3610 m |
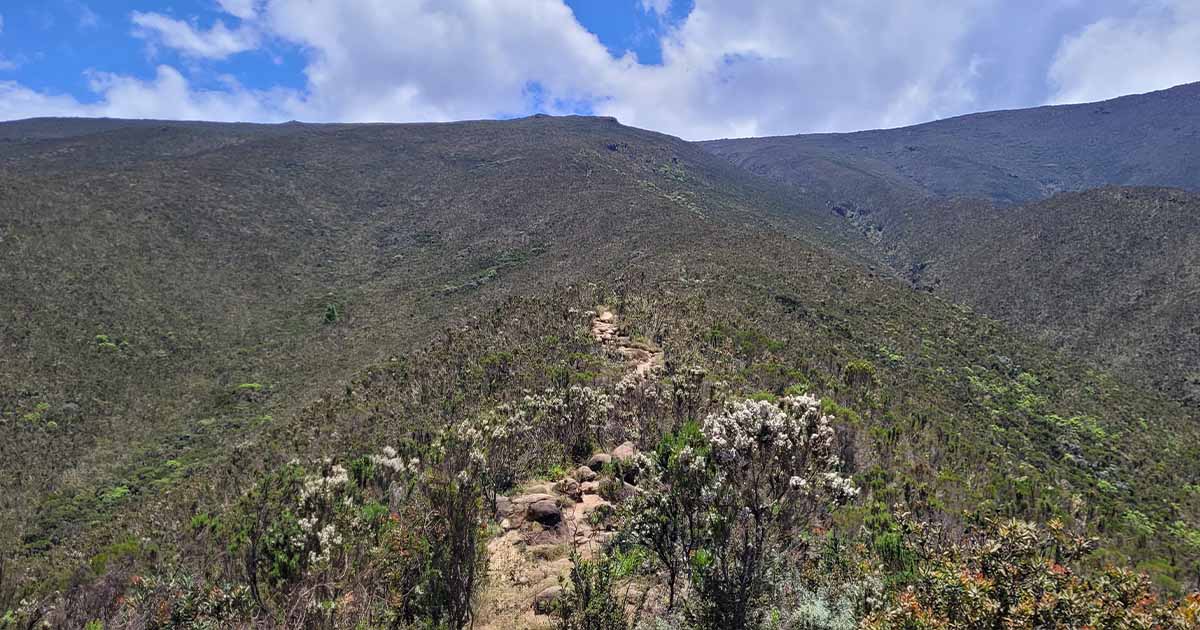
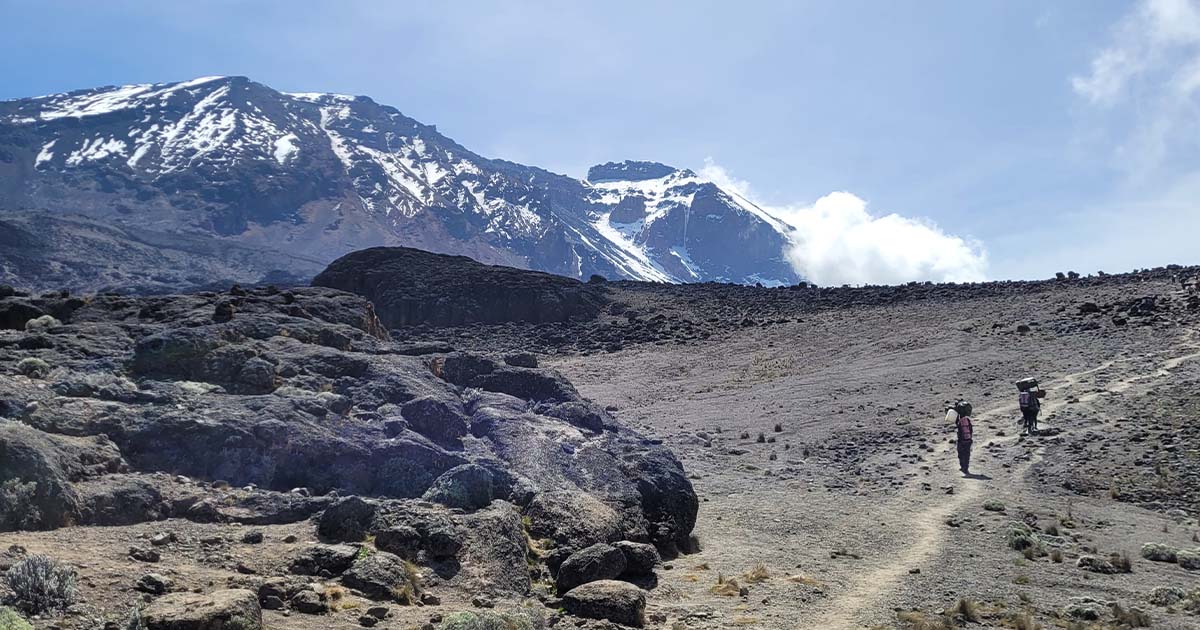
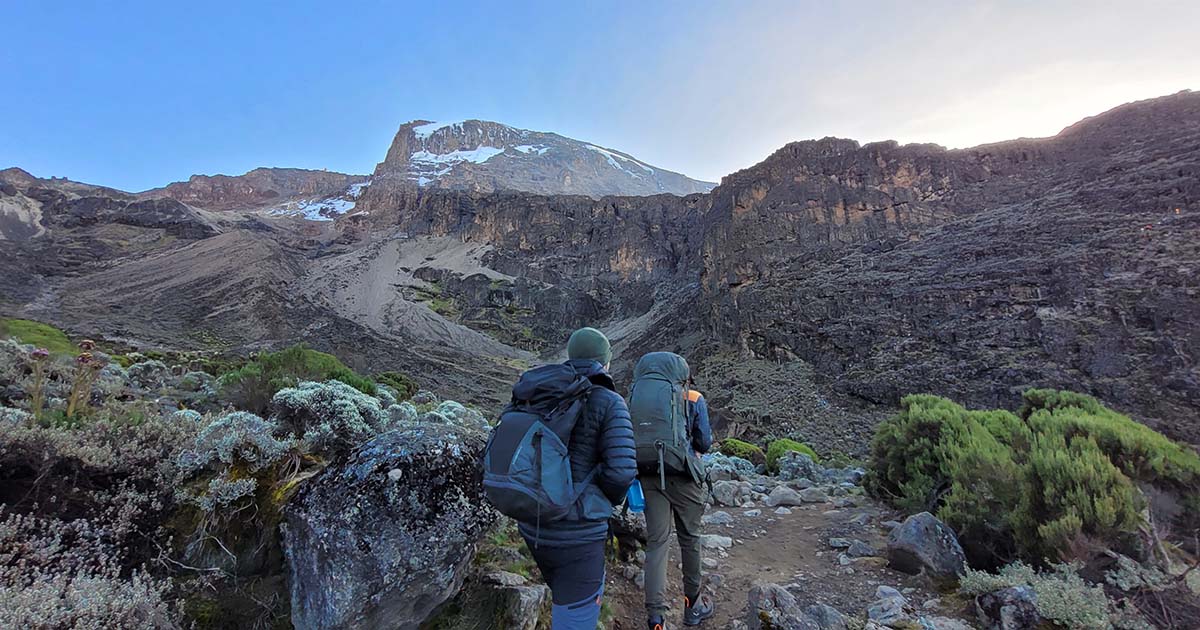
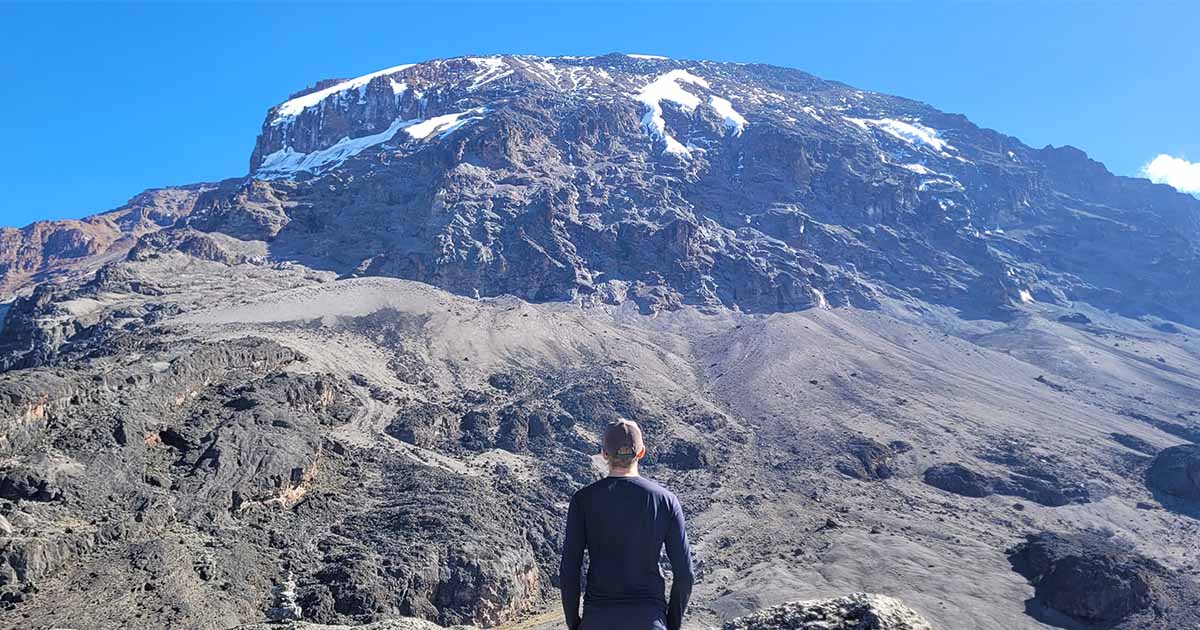
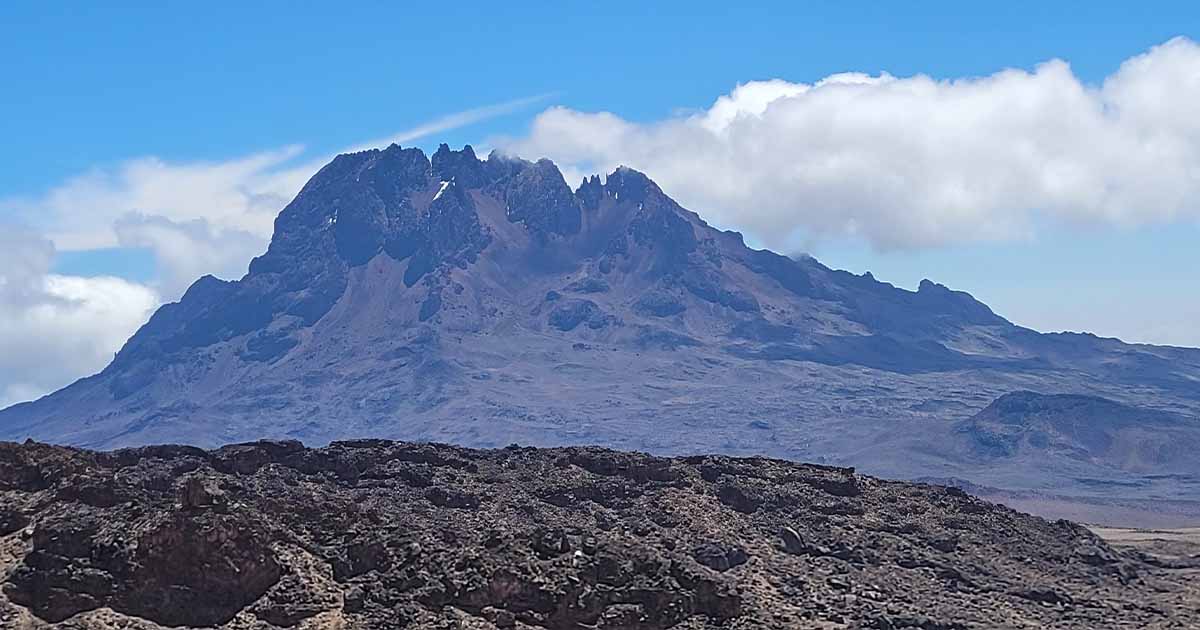
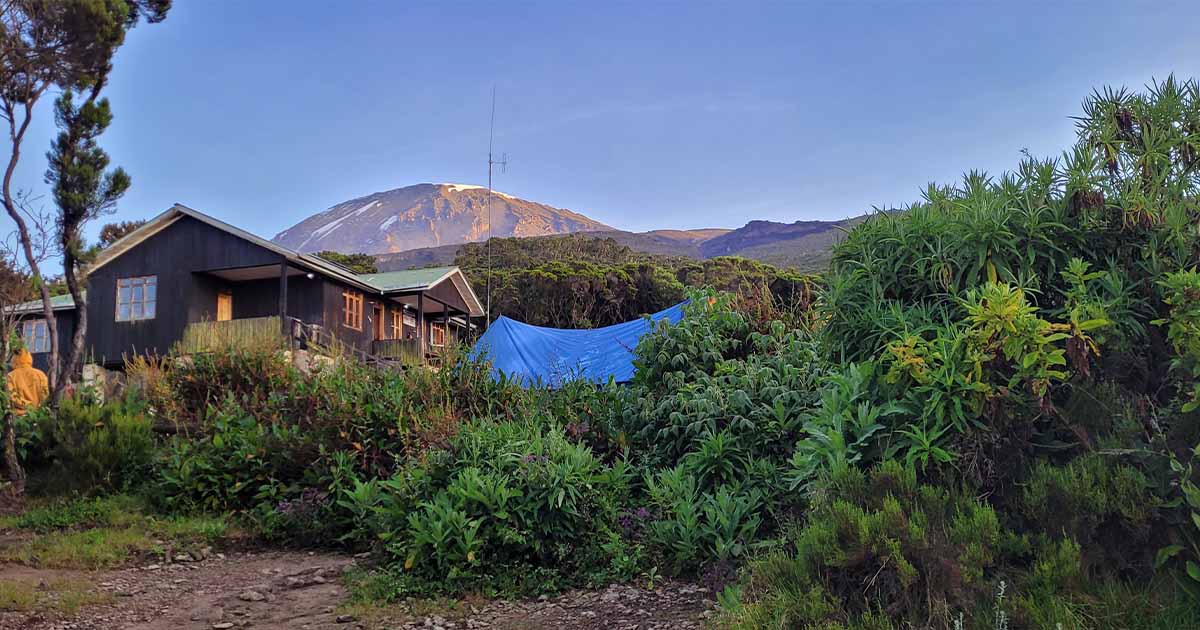
As we reached the Shira Plateau, the hike moved from the forest to thinner vegetation. The day was clear, making it possible to view Kilimanjaro, an unforgettable sight. The view from the west was my favorite during the whole hike.
Day 4 - Shira II Camp
| Description | Details |
|---|---|
| Walk Distance | 10 km |
| Walking Hours | 4 hours |
| Start Altitude | 3610 m |
| End Altitude | 3850 m |
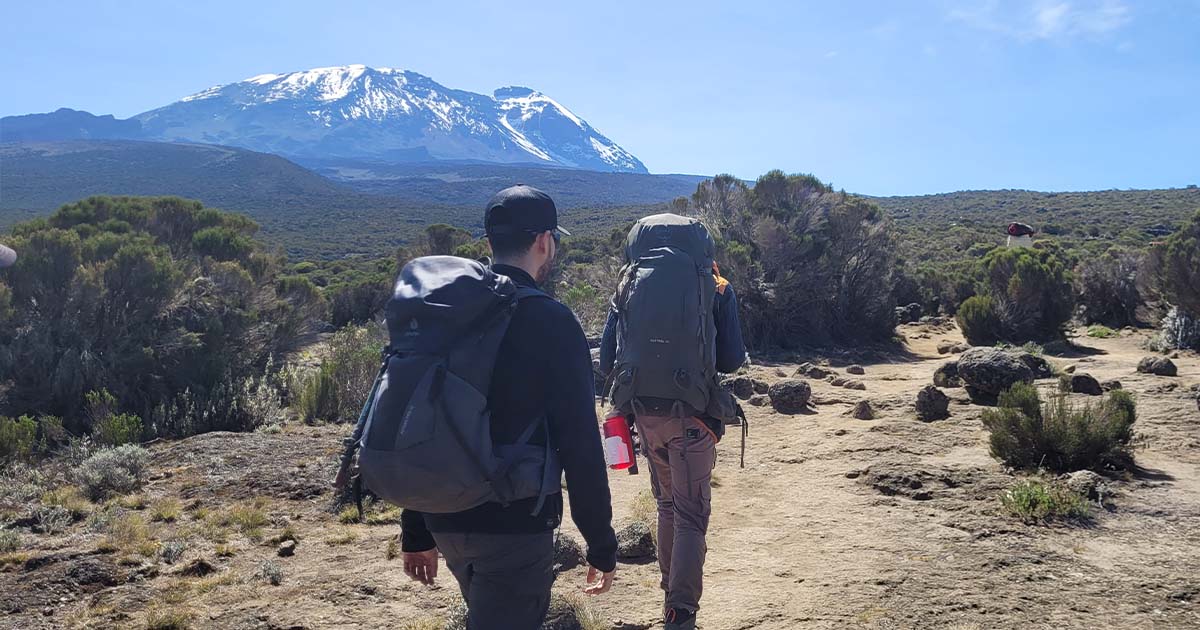
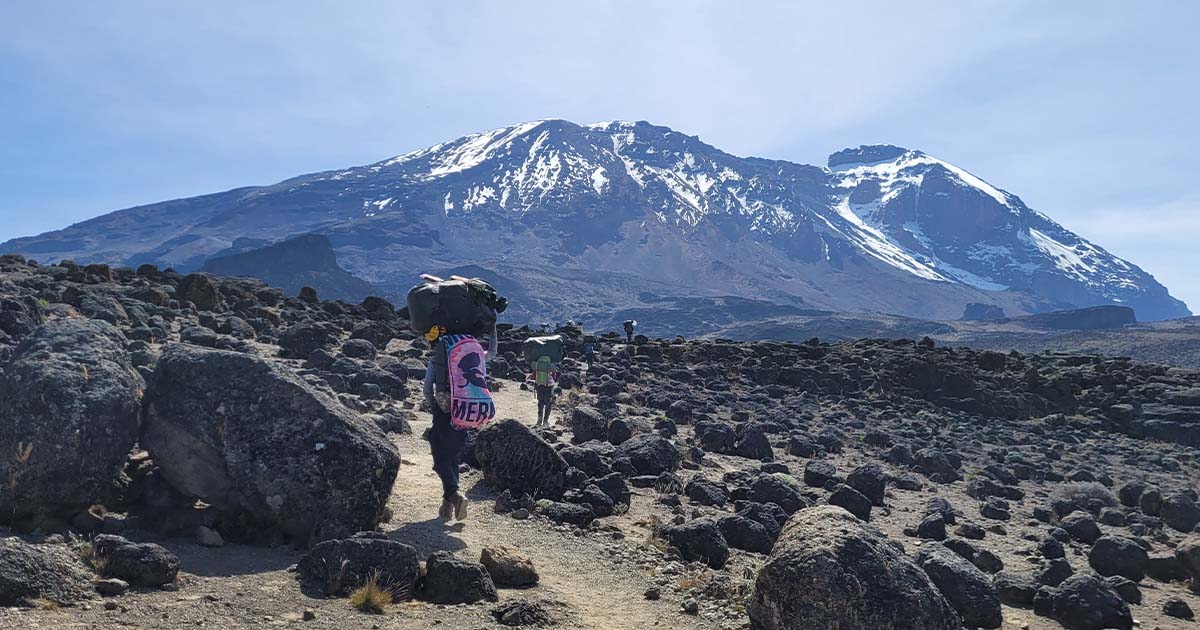
I woke earlier to see the spectacular sunrise that revealed the magnitude of the snow-capped peak. I knew it would be an exciting day as we walked toward Shira II, a straight way closer to the summit. Although the altitude gain was minimal, the effects became noticeable among some climbers. We started to see people suffering from the altitude and giving up the ascension.
After getting to the camp, we walked up for a short walk to help with acclimatization. The acclimatization walk consisted of walking to a higher elevation, spending time there, and returning to camp.

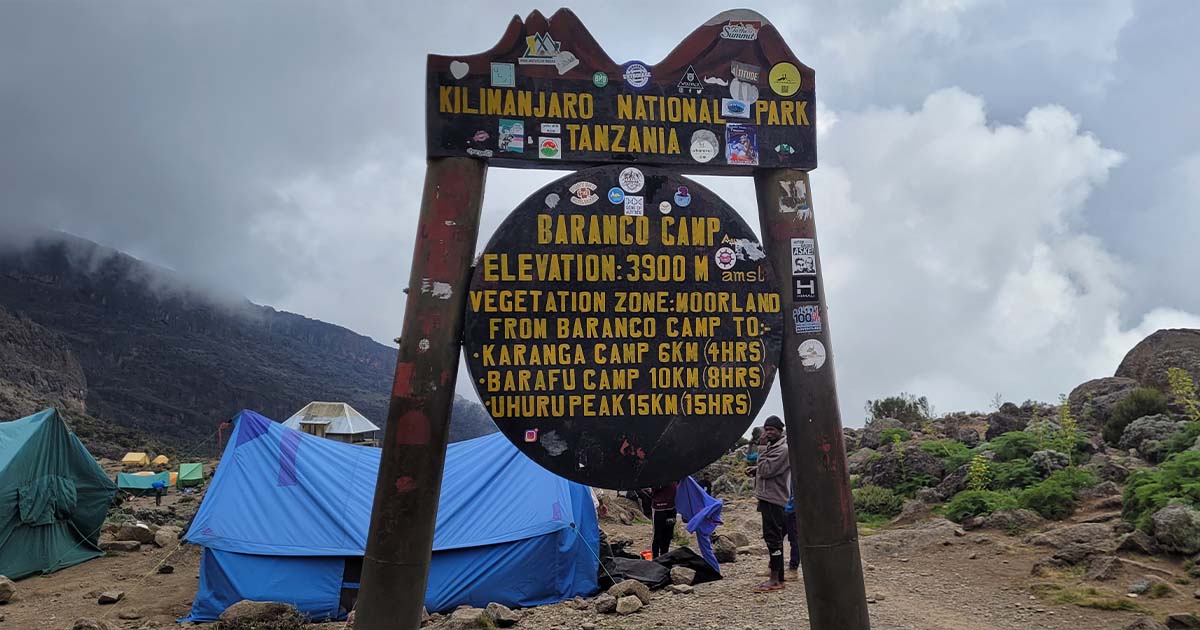
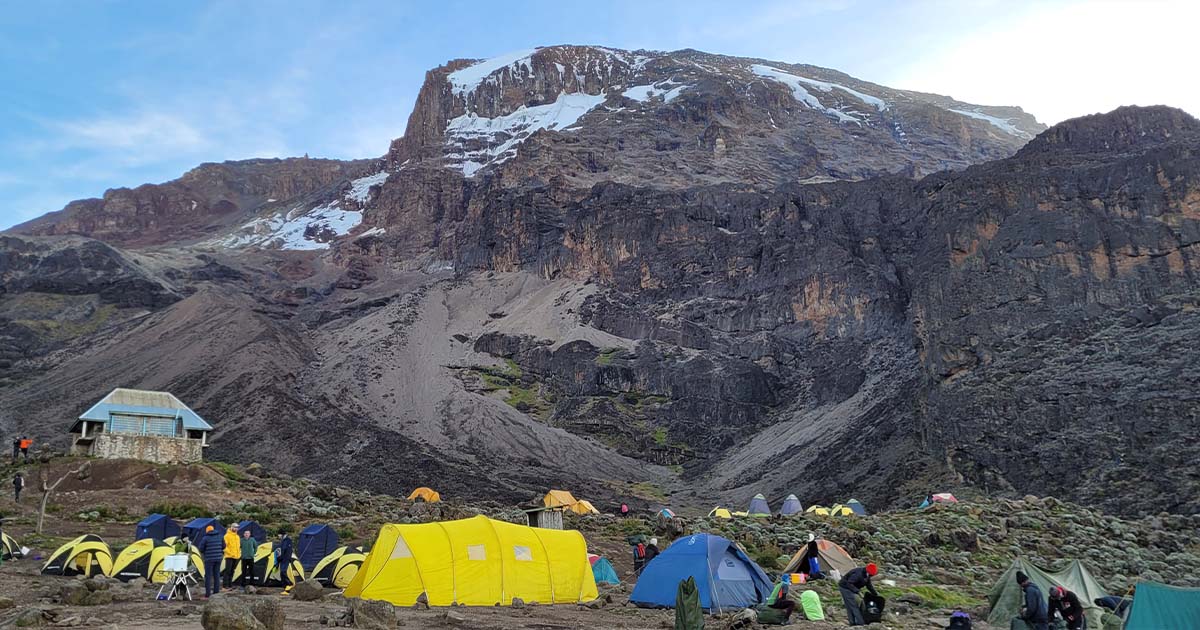
Day 5 - Barranco Camp
| Description | Details |
|---|---|
| Walk Distance | 10 km |
| Walking Hours | 4 hours to Lava Tower, then 2 hours to Barranco Camp |
| Start Altitude | 3850 m |
| End Altitude | 3900 m |
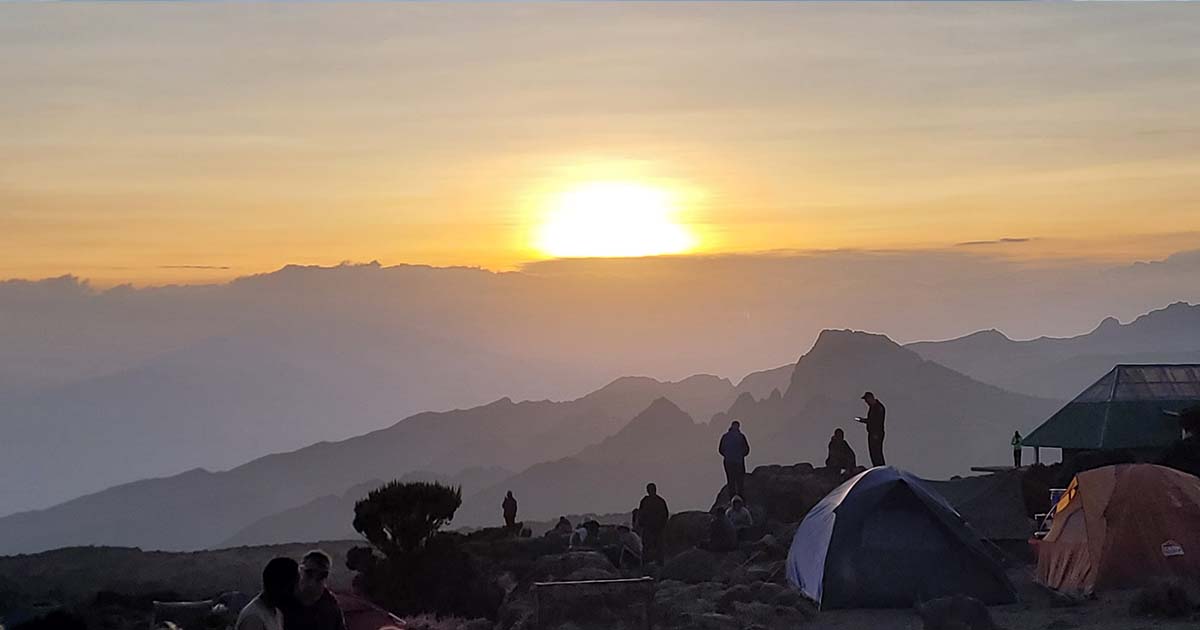
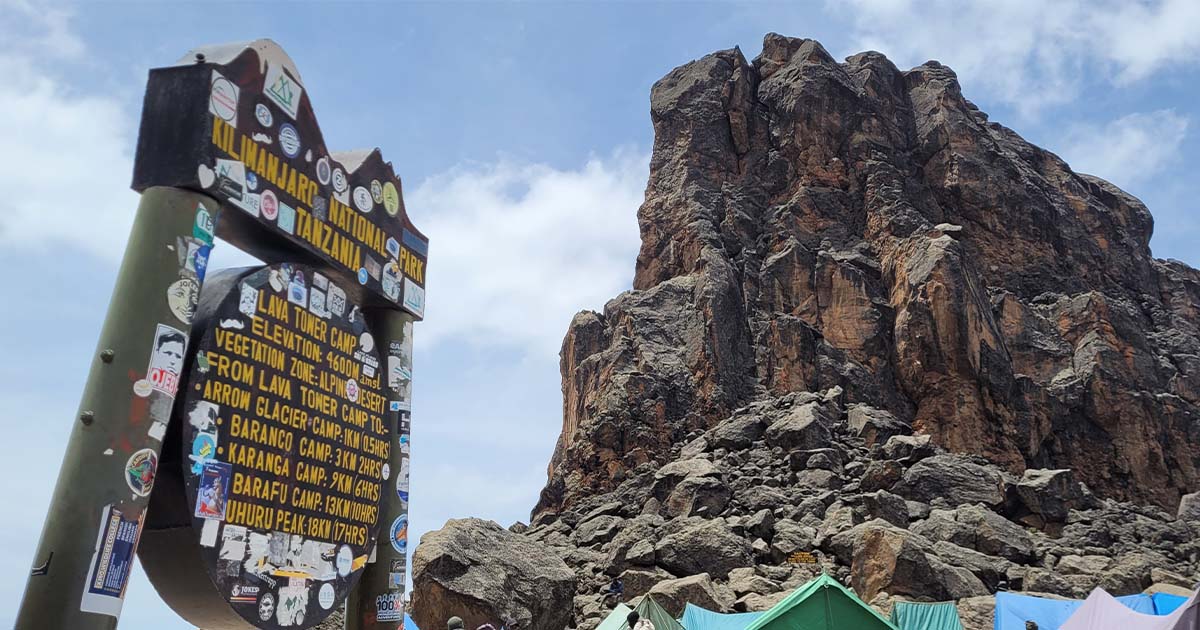
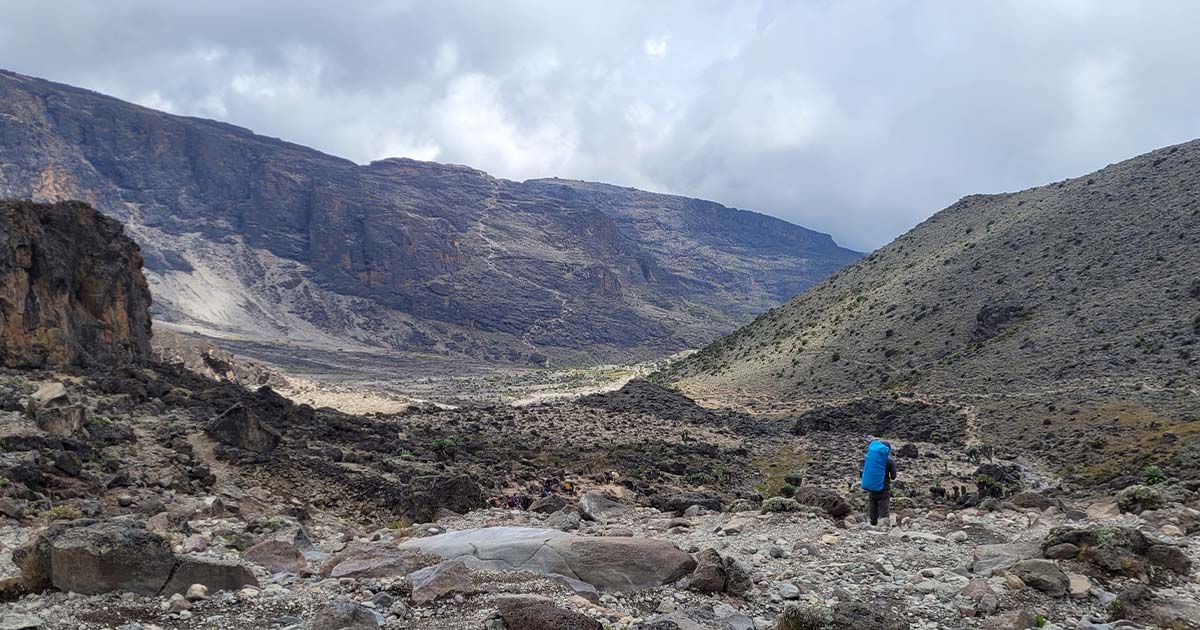
From this point, waking up earlier to see the sunrise was a daily routine. This day, we ascended to Lava Tower at 4600m elevation to have lunch there. Then we descended to Barranco Valley, making it an excellent day to acclimatize your body.
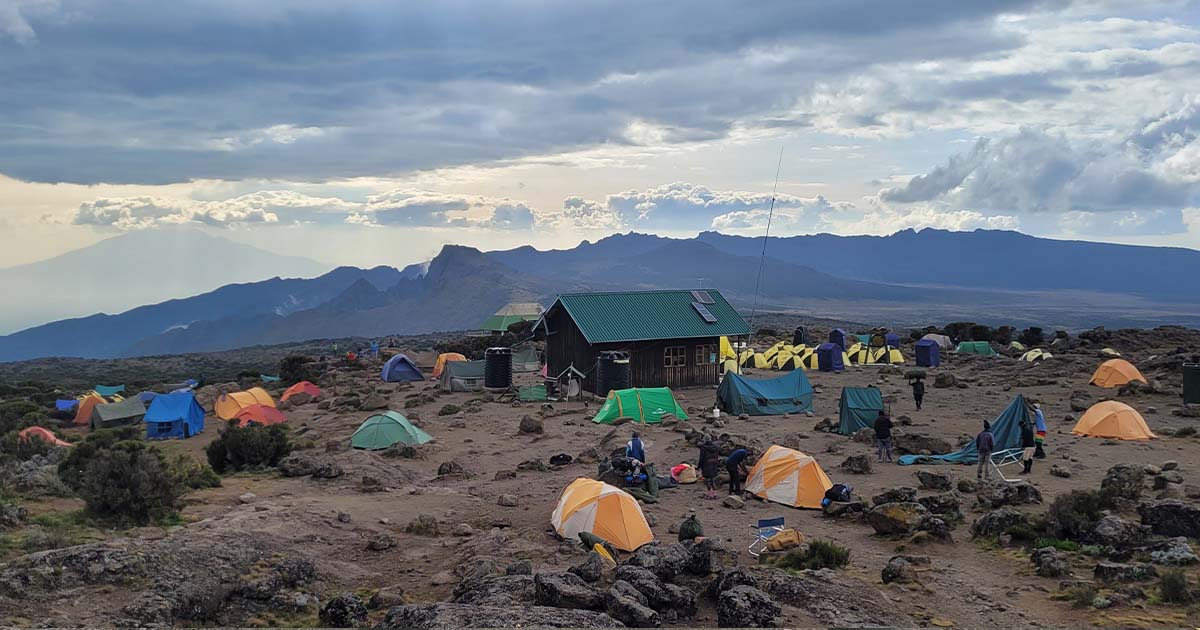
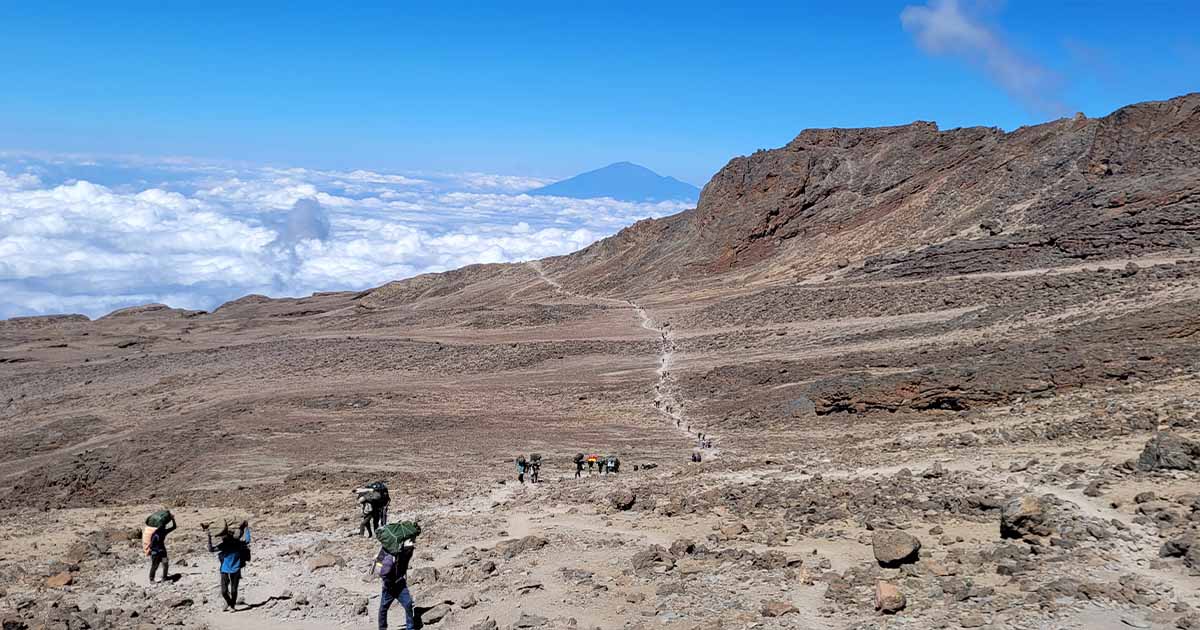
This was also the day the Machame and Lemosho routes met, so the camps were more crowded from now on. But it is not something you should worry about, as they have plenty of space and the porters go in front of you to get a good spot for your tent.
From this day onwards, hearing the chopper coming for rescues was more common. Also, seeing people struggling with altitude, fatigue, and other problems was more typical.
Day 6 - Karanga Camp
| Description | Details |
|---|---|
| Walk Distance | 6 km |
| Walking Hours | 4 hours |
| Start Altitude | 3900 m |
| End Altitude | 3995 m |
That morning, I woke up feeling unwell. My sleep was disrupted by neighboring campers partying all night, and my inadequate sleeping bag left me cold for several nights, finally taking its toll on me.
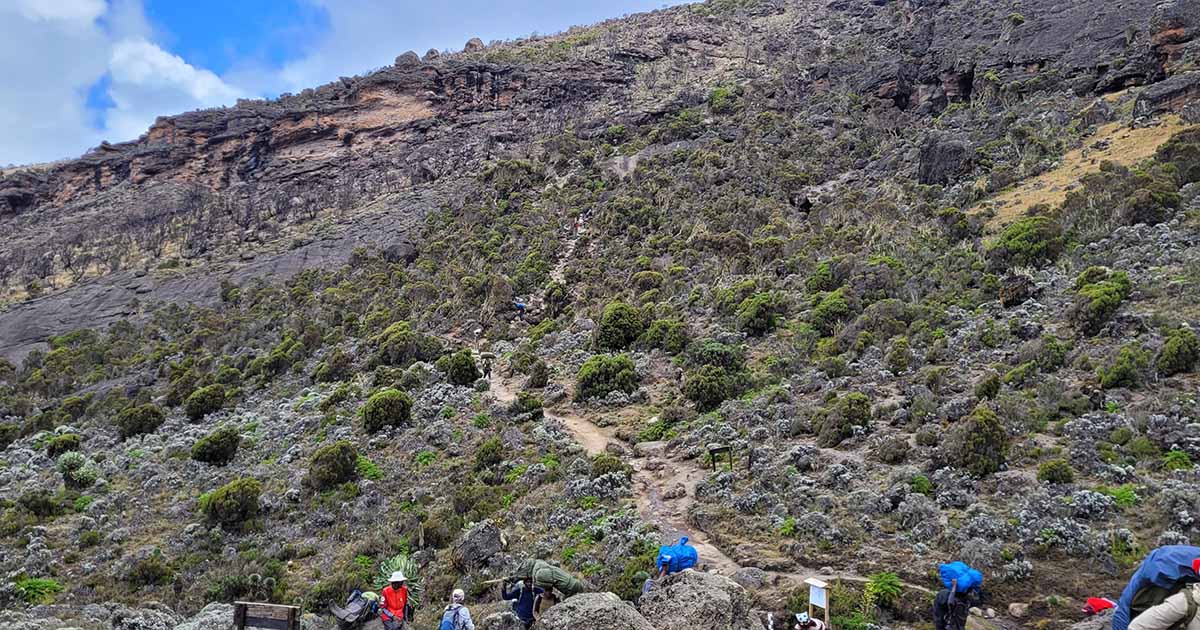
After discussing my condition with the guides and confirming my vitals were stable, we opted to proceed without medication, hoping restful sleep would aid my recovery. We began our hike to Barranco Cliff, a climb that, while not technically challenging, required some scrambling. The ascent was crowded, limiting our pace.
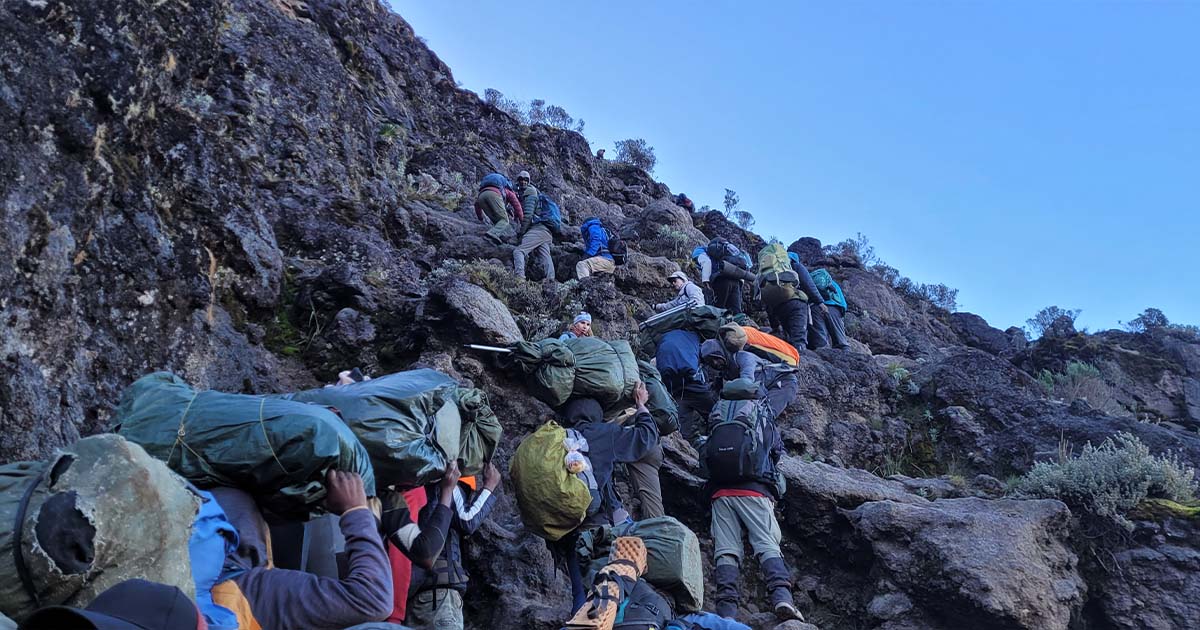
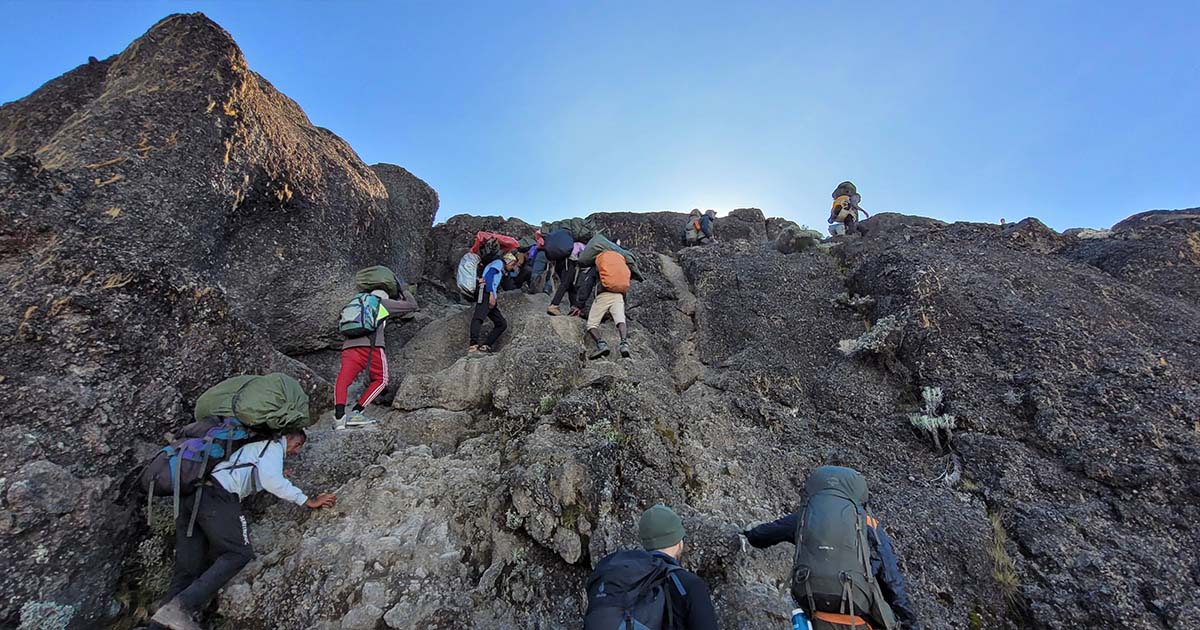
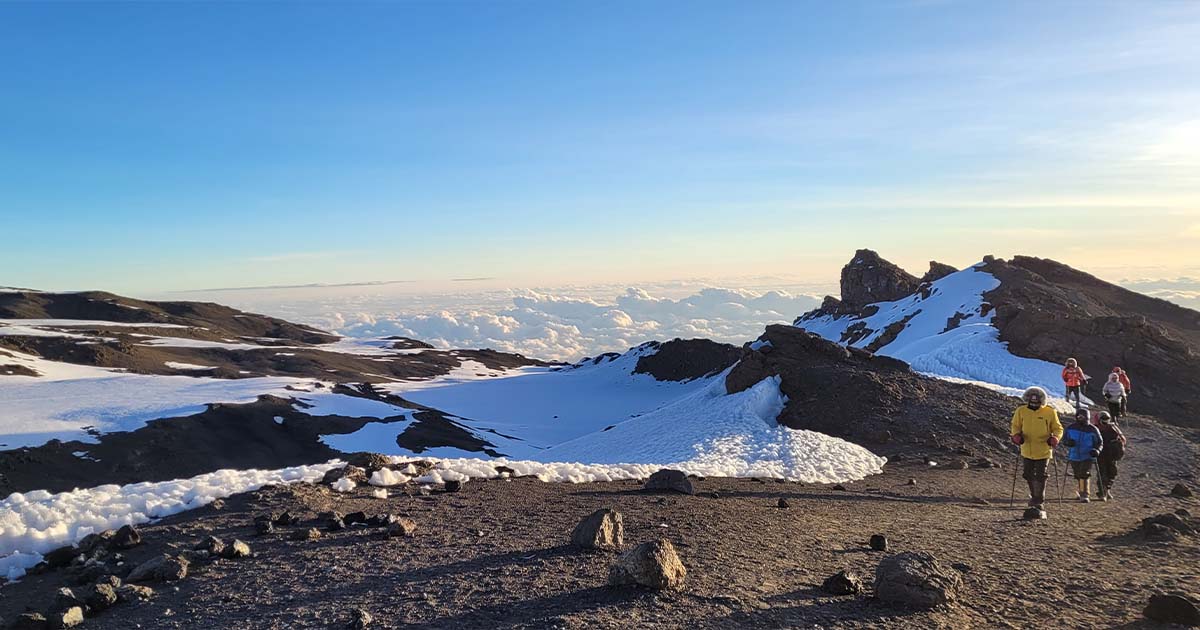
Reaching the top of Barranco Cliff rewarded us with spectacular views of the peak and Mount Meru, a popular spot for memorable photos. The rest of the trek was climbing up and down the mountain’s slopes towards our next camp.
Descending from the top of Barranco Cliff, my body felt unusually heavy, reminiscent of fever symptoms. My compromised immunity likely helped me develop altitude sickness for the first time, making the trek unpleasant. Upon arriving at camp, I tried to sleep, But I couldn’t. Also, I’ve struggled with loss of appetite and nausea, forcing myself to eat despite feeling increasingly unwell.

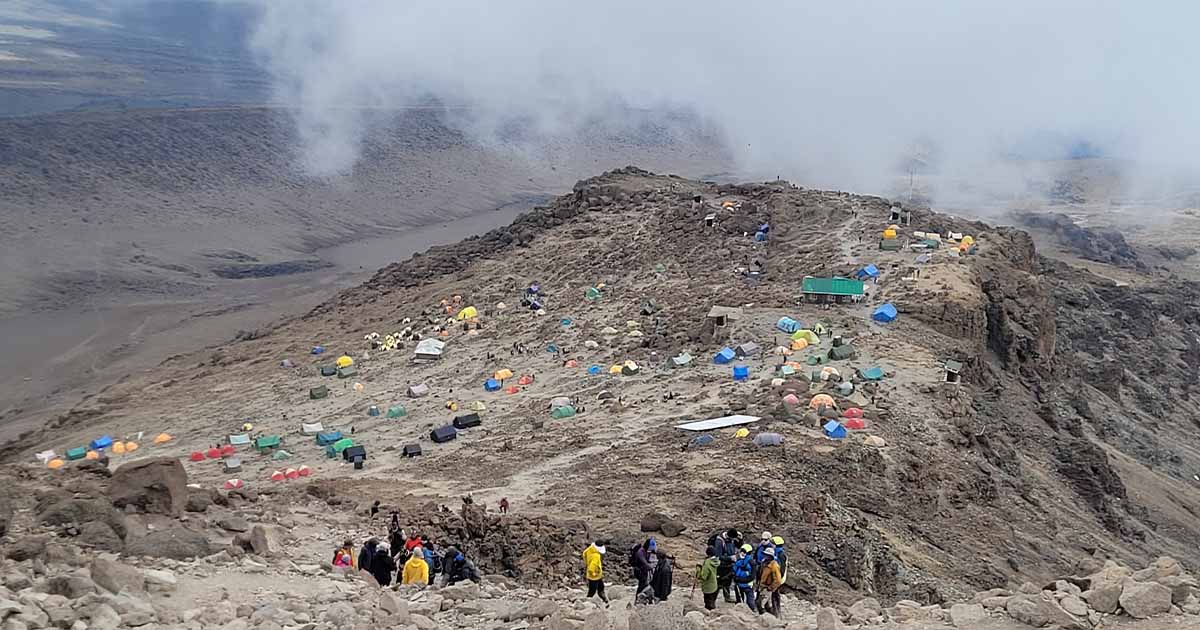
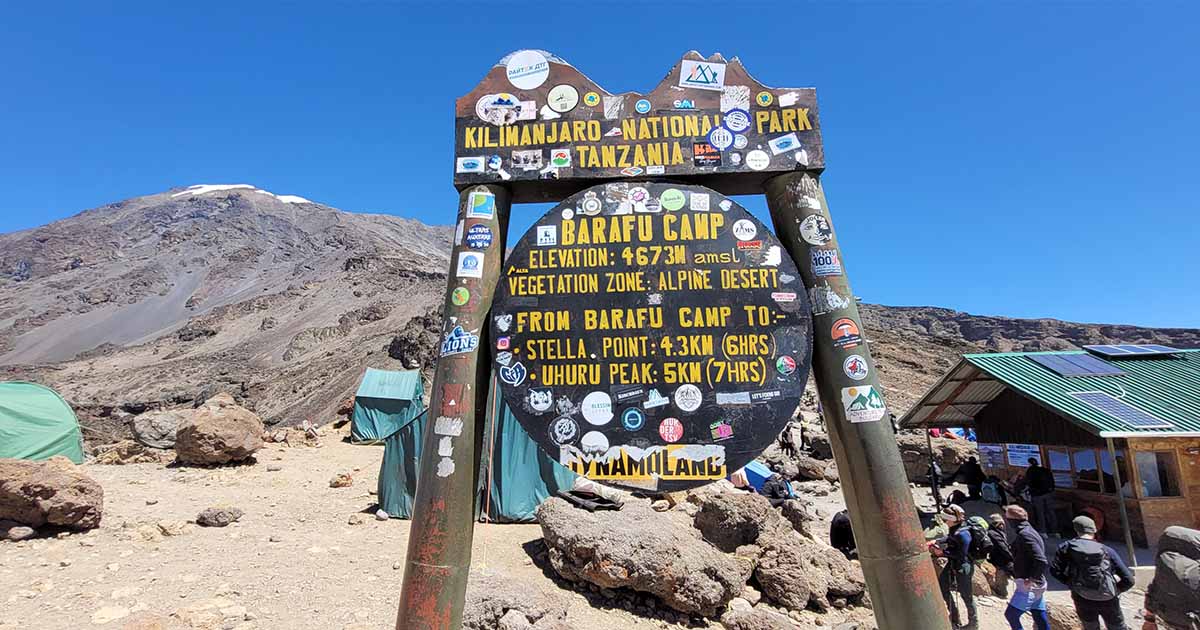
Day 7 - Barafu Camp
| Description | Details |
|---|---|
| Walk Distance | 4 km |
| Walking Hours | 4 hours |
| Start Altitude | 3995 m |
| End Altitude | 4673 m |
The following morning, my condition hadn’t improved. In an attempt to alleviate the symptoms of altitude sickness, I took Diamox for the first time, along with some painkillers, hoping they would ease my discomfort.
As we made our way to Barafu Camp, it became clear that the painkillers were ineffective, and I realized my health wasn’t going to improve anytime soon. Fortunately, our guide provided some flu medication, which offered relief while resting, though the hike remained a struggle.
Despite the hike being relatively short and not the most challenging, battling every symptom made it particularly tough. Nevertheless, the scenery was breathtaking. Upon reaching Barafu Camp, we had a late lunch, did a last acclimatization walk, and got to bed around 6pm to rest.
I managed to sleep around 9 pm, only to be awakened a few minutes later by the sounds of other climbers gearing up for their summit attempt. Their excitement was noticeable, as they were wildly yelling like mountain wolves.
Day 8 - Ascending to Summit and Descending to Mweka Camp
| Description | Details |
|---|---|
| Walk Distance | 19 km |
| Walking Hours | 12 hours, including resting at Barafu Camp |
| Start Altitude | 4673 m |
| End Altitude | 3100 m |
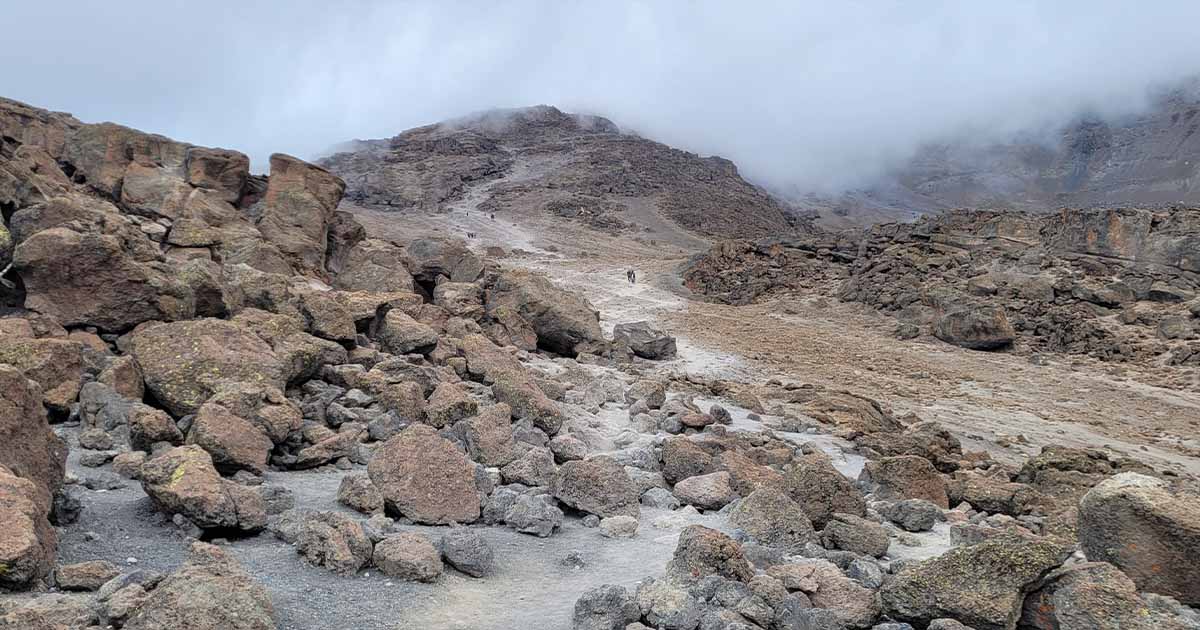
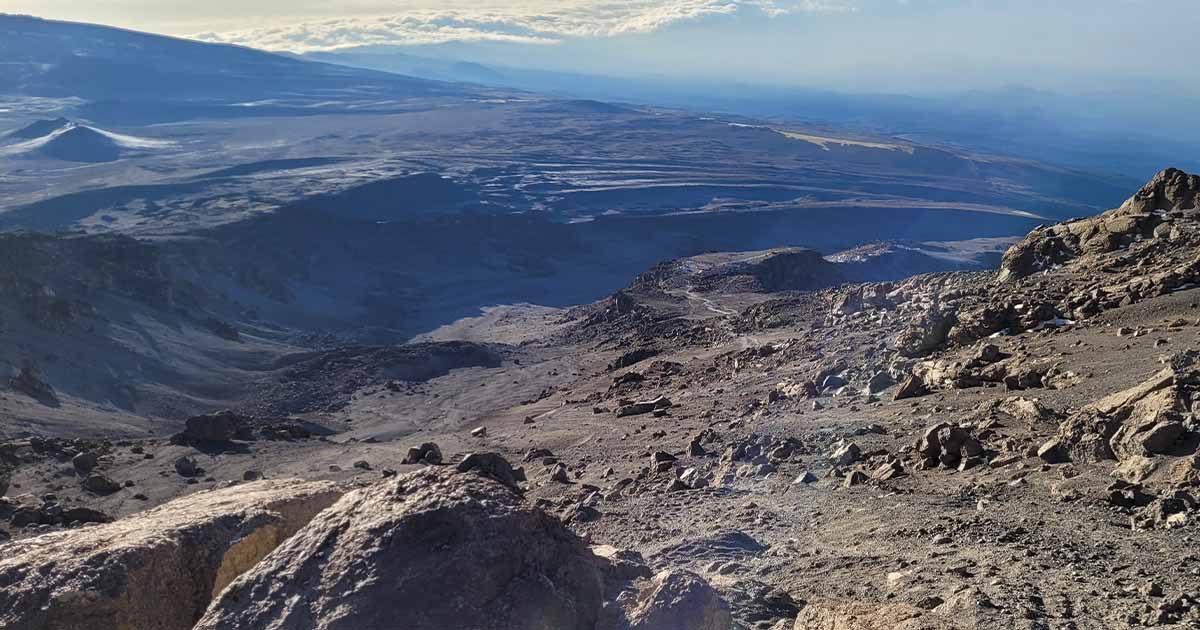
We woke up at midnight, and I managed to get at most an hour of sleep, though I hadn’t expected much more. After breakfast, we began our ascent to Uhuru Peak around 1 am. We were one of the latest groups to leave the camp, and the mountain was crowded. After a few minutes of walking, we could see climbers giving up or being dragged down by porters, which is sadly a familiar sight for high-altitude mountains.
The climb was a real test of endurance. Visibility was low, the wind was biting, and the cold was penetrating, intensified by my lack of rest and the high altitude. My persistent cough and dry throat added to the difficulty, making this night the most arduous part of our expedition.
We maintained a consistent, slow pace, taking breaks every hour for water and snacks, but never more than 3 minutes to avoid freezing. Despite our pace, we overtook almost all the groups, becoming the second group to reach Uhuru Peak.
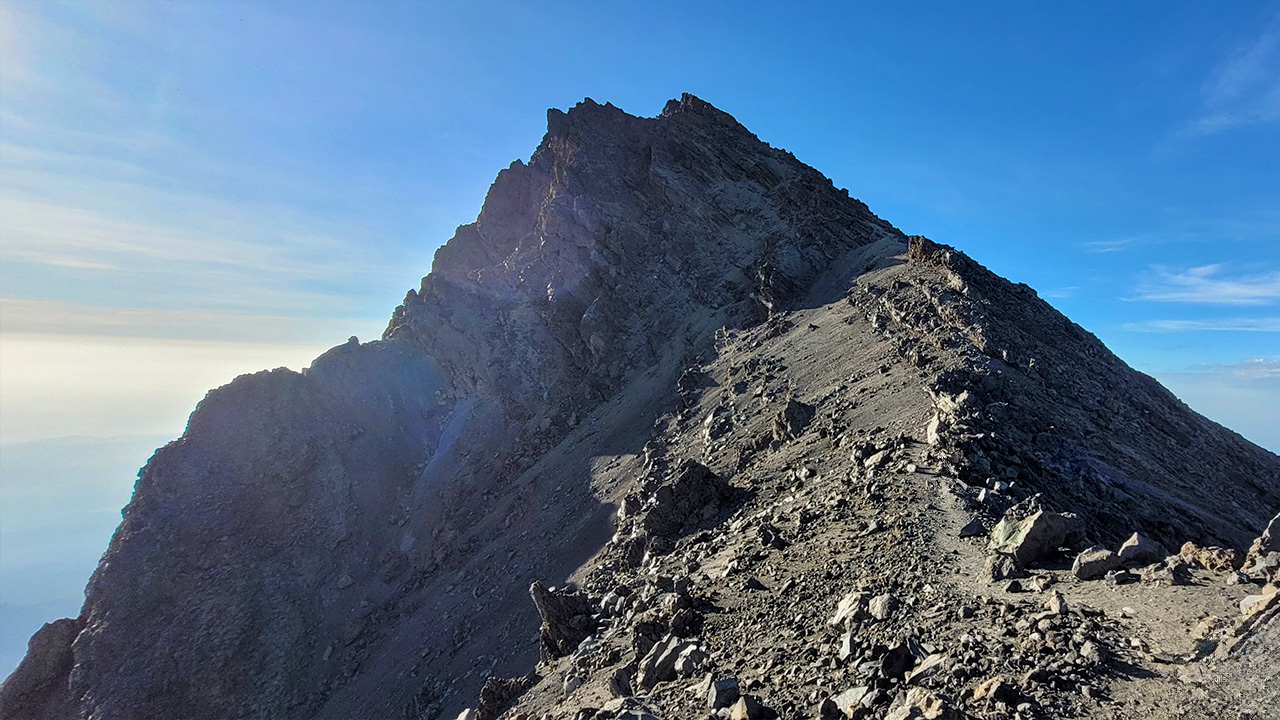
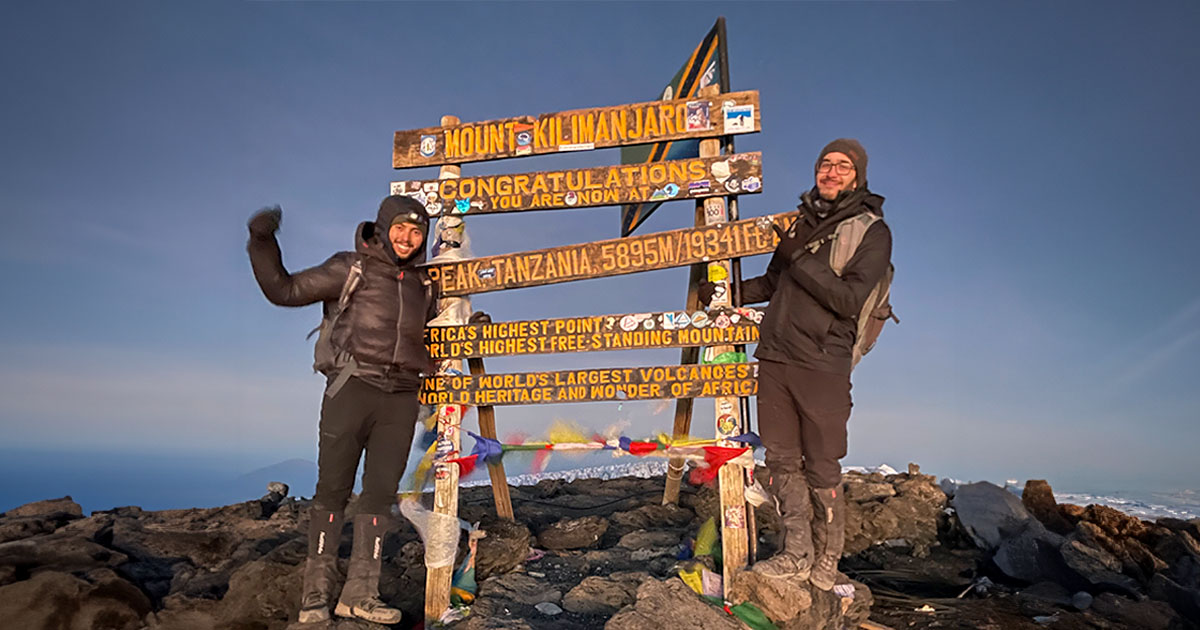
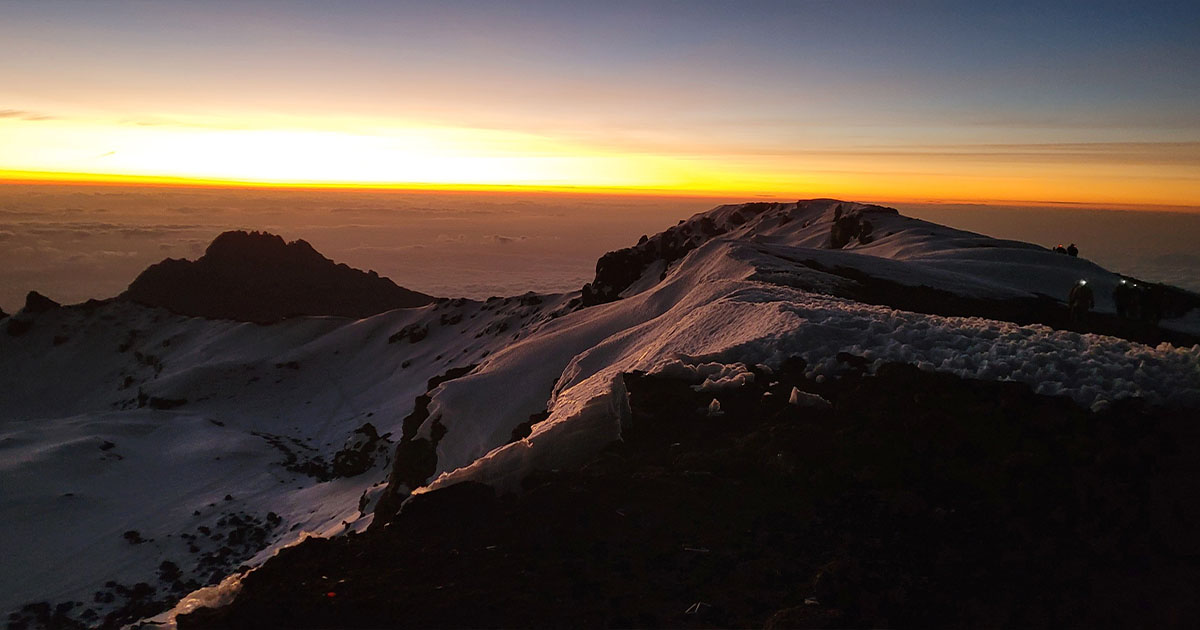
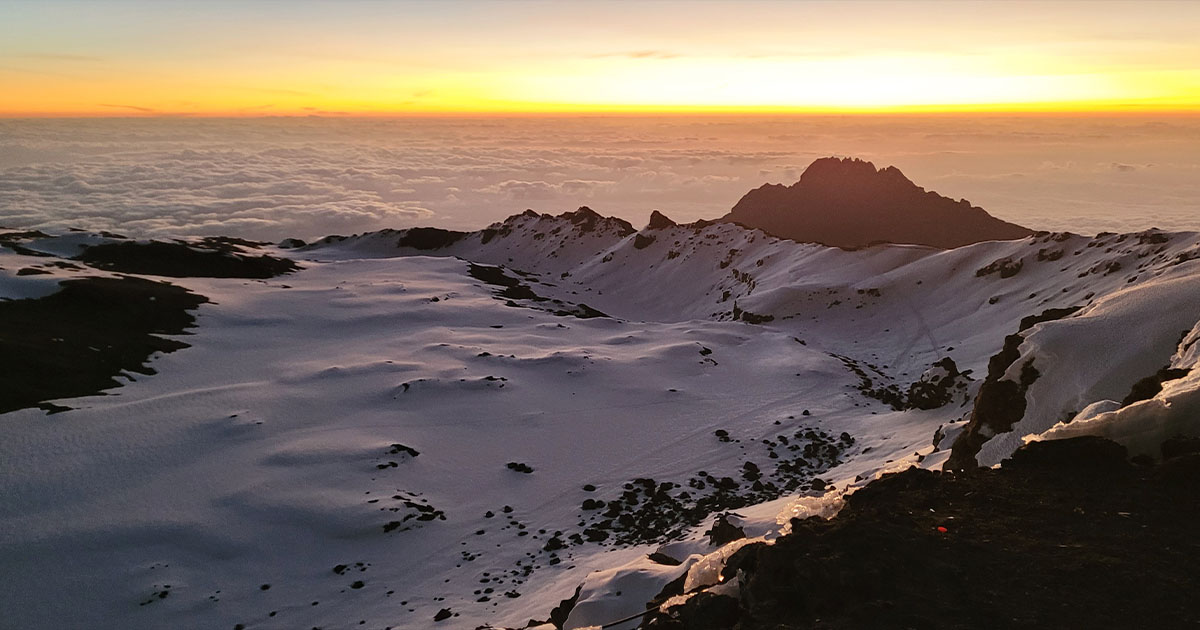
Arriving at Stella Point after four hours, we knew the steepest section was behind us. There was no way of giving up now, so we took the last break before the initial push to the summit, reaching it at 6 am, right before sunrise. The joy of witnessing one of the most beautiful sunrises and the achievement of reaching the summit made me forget any discomfort I was feeling.
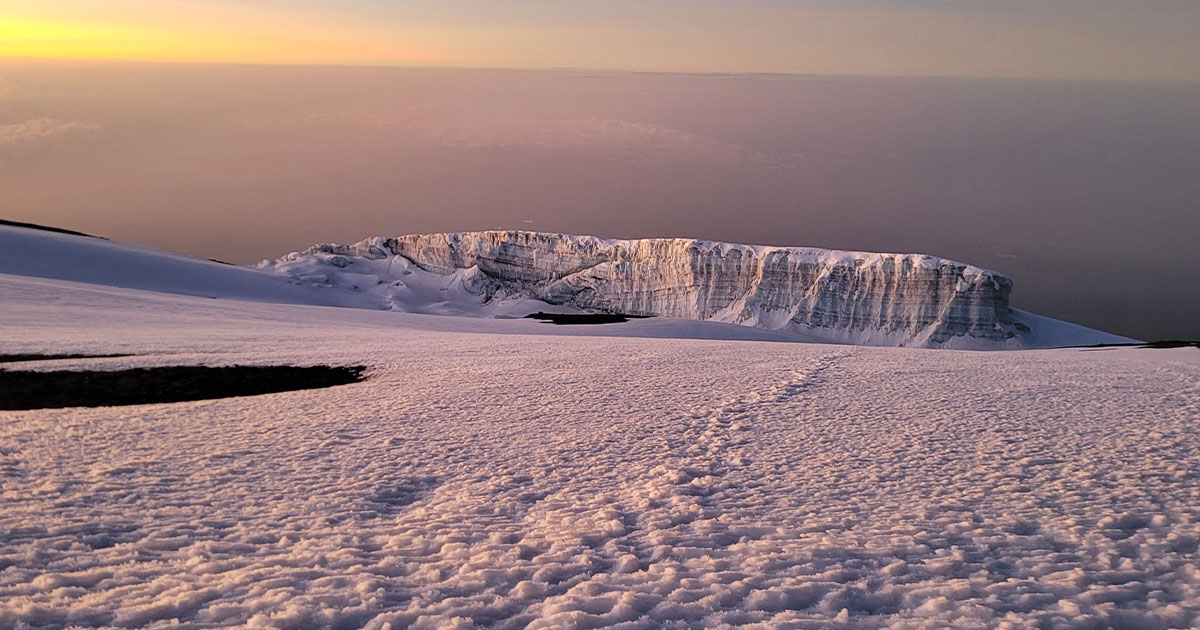
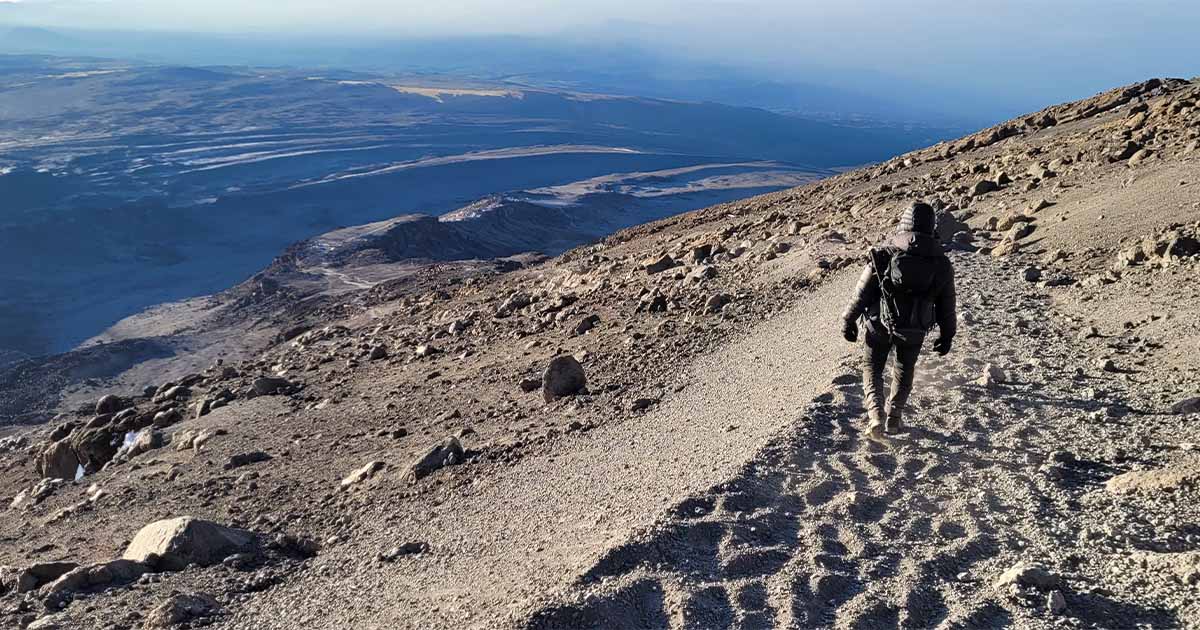
After spending about 30 minutes at the summit, we began our descent. Each step down brought relief from the altitude but also a growing fatigue.
We were back at Barafu Camp for a brief rest and brunch two hours later, then continued to Mweka Camp, arriving by 1:30 pm. Exhausted yet fulfilled.
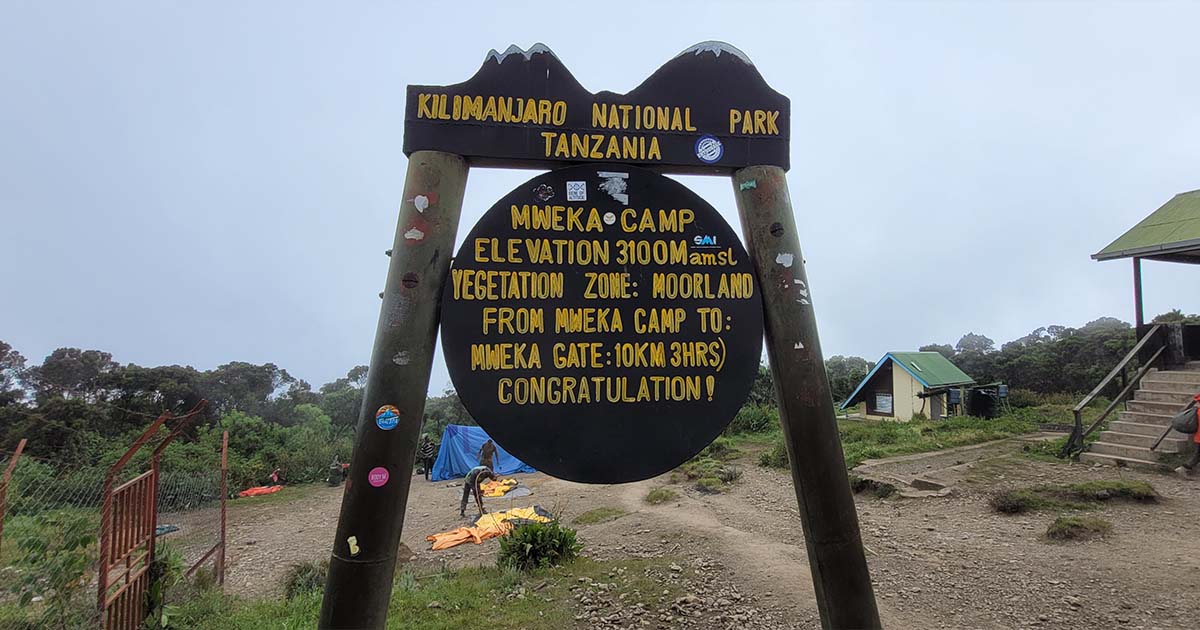
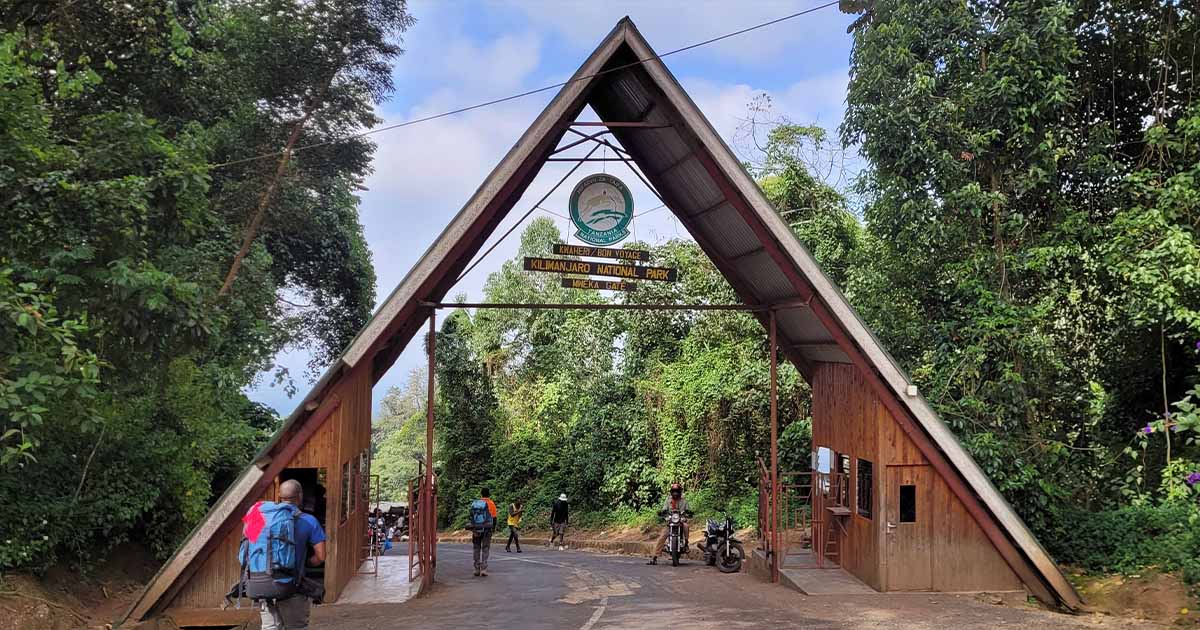
Day 9 - Mweka Gate
| Description | Details |
|---|---|
| Walk Distance | 10 km |
| Walking Hours | 2 hours |
| Start Altitude | 3100 m |
| End Altitude | 1640 m |
This morning, I felt surprisingly free from fatigue. My legs were painless, and the effects of altitude vanished. Although my cough persisted, the fever was gone. After enjoying breakfast and expressing our gratitude to the team, we went to the Mweka gate to collect our summit certificates. The descent was relatively easy, thanks to the stepped path and its gentle slope.
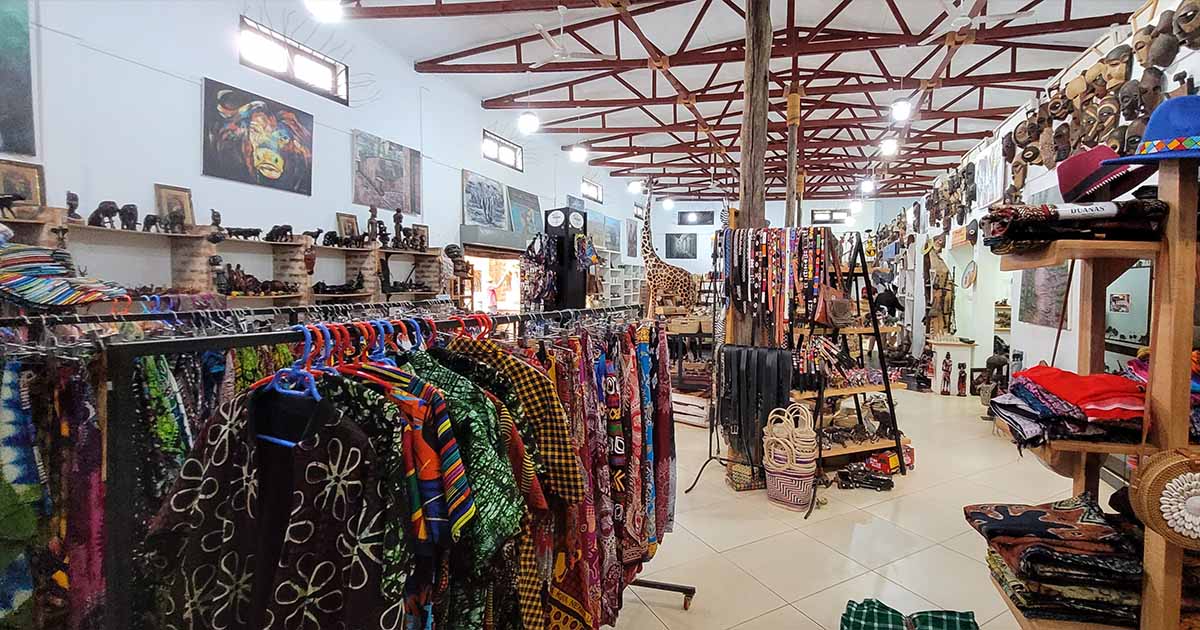
Upon reaching the gate, we paused at a curio shop to browse through souvenirs. We then enjoyed our final meal, prepared by our chef, Mussa. Following lunch, we returned to the hotel to rest and began planning our next-day adventure: a safari to Tarangire National Park.
Share This Article
What to read next
Disclaimer: This post may include affiliate links. We may receive a commission at no extra cost to you if you click one of them. Thank you for your support!