I’ve successfully climbed Mount Meru, a 4,566-meter-high volcano, the second-highest peak in Tanzania and the 5th highest peak in Africa. This guide is here to help you understand everything you need to know about your Meru Expedition, whether you’ve climbed many mountains before or this is your first big adventure.
Mount Meru as Acclimatization for Kilimanjaro
Before climbing Kilimanjaro, I decided to climb Mount Meru first. It’s a three to four-day trek and is an excellent opportunity for your body to adapt to higher altitudes in a less harsh environment, which prepares you better for Kilimanjaro. During my ascent, it became evident that everyone had the same idea. I didn’t meet anyone who wasn’t going to Kili after Meru.
A Comprehensive Guide to Successfully Climb Kilimanjaro
Climb Mount Kilimanjaro with this guide. Learn about routes, tour operators, preparation, dealing with altitude, and my personal experience. Get tips for a successful climb.
Is Climbing Meru Hard?
Climbing Mount Meru doesn’t need any specialized climbing skills. It’s a direct walk from the bottom to the top. But it’s still important to be ready for it. Reaching the summit requires physical fitness, determination, and resilience to handle high altitude.
I had no trouble on this mountain. High altitudes don’t affect me much, so that was no issue, and I really enjoyed staying in the huts during the hike. However, my friend found the high altitude challenging during this hike. This experience led him to use altitude sickness medication for our Kilimanjaro climb, helping him to acclimatize without struggles.
Does Mount Meru worth it?
Definitely, if you enjoy hiking, you should climb this mountain. I recommend Mount Meru even if you’re not going to Kilimanjaro. The mountain is beautiful and offers a fantastic experience on its own.
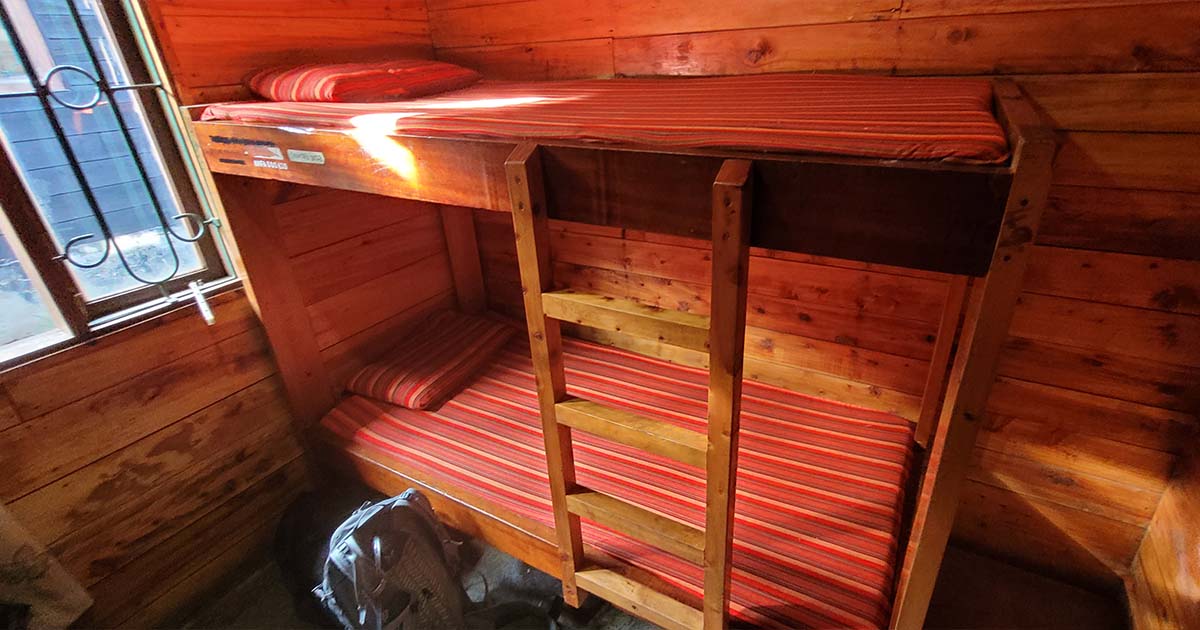
I had a great time on this mountain; it was my first experience sleeping in huts, and I must admit, it is super comfy.
Dealing with Altitude Sickness
The biggest challenge you’ll face on Meru is altitude sickness, which can affect anyone, regardless of fitness level. The symptoms include headache, nausea, diarrhea, insomnia, loss of appetite, shortness of breath, fast heart rate, and dizziness. Most severe cases can progress to High Altitude Pulmonary Edema (HAPE) or High Altitude Cerebral Edema (HACE), both of which are potentially life-threatening conditions requiring immediate descent and medical attention.
The key to minimizing the risk of it is staying hydrated, eating well, and moving slowly and steadily. Consulting a healthcare professional and considering altitude medication is advisable. Altitude sickness can make every step during the hike excruciating, emphasizing the importance of preparation and precaution.
Best Time of Year to Climb
The best times to climb Meru are the same as Kili, during the dry seasons: from June to October and from December to early March. These periods offer the clearest skies and the lowest risk of precipitation, making your climb more enjoyable and less muddy.
As these are the best months to climb it, they are also more crowded. Also, the weather is unpredictable, so you might get heavy rain even during the dry season, so be geared for the worst.
How to Prepare for Your Expedition?
I’m not a professional mountain guide; these suggestions are based on my experience. In my view, the best preparation involves extensive hiking. Hike every mountain you can. When hiking isn’t feasible, aim to increase your fitness level and engage in activities that strengthen mental toughness.
Regarding equipment, I’ll create a separate detailed guide. However, it’s worth noting that many tour operators provide the option to rent the essential equipment you’ll need for the climb.
Which Routes Can You Climb Meru?
For Mount Meru, there’s only the Momella route available for climbing. I’m sharing the recording of our trail in case you’re interested in seeing it.
Can You Climb Meru Solo?
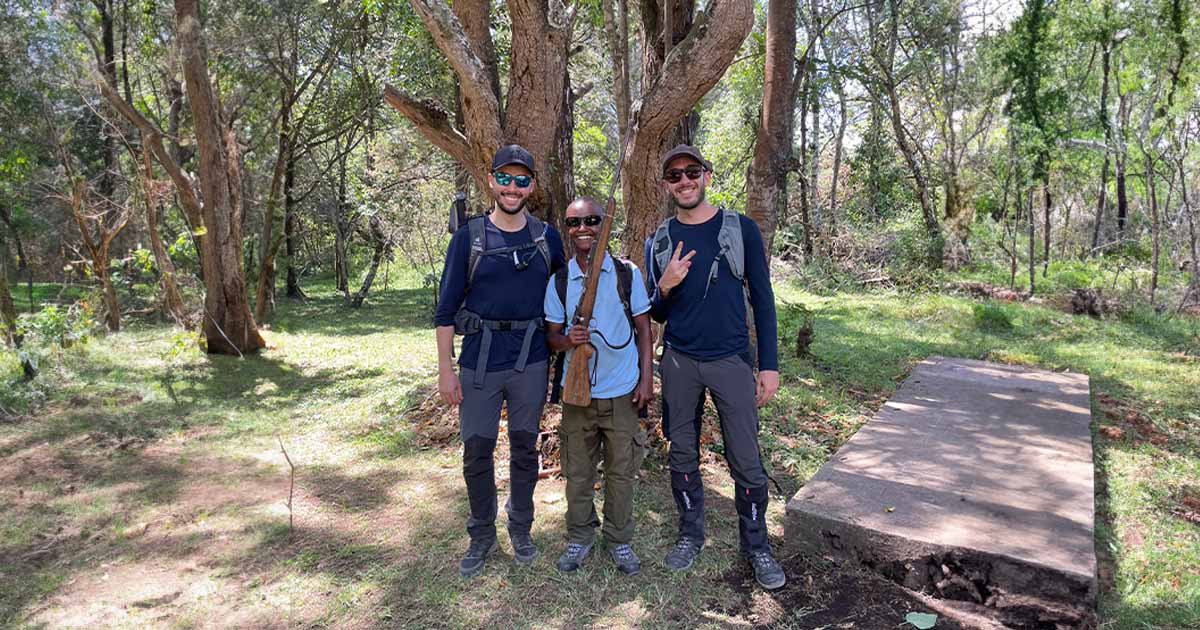
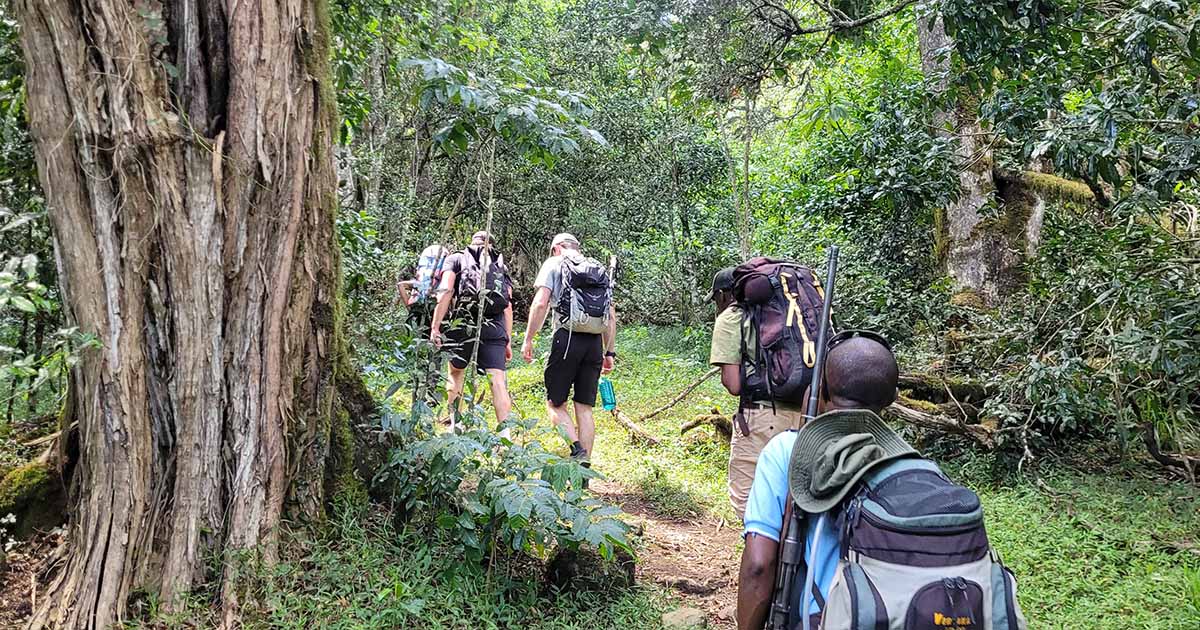
Unlike Kilimanjaro, you don’t need a guide to climb Mount Meru. However, You need a ranger to accompany you to the campsites for the first two days because there’s a chance of running into buffalos. On the night you go for the summit, you can proceed alone, but you’ll need a ranger again when you return to the forest area.
That being said, I suggest using a licensed tour operator because managing the logistics alone can be challenging. Plus, you’ll probably have difficulty explaining to the rangers and camp managers whenever they ask where your guide is.
Even if you plan to climb by yourself, you’ll have to be part of a group since there aren’t enough rangers for each group to have one. The ranger who accompanied us was extremely friendly. He took the time to explain everything, showed us wildlife and plants, and made our experience richer.
How to Choose a Tour Operator?
When picking a company to guide your climb, focus on those known for their safety practices, care for the environment, and how well they treat their employees.
The guide with whom I climbed Mount Kenya vouched Solo Adventures for my Kilimanjaro expedition. Following his advice, I went with them for Meru and Kili and couldn’t have been more satisfied with my decision. Here’s why Solo Adventures stood out:
- Informative Approach: Unlike other companies, they take the time to educate you about the local flora, fauna, and ecosystems. It was common to find climbers from other groups listening to our guide’s explanations.
- Competitive Pricing: They offer very competitive rates, making the climb accessible without compromising on the quality of the experience or safety.
- Supportive Leadership: The company owner is a mountain guide deeply committed to his team. He fosters an environment where everyone has the opportunity for personal and professional growth, as evidenced by his team’s admiration for him.
- Local Company: Being a locally owned company, you contribute directly to the local community.
How Much Does it Cost?
The cost of climbing Mount Meru can vary widely, typically from $800 to $1,500 per person, depending on the route, tour operator, size of the group, and level of luxury. This price should include park fees, guide and porter wages, food, and accommodation, but check what’s included carefully. Also, expect to give from 10% to 15% as a tip to your crew.
Visa Requirements for Tanzania
Most travelers will require a visa to enter Tanzania. Many nationalities can obtain a visa on arrival, but Tanzania provides the flexibility of applying for a visa online. The visa cost is reasonable, with a single entry visa valid for 90 days or 50 USD.
Applying for an electronic visa is strongly advised because it’s convenient. This way, you can avoid the queues upon arrival and avoid potential issues at the airport.
Additional Documents
Apart from the visa, you might need some extra documents and preparations:
- Vaccination Certificates: Depending on your travel history, you may need proof of vaccination against certain diseases, like yellow fever. Check the latest health advice and requirements for Tanzania before your trip.
- Travel Insurance: It’s highly recommended to have travel insurance that covers high-altitude trekking. While Solo Adventures provided me with insurance, if you’re looking for a suggestion, SafetyWing might be a good option.
My Trekking Experience on Mount Meru
In this section, I’ll share my experience trekking up Mount Meru.
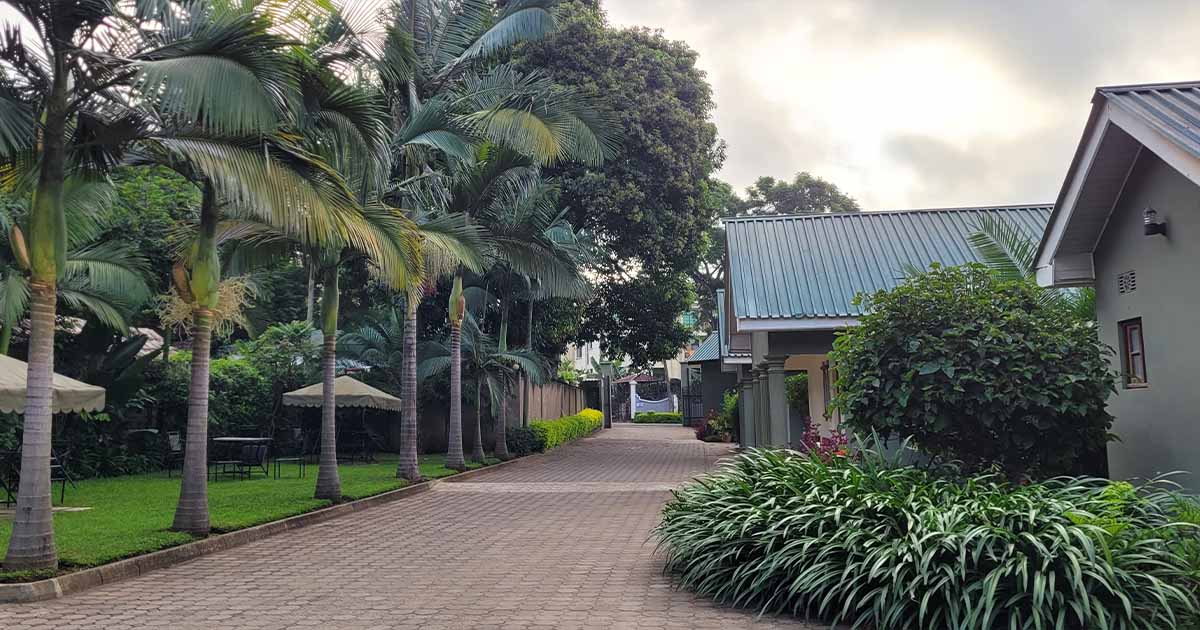
Day 1 - Arrival In Arusha
I landed at Kilimanjaro International Airport (JRO) around 6 pm, met up with the team at our hotel in Arusha for a briefing on our upcoming adventure, and gear check.
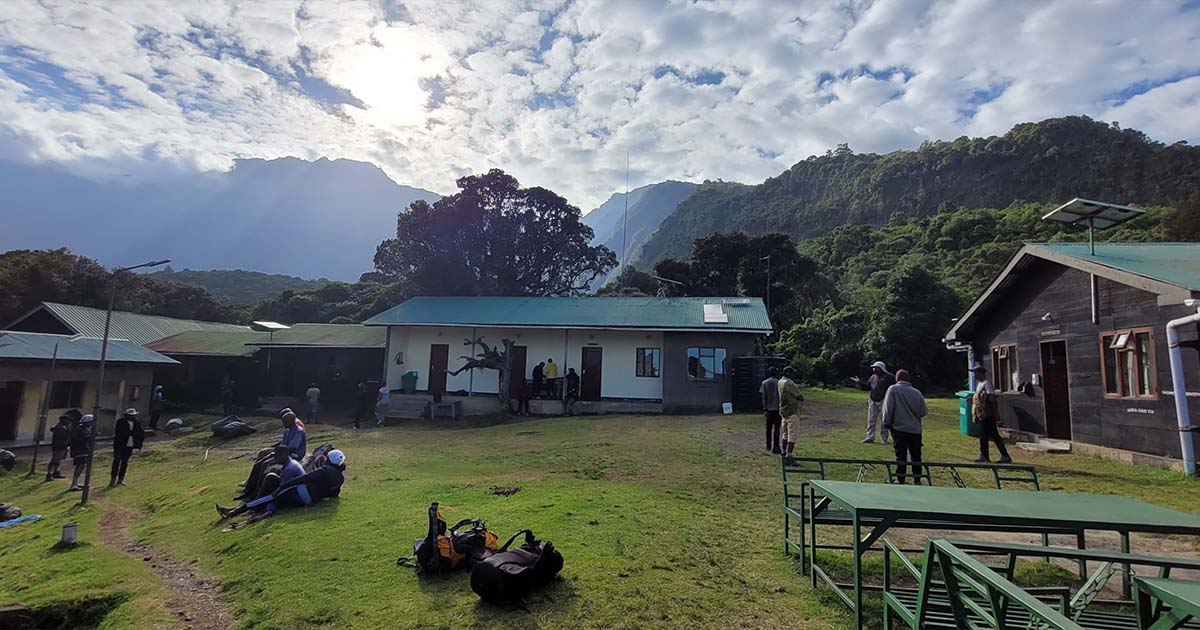
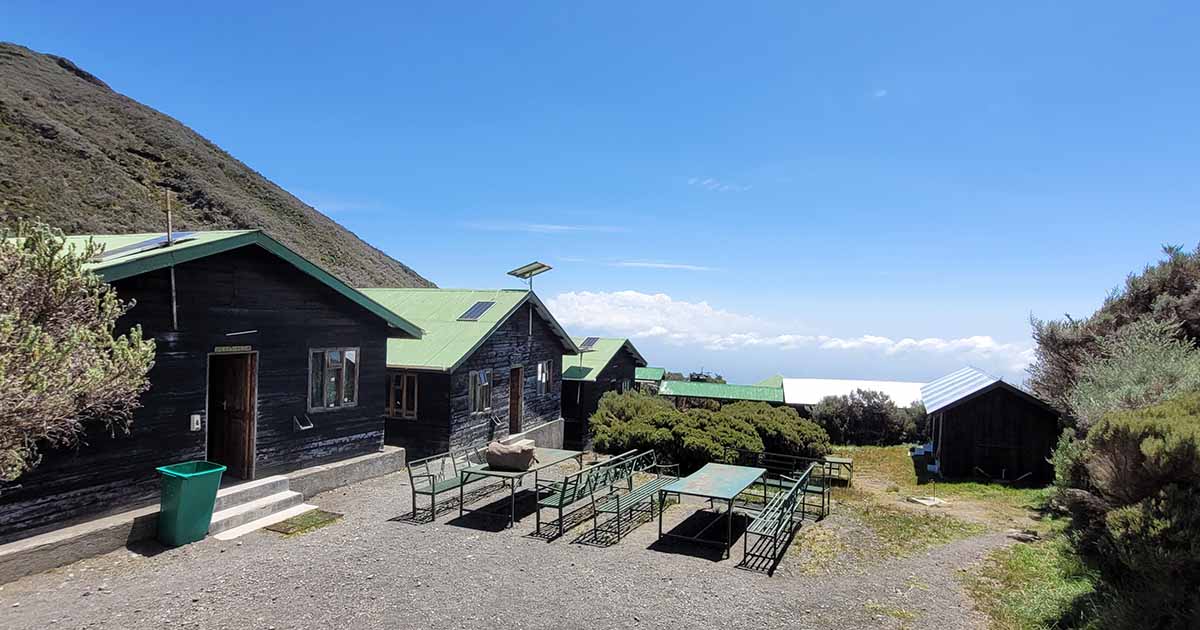
Day 2 - Miriakamba Hut
| Description | Details |
|---|---|
| Walk Distance | 10 km |
| Walking Hours | 4 hours |
| Start Altitude | 1580 m |
| End Altitude | 2541 m |
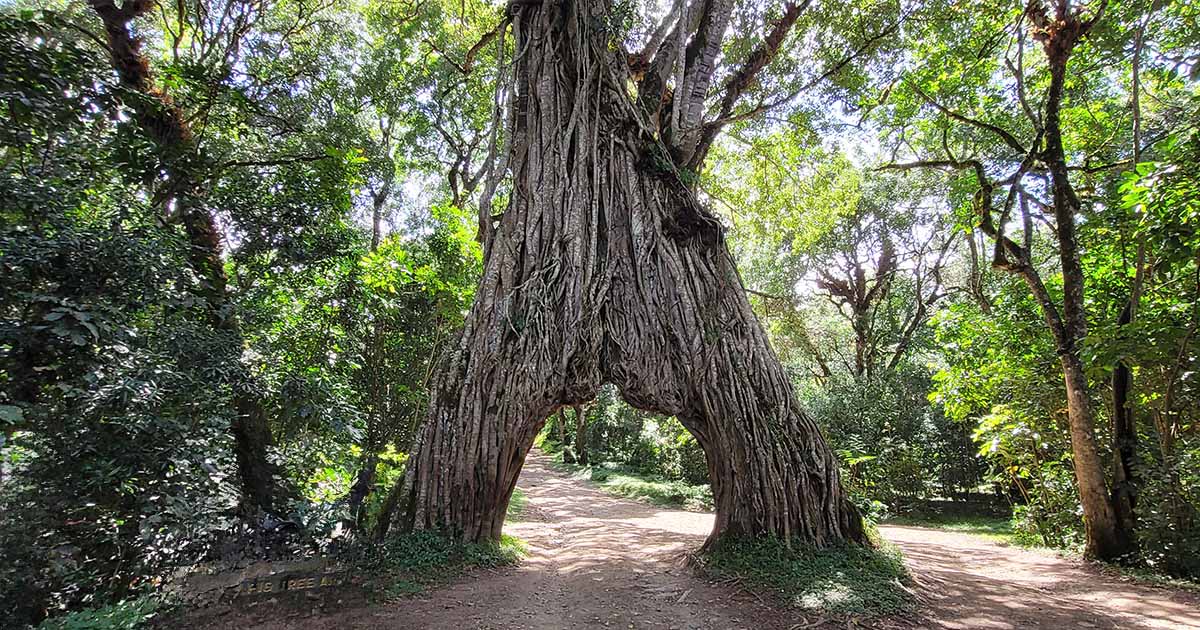
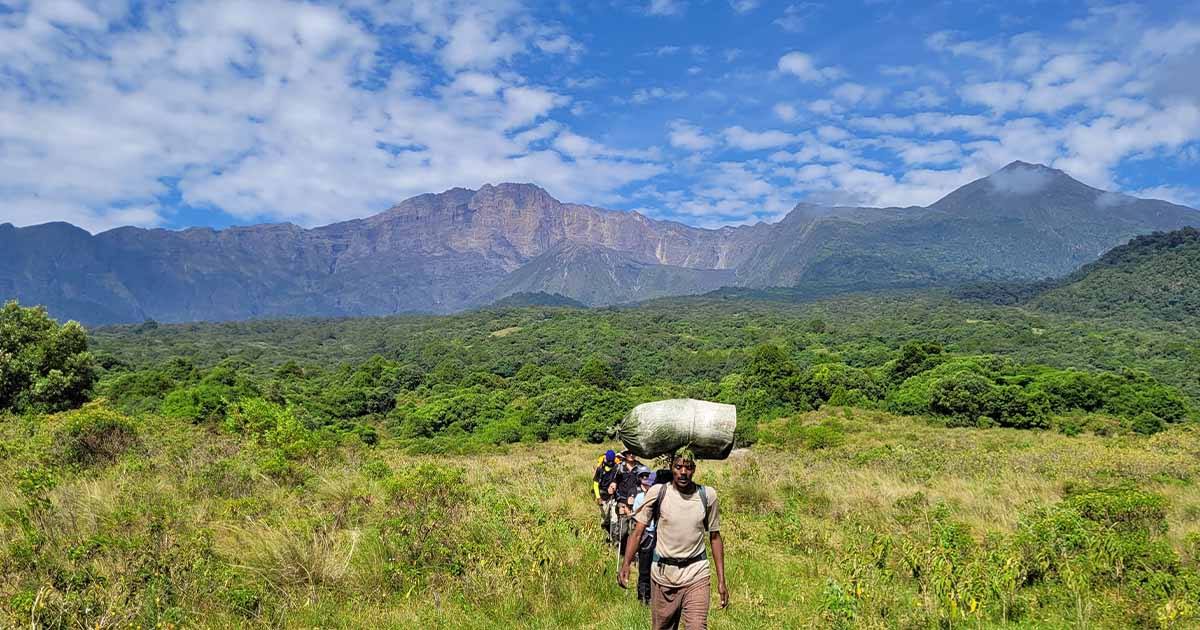
We started our day with breakfast at 8 am and then drove from our hotel to the Momella Gate for about an hour. Once there, we had lunch and waited for a group to form so we could begin our climb with the Armed Ranger. We started our hike around 2 pm, and it was only a short walk before we were in the forest, spotting Colobus Monkeys and Hornbill birds.

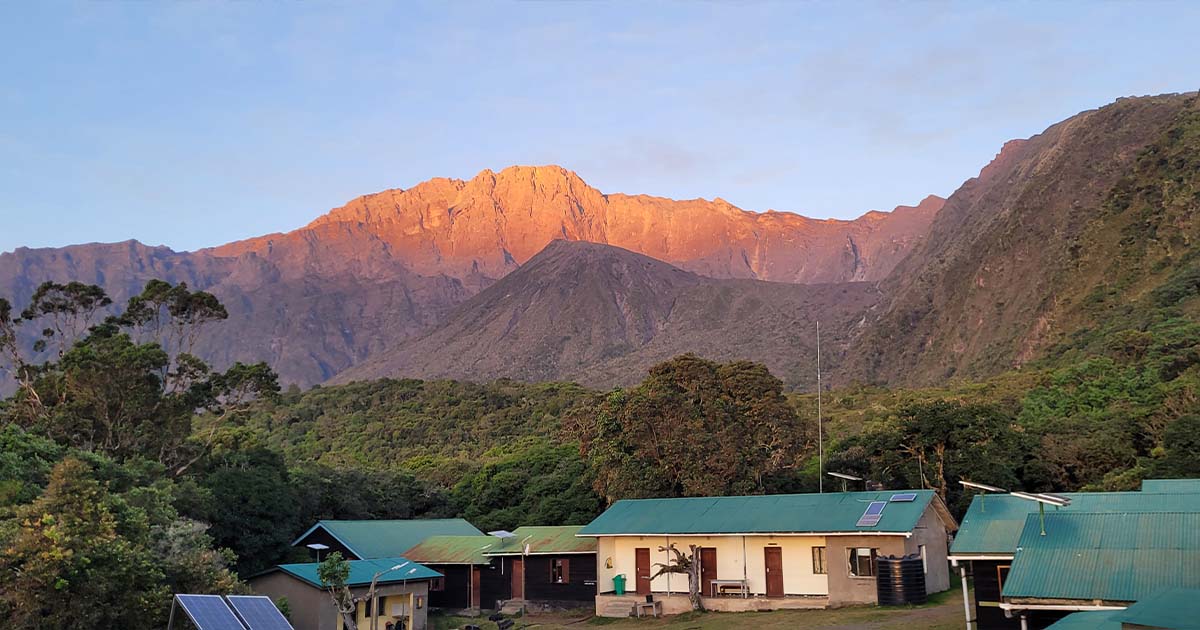
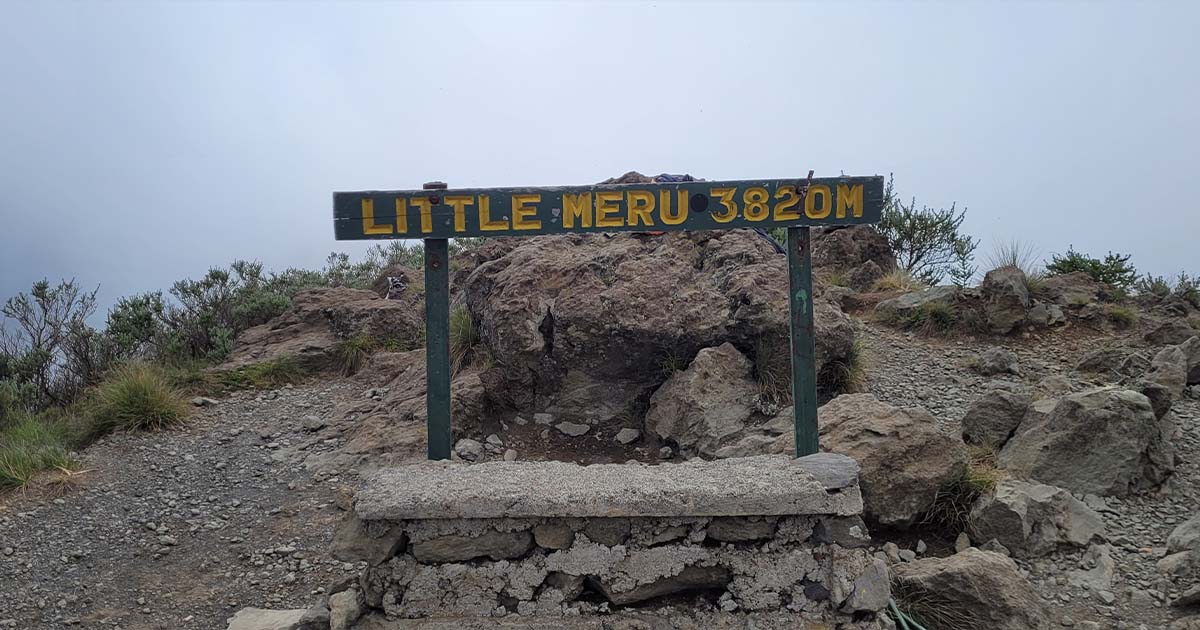
Day 3 - Saddle Hut
| Description | Details |
|---|---|
| Walk Distance | 8 km, including Little Meru |
| Walking Hours | 3 hours to Saddle Hut, then 1 hour on Little Meru |
| Start Altitude | 2541 m |
| End Altitude | 3570 m |
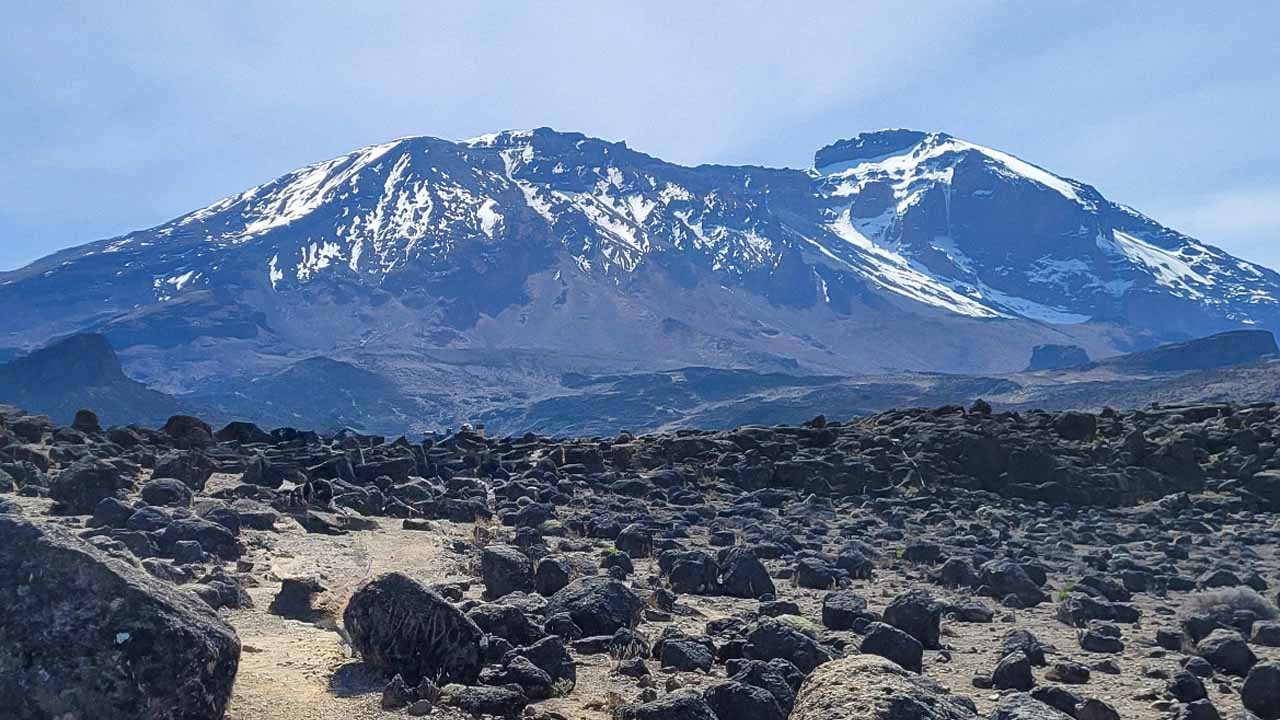
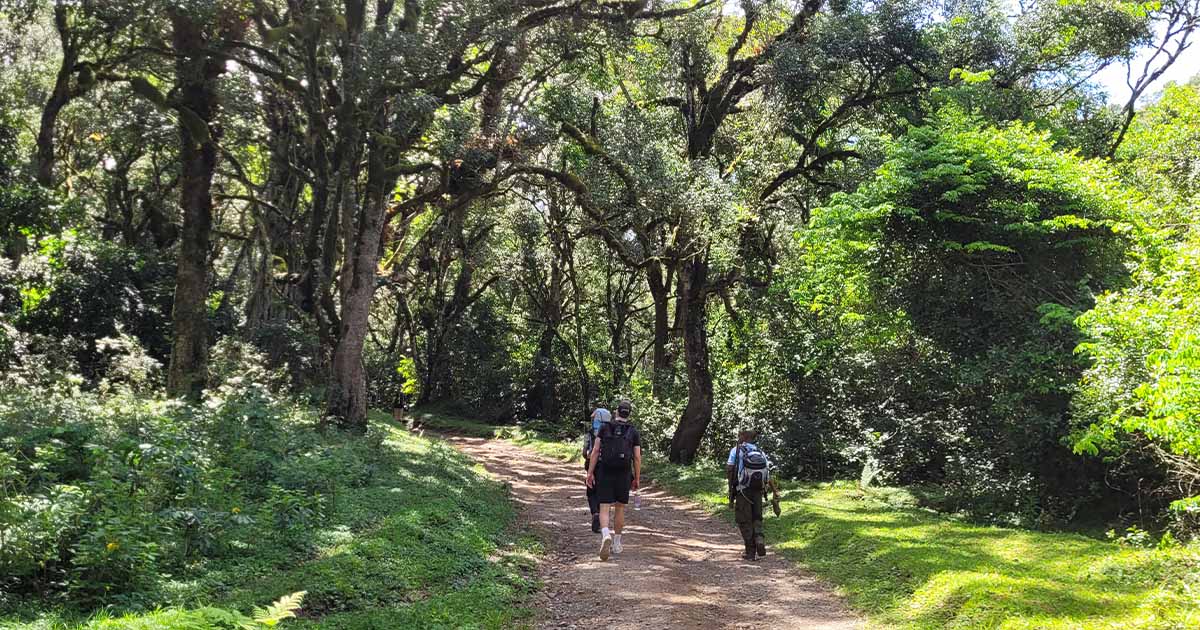
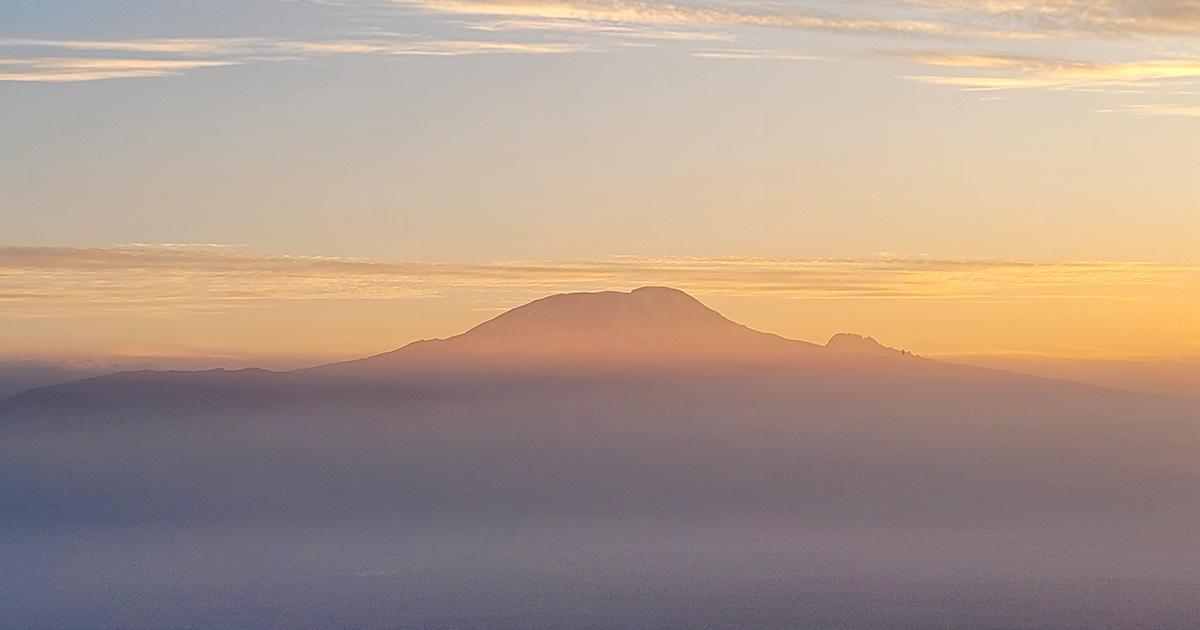
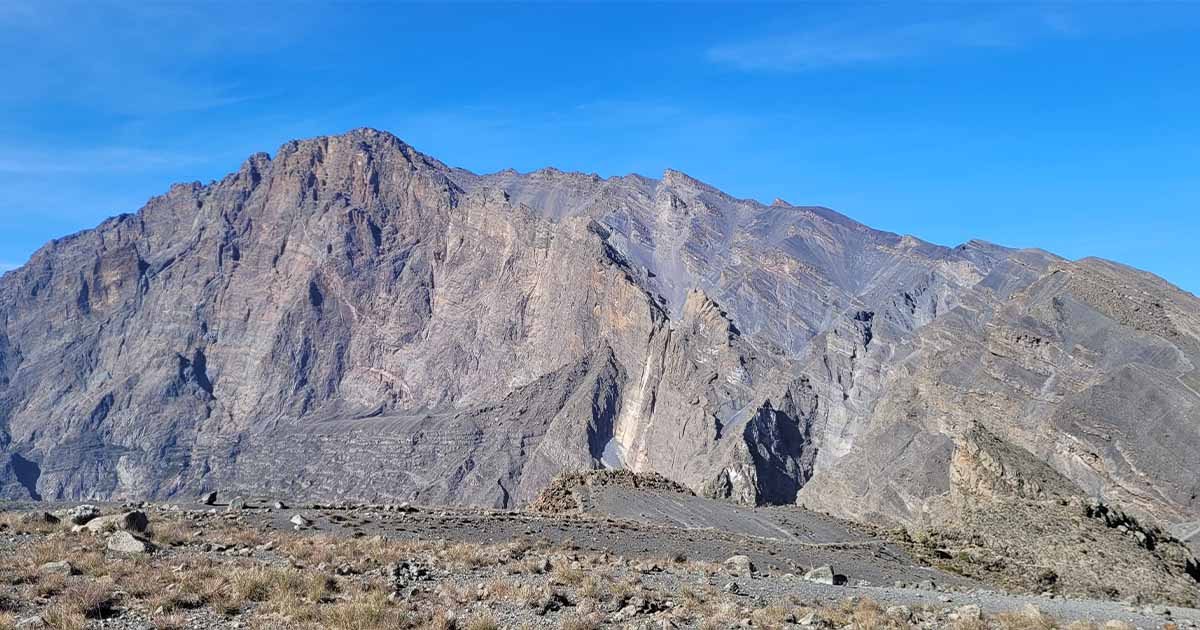
I woke up early to watch the sunrise over distant Kilimanjaro. After breakfast, we began our hike through a more open forest. It was a similar day to the first, and we even spotted some Waterbucks.
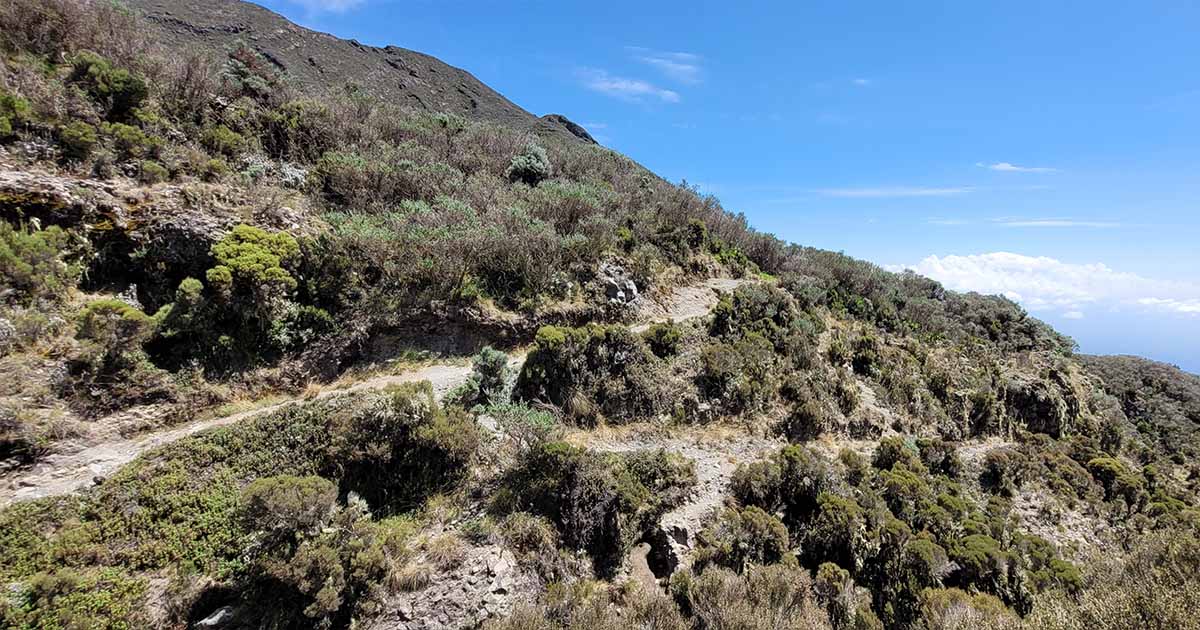
Upon reaching the camp and resting briefly, we went on a 40-minute hike to Little Meru, an excellent acclimatization strategy. The descent took us 20 minutes. Overall, it was a light day, but we noticed some people having a hard time with the altitude while others decided not to continue their climb to the summit.
Day 4 - Ascending to Summit and Descending to Miriakamba Hut
| Description | Details |
|---|---|
| Walk Distance | 15 km |
| Walking Hours | 13 hours, including resting at Saddle Hut |
| Start Altitude | 3570 m |
| End Altitude | 2541 m |
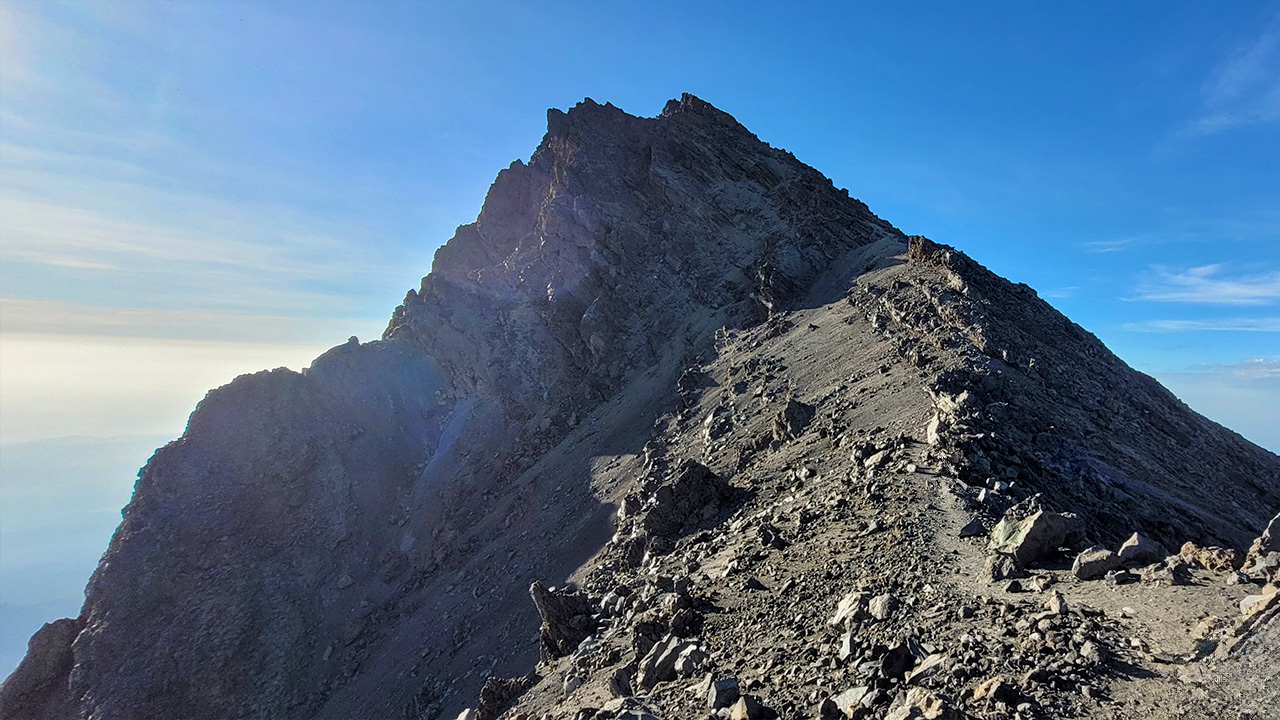
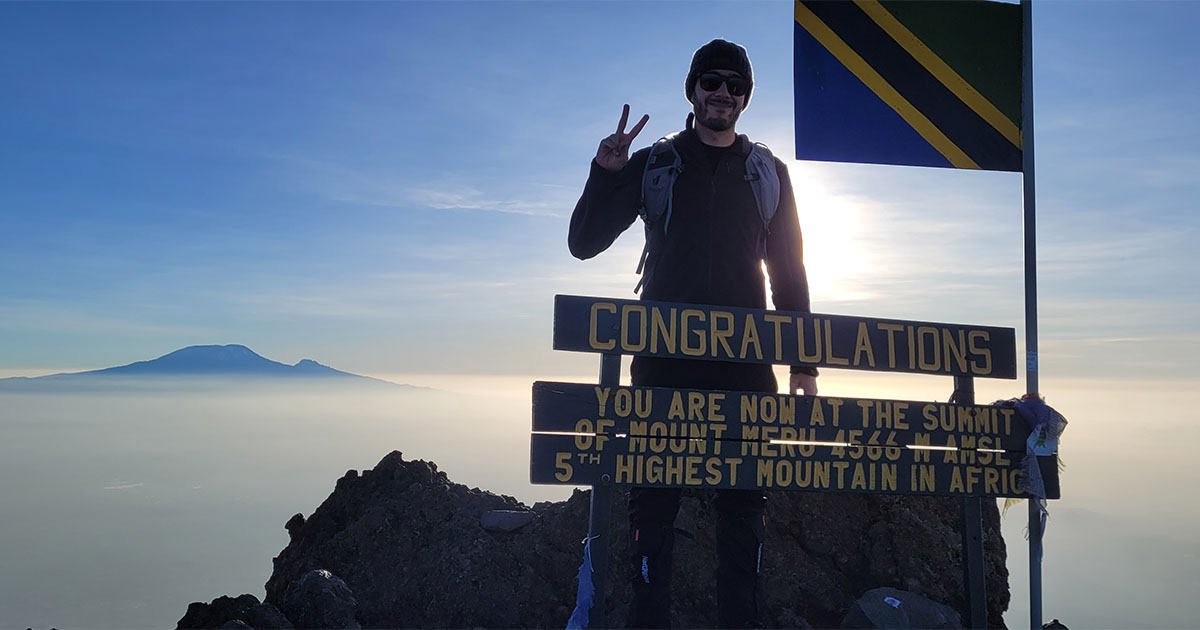
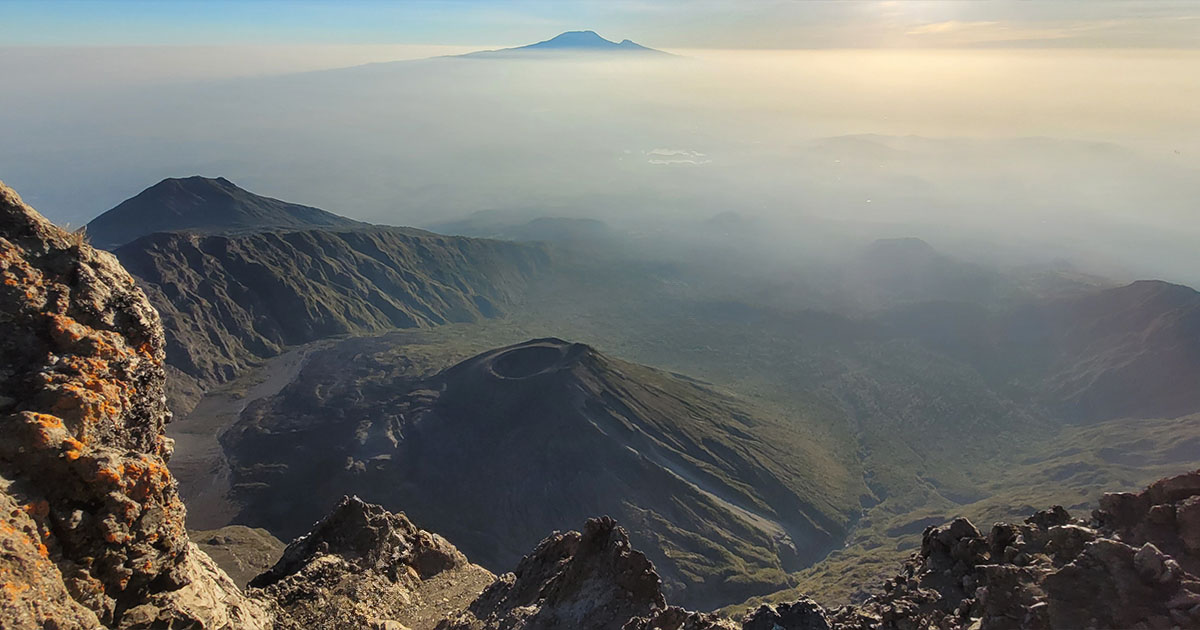
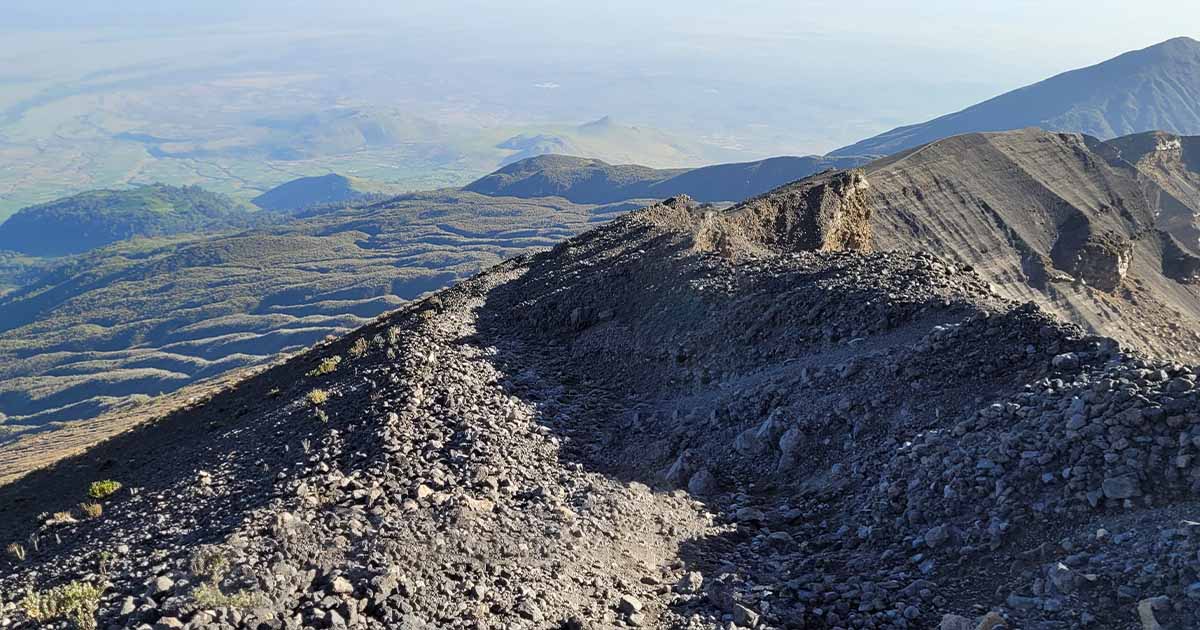
We woke up at midnight, and I managed to get at most two hours of sleep, though I hadn’t expected much more, as I didn’t feel tired to fall asleep before 10 pm. After breakfast, we began our ascent to Socialist Peak around 1 am.
Visibility was low, and the wind was biting. We maintained a consistent, slow pace, taking breaks every hour for water and snacks, but never more than 3 minutes to avoid freezing. Despite our pace, we overtook many groups that started earlier than us.
As we approached the summit, my friend found the altitude increasingly difficult to handle. He needed to pause for breath every 10 meters or so, which is understandable because once the altitude hits, every step is excruciating. We reached the summit at 7 am, right after sunrise. The summit area is small, but it felt special since we were alone there.
After spending about 20 minutes at the summit, we began our descent. With each step downwards, the relief from the altitude became more apparent. An hour and a half later, we were back at Saddle Hut for a short break and brunch, and then we continued our descent to Miriakamba Hut, where we arrived by 2 pm.
Day 5 - Momella gate
| Description | Details |
|---|---|
| Walk Distance | 7 km |
| Walking Hours | 3 hours |
| Start Altitude | 2541 m |
| End Altitude | 1580 m |
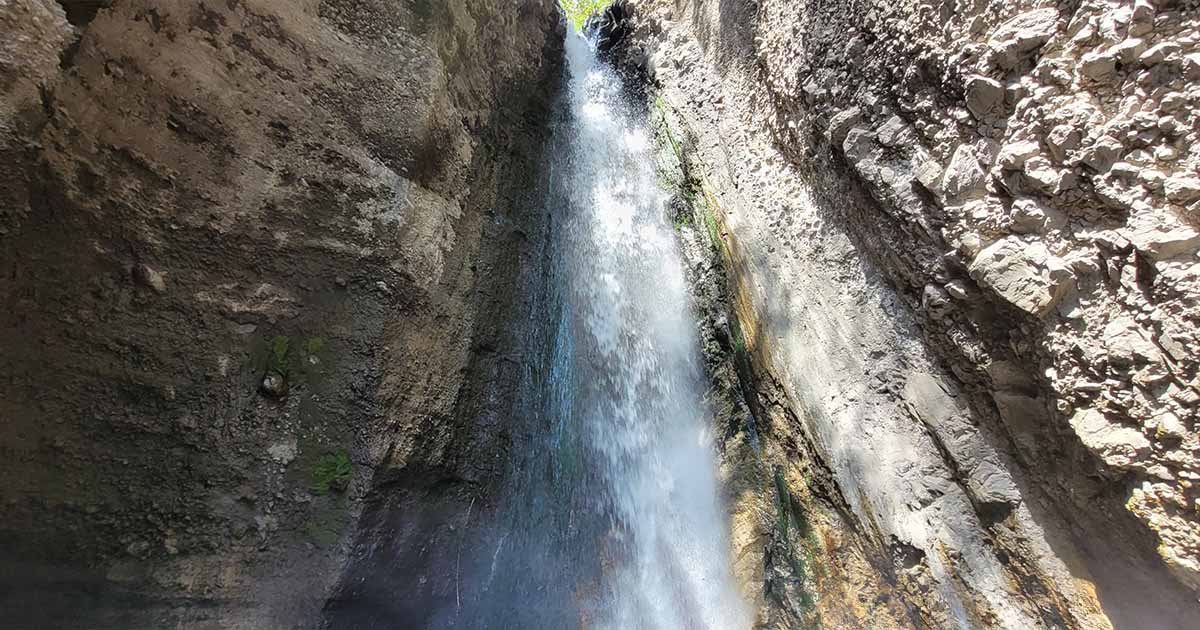
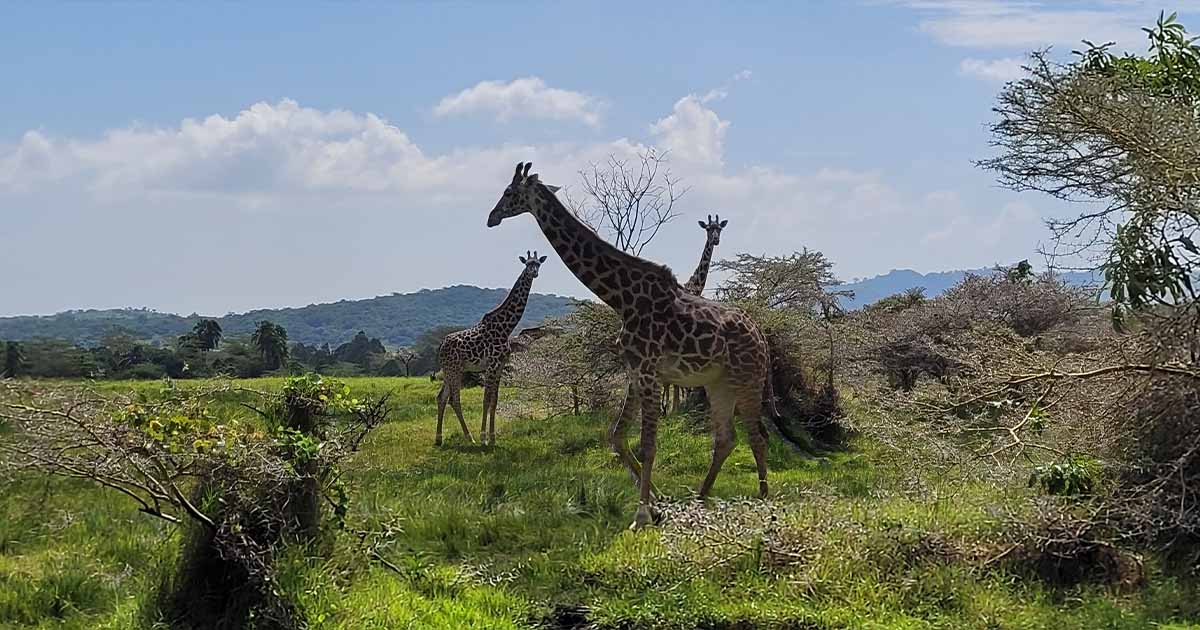
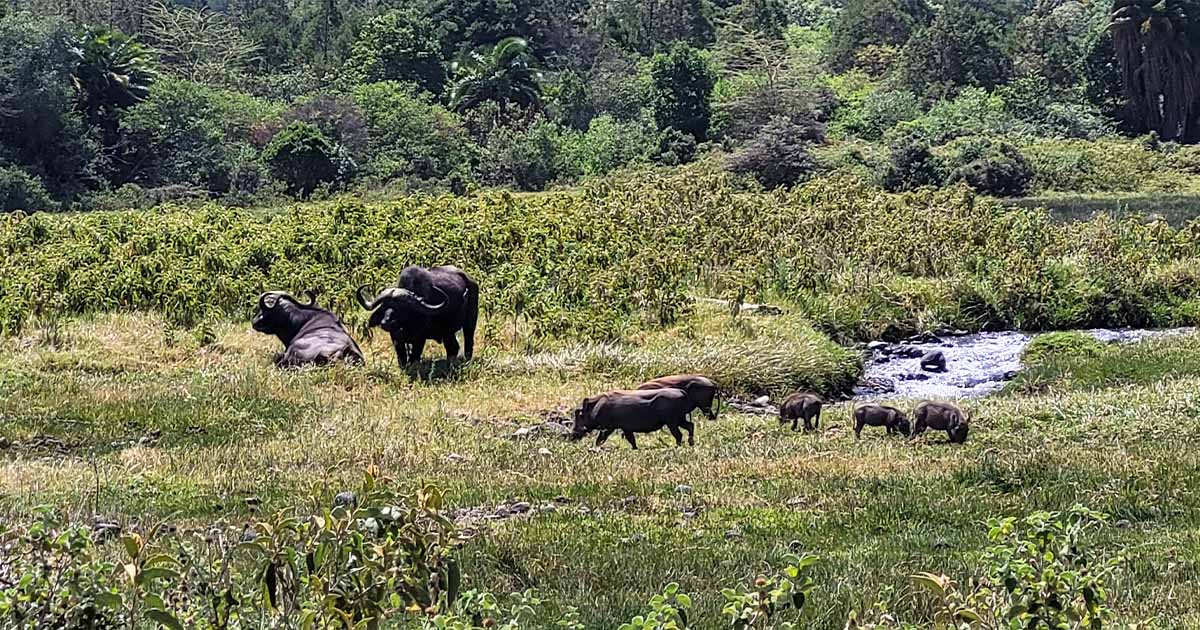
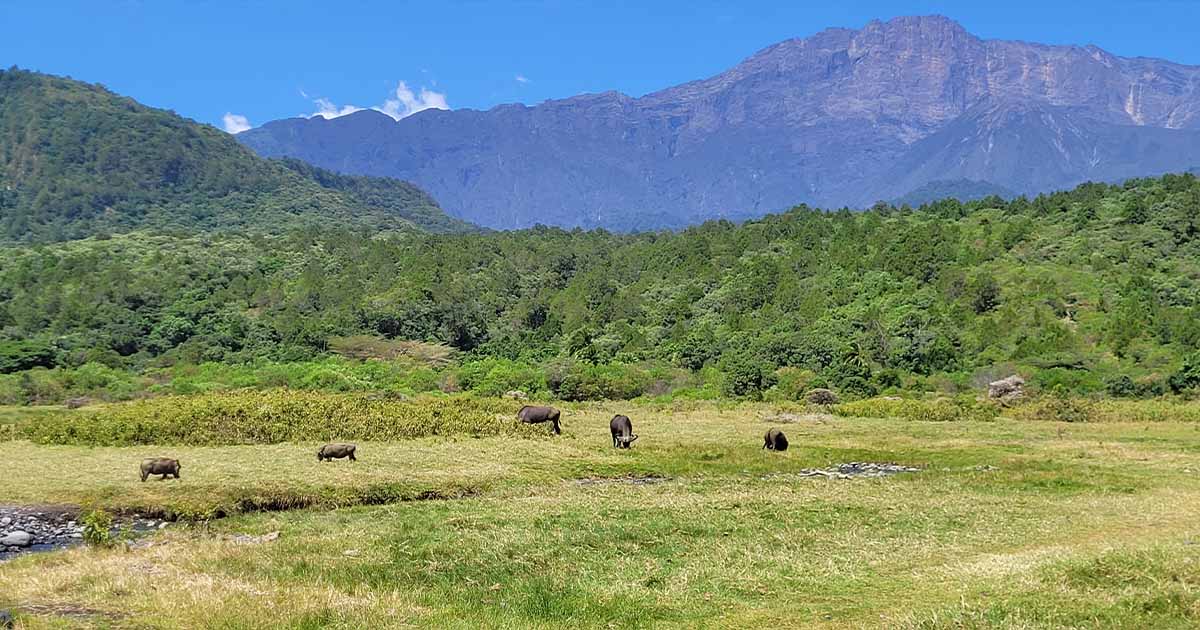
After having breakfast and expressing our gratitude to the team, we began our descent to Momella Gate with several groups gathered, as we did for the first two days. The way down is steeper but shorter than the one we used on the first day. This alternate route also has a waterfall along the way. Our Ranger led us through open vegetation, an area often used for Walking Safaris in Arusha National Park, where we could see giraffes, buffalos, and warthogs, making the end of our adventure unforgettable.
Share This Article
What to read next
Disclaimer: This post may include affiliate links. We may receive a commission at no extra cost to you if you click one of them. Thank you for your support!